
OpenID Connect (OIDC) is an industry-standard authentication layer built on top of the OAuth 2.0 authorization protocol. The OAuth 2.0 protocol provides security through scoped access tokens, and OIDC provides user authentication and single sign-on (SSO) functionality. For more refer here (https://datatracker.ietf.org/doc/html/rfc6749). There are two main types of authentication that you can perform with Okta:
- The OAuth 2.0 protocol controls authorization to access a protected resource, like your web app, native app, or API service.
- The OpenID Connect (OIDC) protocol is built on the OAuth 2.0 protocol and helps authenticate users and convey information about them. It’s also more opinionated than plain OAuth 2.0, for example in its scope definitions.
So If you want to import users and groups from an OpenID Connect (OIDC) identity provider to your Cloud Director system (provider) or Tenant organization, you must configure provider/tenant organization with this OIDC identity provider. Imported users can log in to the system/tenant organization with the credentials established in the OIDC identity provider.
We can use VMware Workspace ONE Access (VIDM) or any public identity providers, but make sure OAuth authentication endpoint must be reachable from the VMware Cloud Director cells.in this blog post we will use OKTA OIDC and configure VMware Cloud to use this OIDC for authentication.
Step:1 – Configure OKTA OIDC
For this blog post, i created an developer account on OKTA at this url –https://developer.okta.com/signup and once account is ready, follow below steps to add cloud director as an application in OKTA console:
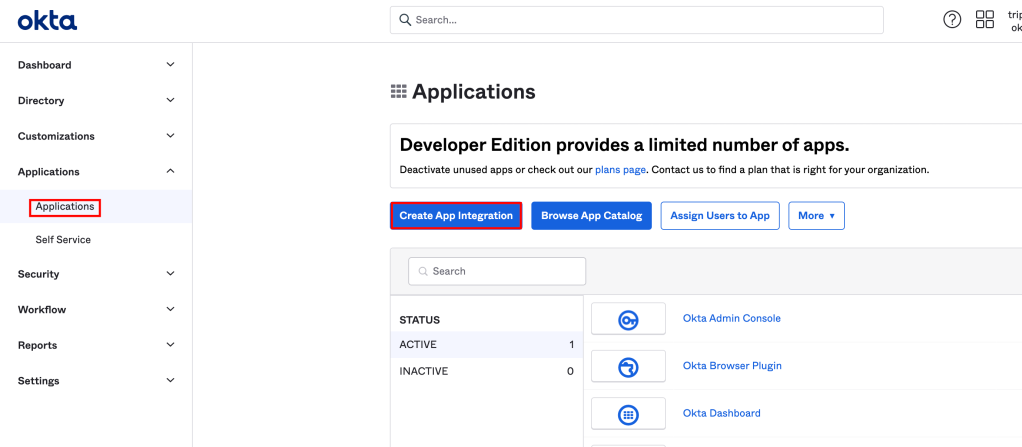
- In the Admin Console, go to Applications > Applications.
- Click Create App Integration.
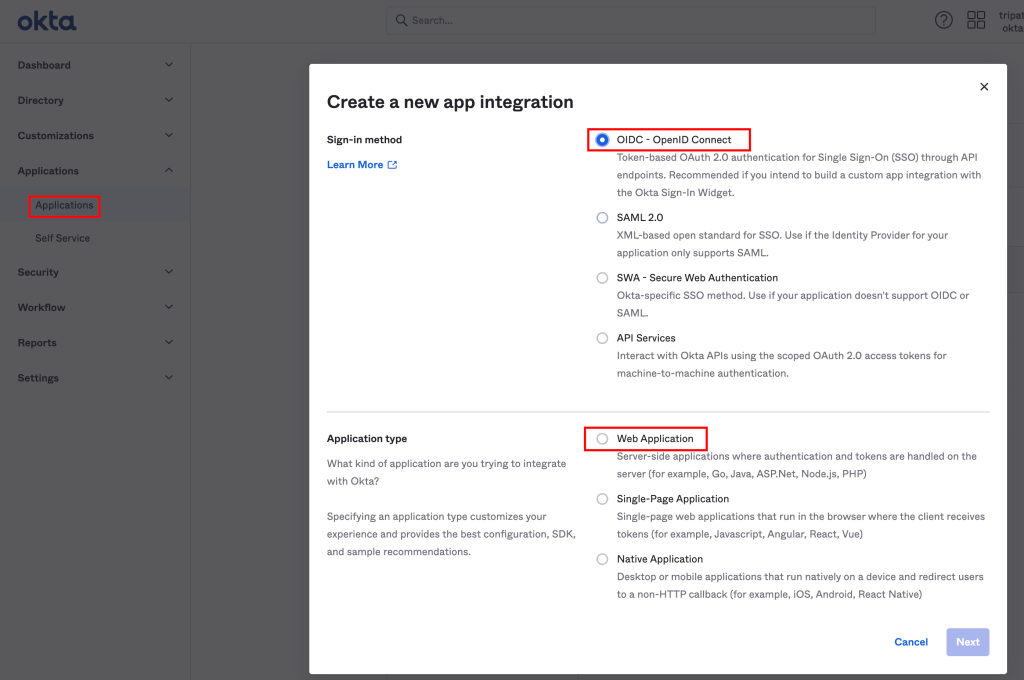
- To create an OIDC app integration, select OIDC – OpenID Connect as the Sign-in method.
- Choose what type of application you plan to integrate with Okta, in Cloud Director case Select Web Application.
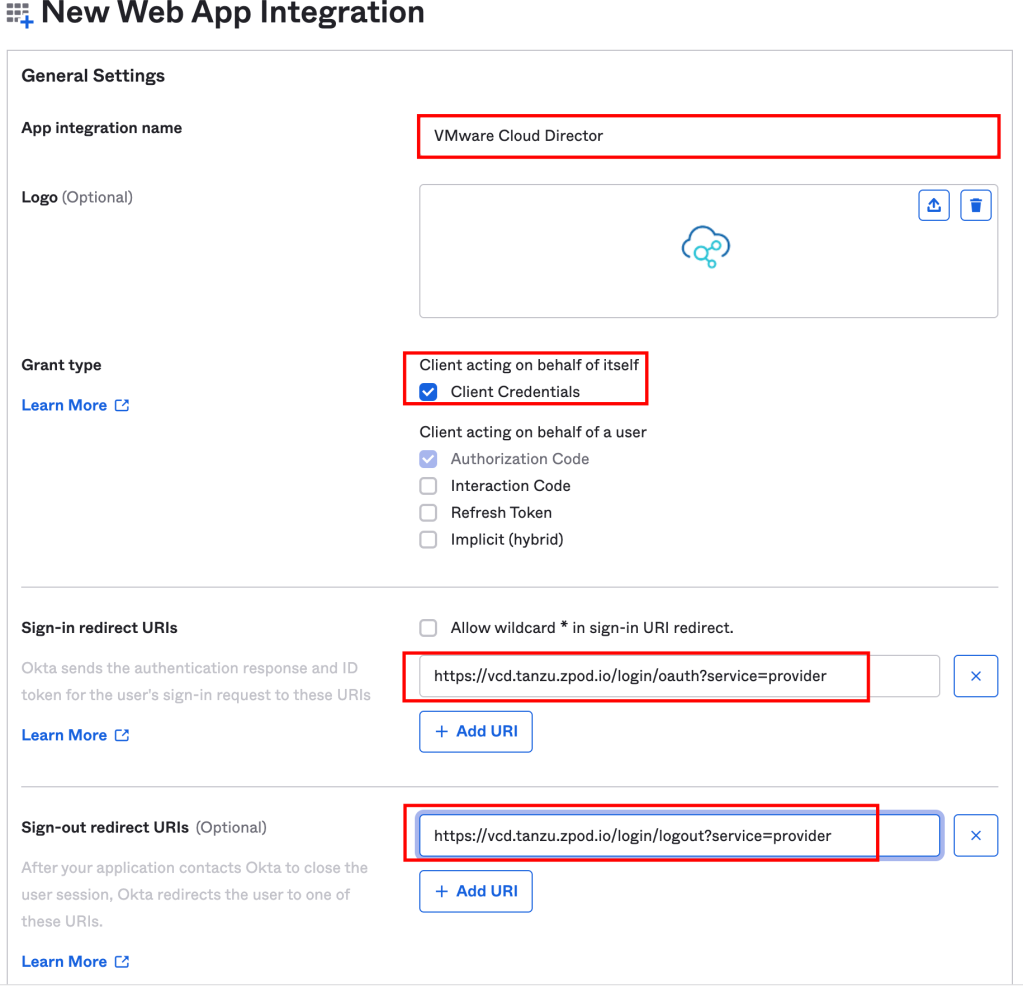
- App integration name: Specify a name for Cloud Director
- Logo (Optional): Add a logo to accompany your app integration in the Okta org
- Grant type: Select from the different grant type options
- Sign-in redirect URIs: The Sign-in redirect URI is where Okta sends the authentication response and ID token for the sign-in request, in our case for provider https://<vcd url>/login/oauth?service=provider and incase if you are doing it for tenant then use https://<vcd url>/login/oauth?service=tenant:<org name>
- Sign-out redirect URIs: After your application contacts Okta to close the user session, Okta redirects the user to this URI.
- Assignments: Controlled access: The default access option assigns and grants login access to this new app integration for everyone in your Okta org or you can choose to Limit access to selected groups
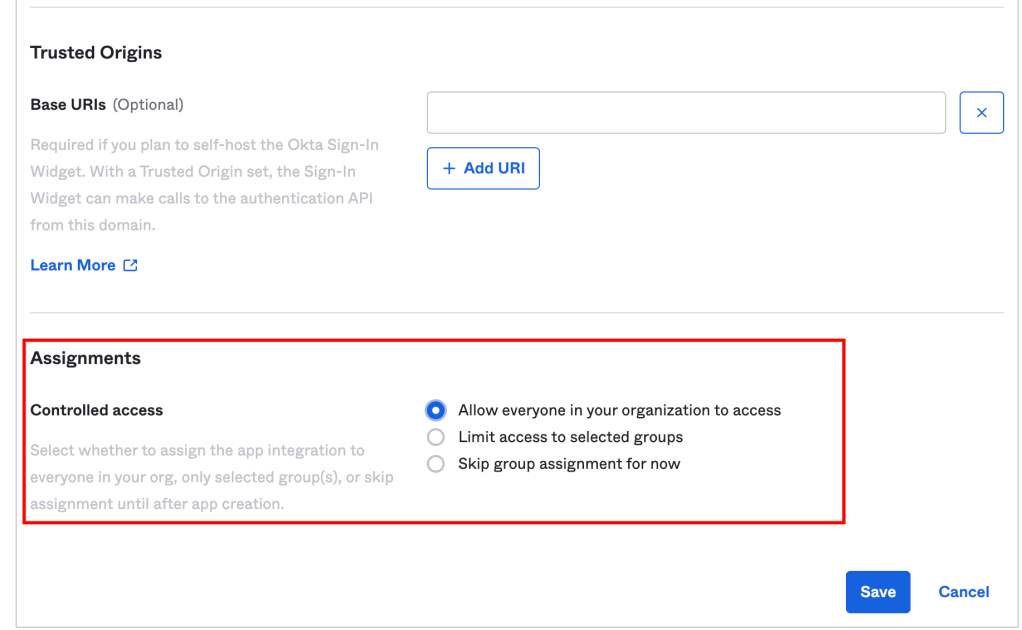
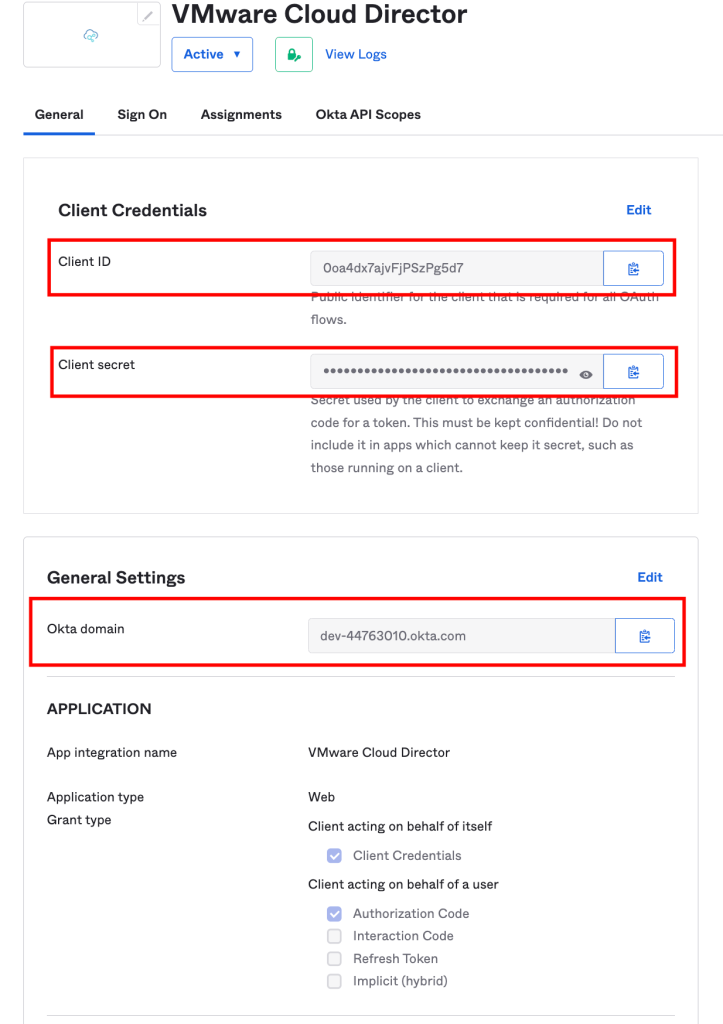
Click Save. This action creates the app integration and opens the settings page to configure additional options.
The Client Credentials section has the Client ID and Client secret values for Cloud Director integration, Copy both the values as we enter these in Cloud Director.
The General Settings section has the Okta Domain, for Cloud Director integration, Copy this value as we enter these in Cloud Director.
Step:2 – Cloud Director OIDC Configuration
Now I am going to configure OIDC authentication for provider side of cloud provider and with very minor changes (tenant URL) it can be configured for tenants too.
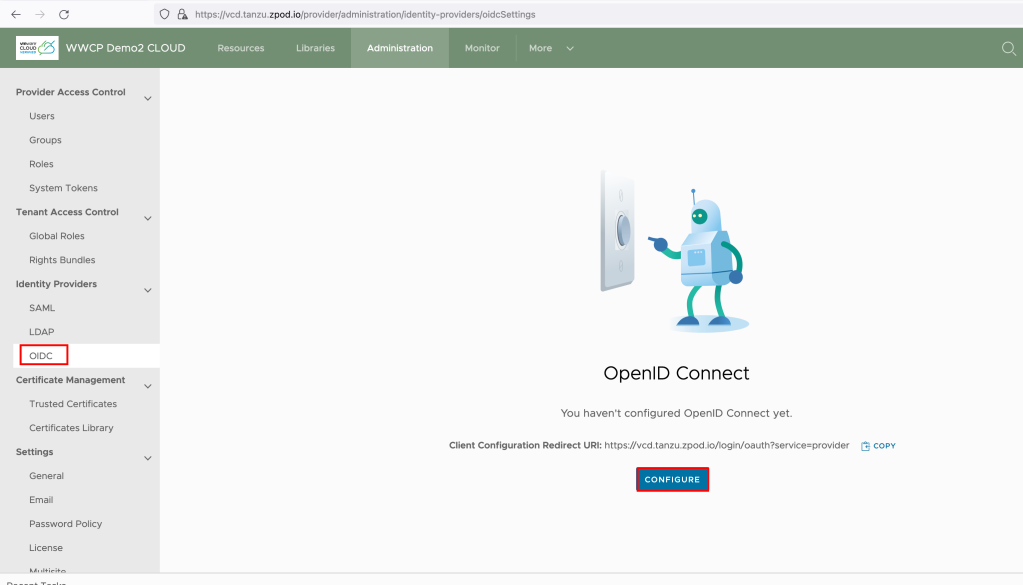
Let’s go to Cloud Director and from the top navigation bar, select Administration and on the left panel, under Identity Providers, click OIDC and click CONFIGURE
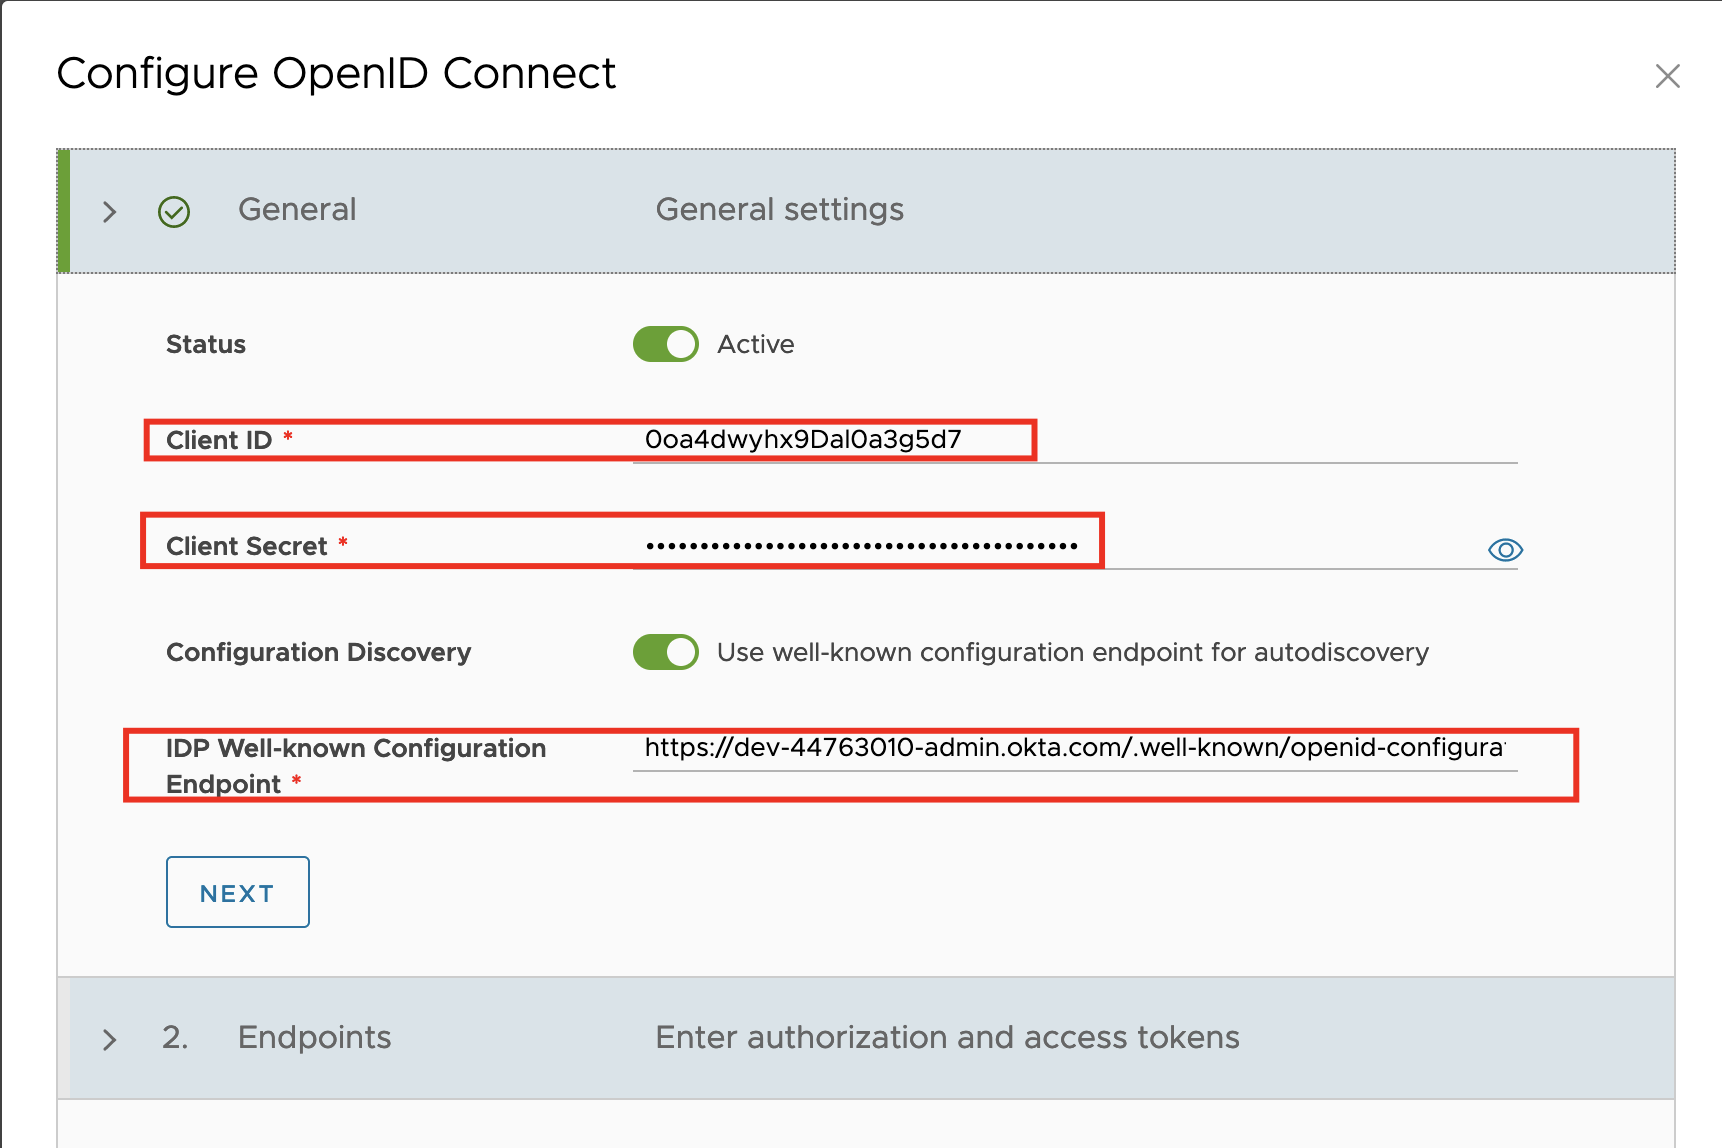
General: Make sure that OpenID Connect Status is active, and enter the client ID and client secret information from the OKTA App registration which we captured above.
To use the information from a well-known endpoint to automatically fill in the configuration information, turn on the Configuration Discovery toggle and enter a URL, for OKTA the URL would look this – https://<domain.okta.com>/.well-known/openid-configuration and click on NEXT
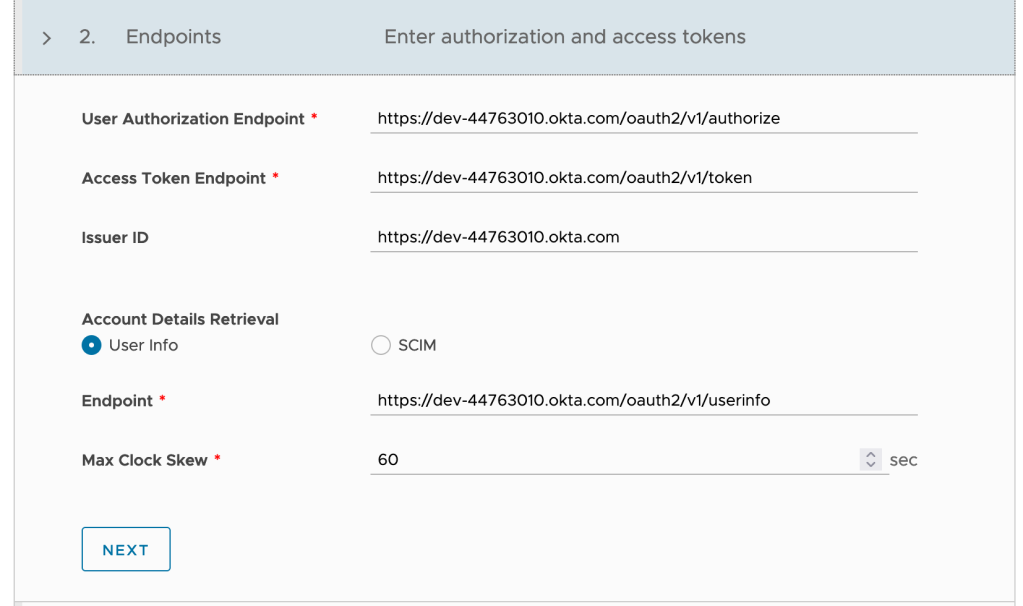
Endpoint: Clicking on NEXT will populate “Endpoint” information automatically, it is however, essential that the information is reviewed and confirmed.
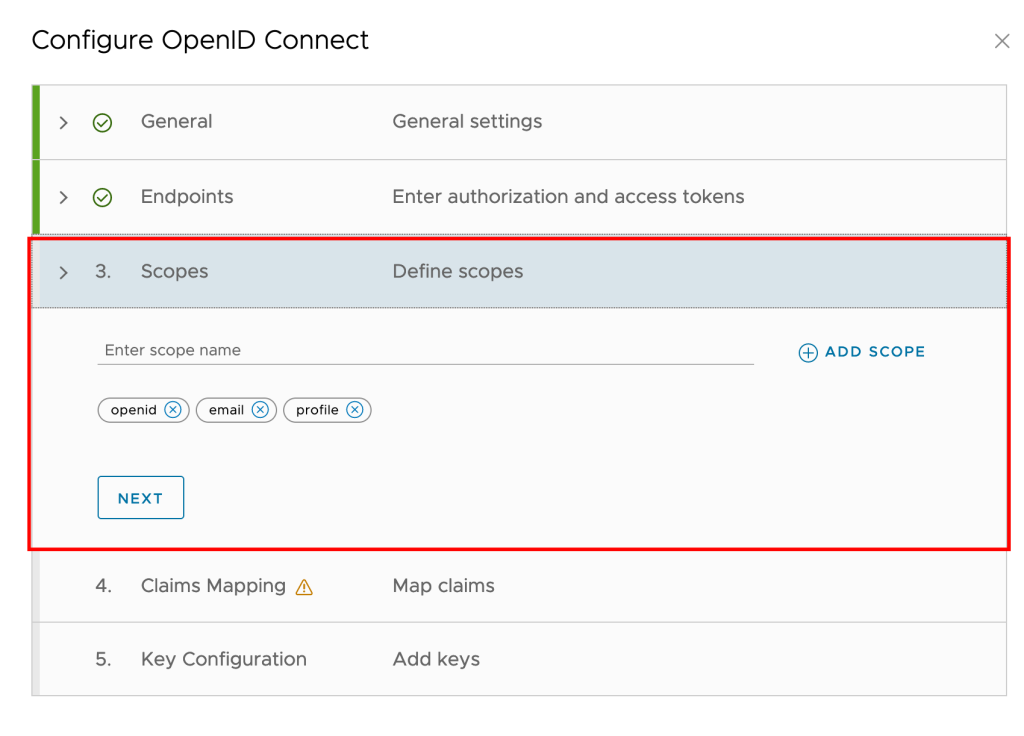
Scopes: VMware Cloud Director uses the scopes to authorize access to user details. When a client requests an access token, the scopes define the permissions that this token has to access user information.enter the scope information, and click Next.
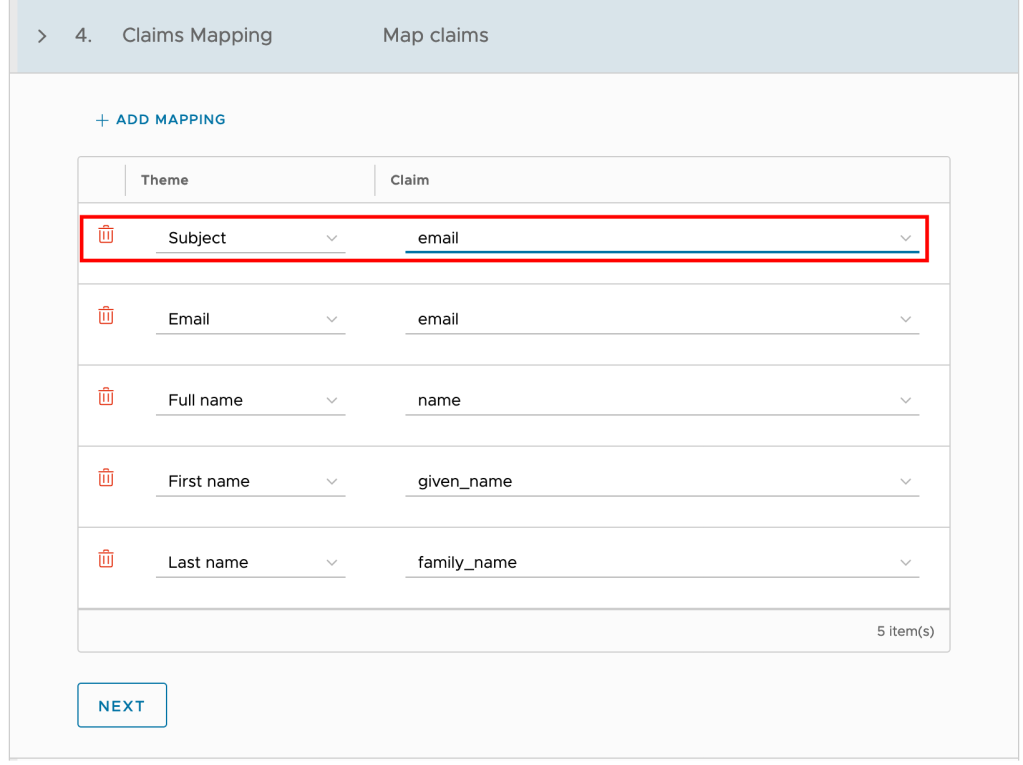
Claims: You can use this section to map the information VMware Cloud Director gets from the user info endpoint to specific claims. The claims are strings for the field names in the VMware Cloud Director response
This is the most critical piece of configuration. Mapping of this information is essential for VCD to interpret the token/user information correctly during the login process.
For OKTA developer account, user name is email id, so i am mapping Subject to email as below
Key Configuration:
OIDC uses a public key cryptography mechanism.A private key is used by the OIDC provider to sign the JWT Token and it can be verified by a 3rd party using the public keys published on the OIDC provider’s well-known URL.These keys form the basis of security between the parties. For security to be maintained, this is required to keep the private keys protected from any cyber-attacks.One of the best practices that has been identified to secure the keys from being compromised is known as key rollover or key Refresh.
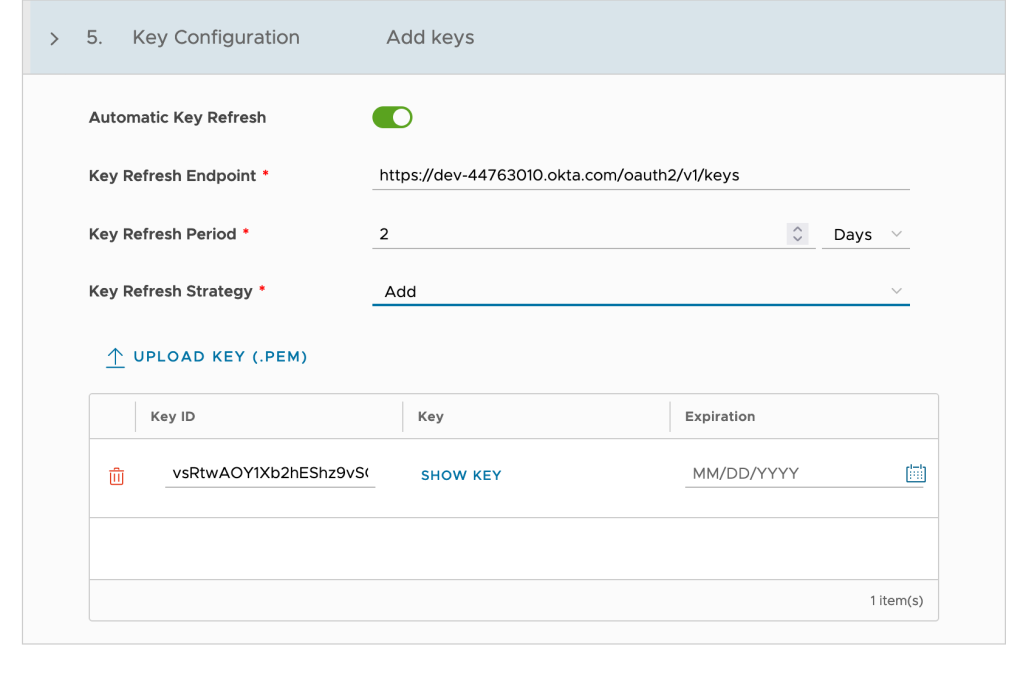
From VMware Cloud Director 10.3.2 and above, if you want VMware Cloud Director to automatically refresh the OIDC key configurations, turn on the Automatic Key Refresh toggle.
- Key Refresh Endpoint should get populated automatically as we choose auto discovery.
- Select a Key Refresh Strategy.
- Add – Preferred option, add the incoming set of keys to the existing set of keys. All keys in the merged set are valid and usable.
- Replace – Replace the existing set of keys with the incoming set of keys.
- Expire After – You can configure an overlap period between the existing and incoming sets of keys. You can configure the overlapping time using the Expire Key After Period, which you can set in hourly increments from 1 hour up to 1 day.
If you did not use Configuration Discovery in Step 6, upload the private key that the identity provider uses to sign its tokens and click on SAVE
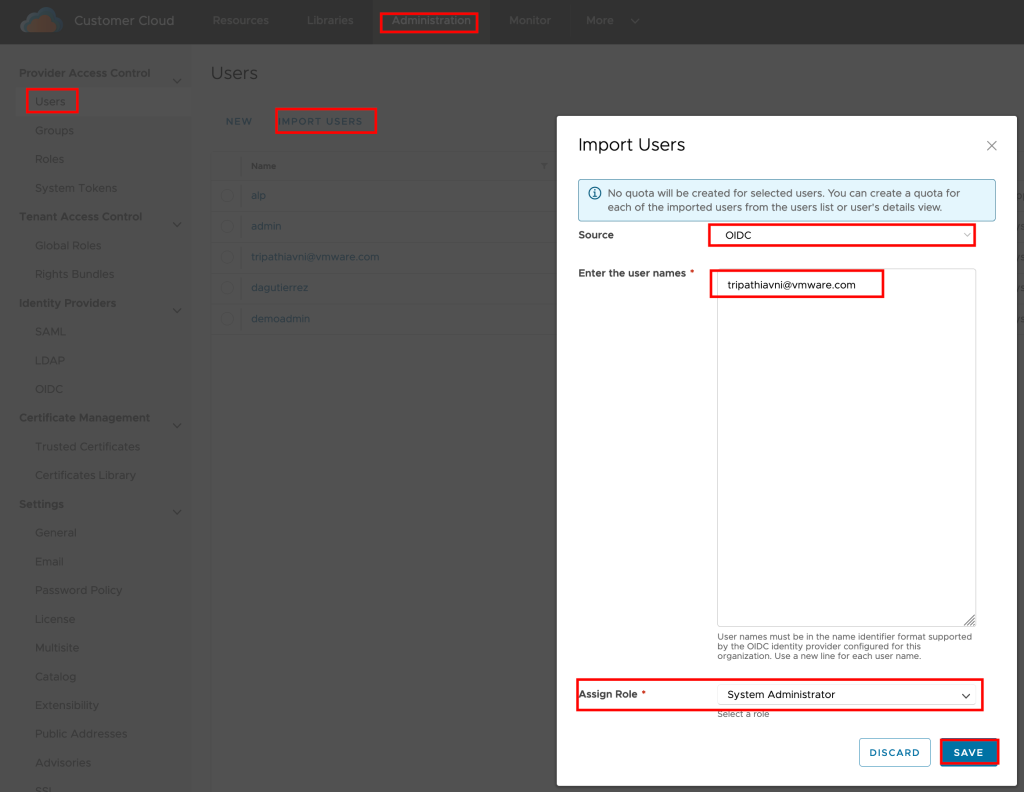
Now go to Cloud Director, under Users, Click on IMPORT USERS and choose Source as “OIDC” and add user which is there in OKTA and Assign Role to that user, thats it.
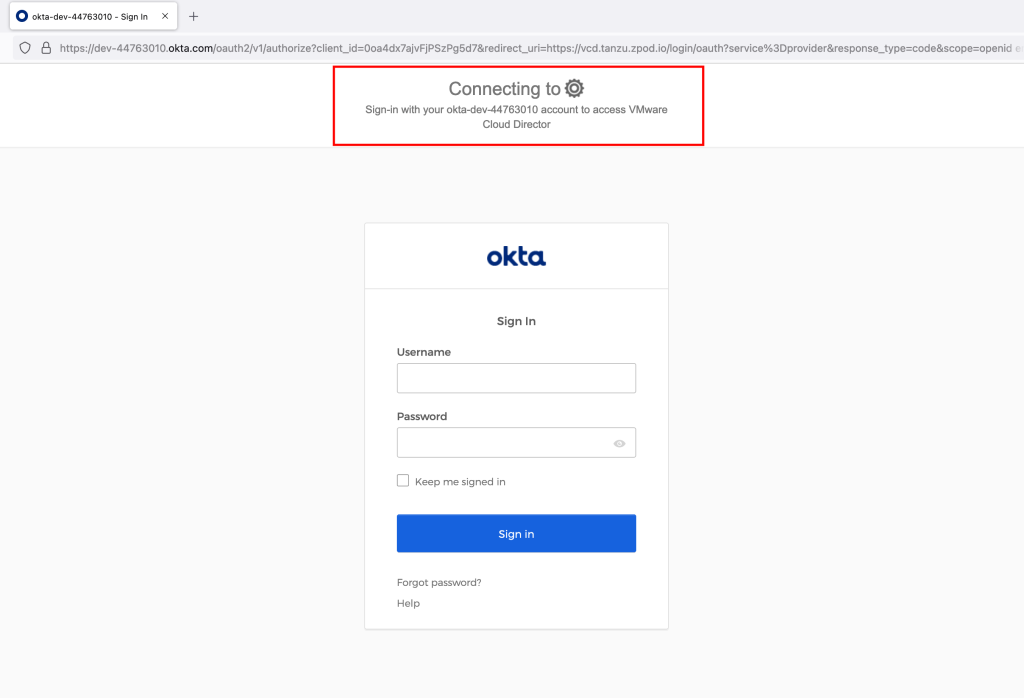
Now you can logout from the vCD console and try to login again, Cloud Director automatically redirects to OKTA and asks for credential to validate.
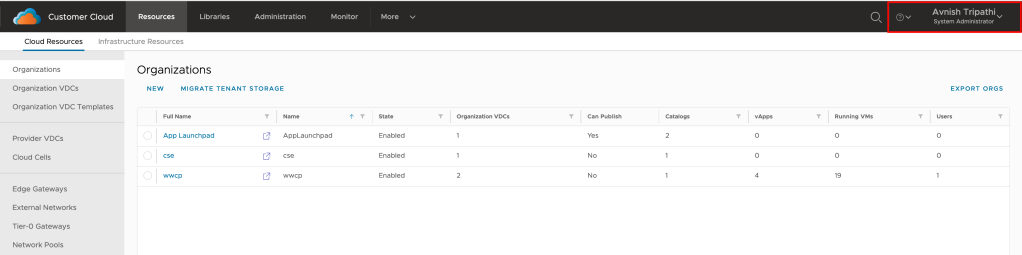
Once the user is authenticated by Okta, they will be redirected back to VCD and granted access per rights associated with the role that was assigned when the user was provisioned.
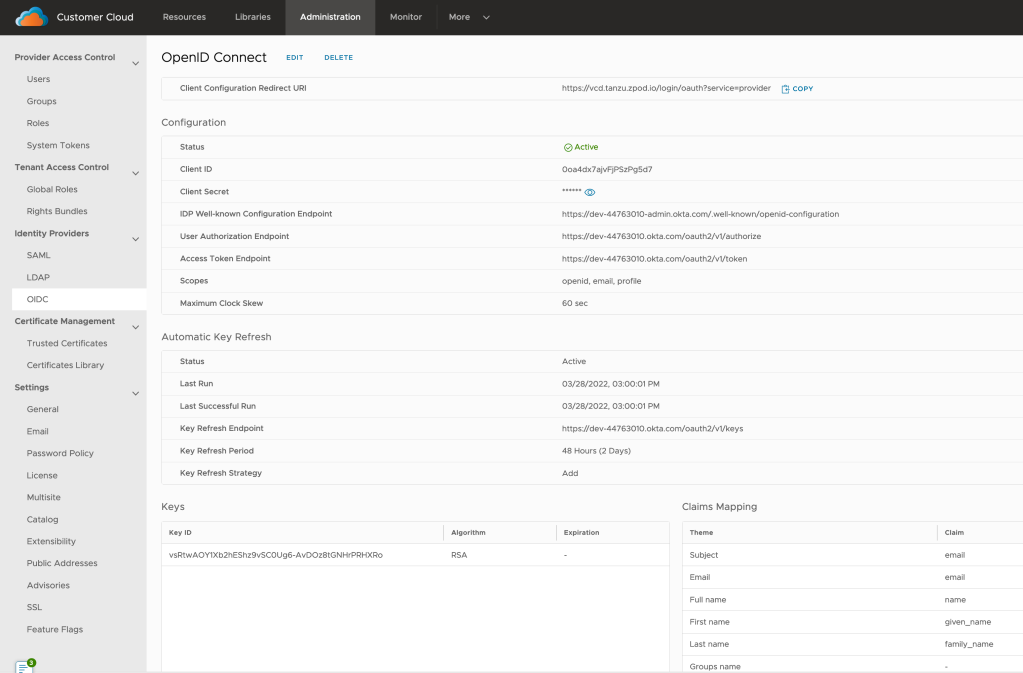
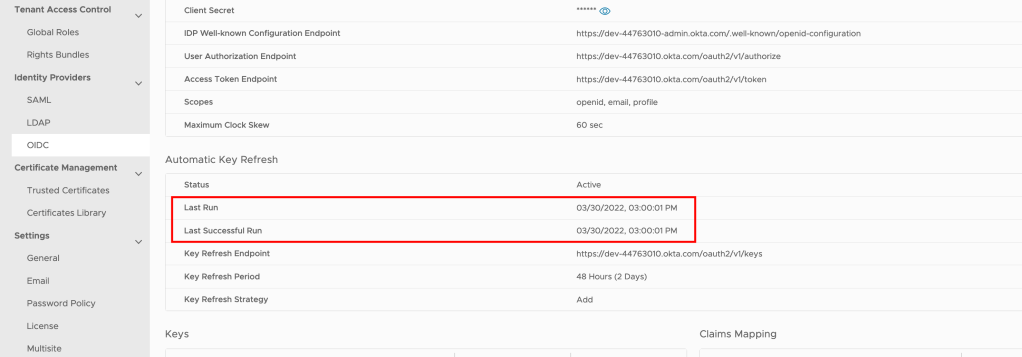
Verify that the Last Run and the Last Successful Run are identical. The runs start at the beginning of the hour. The Last Run is the time stamp of the last key refresh attempt. The Last Successful Run is the time stamp of the last successful key refresh. If the time stamps are different, the automatic key refresh is failing and you can diagnose the problem by reviewing the audit events. (This is only applicable if Automatic Key Refresh is enabled. Otherwise, these values are meaningless)
Bring on your Own OIDC – Tenant Configuration
For tenant configuration, i have created a video, please take a look here, Tenant can bring their own OIDC and self service in cloud director tenant portal.
This concludes the OIDC configuration with VMware Cloud Director. I would like to Thank my colleague Ankit Shah, for his guidance and review of this document.
