
In this post, I will be configuring two-factor authentication (2FA) for VMware Cloud Director using Workspace ONE Access formally know as VMware Identity Manager (vIDM). Two-factor authentication is a mechanism that checks username and password as usual, but adds an additional security control before users are authenticated. It is a particular deployment of a more generic approach known as Multi-Factor Authentication (MFA).Throughout this post, I will be configuring VMware Verify as that second authentication.
What is VMware Verify ?
VMware Verify is built in to Workspace ONE Access (vIDM) at no additional cost, providing a 2FA solution for applications.VMware Verify can be set as a requirement on a per app basis for web or virtual apps on the Workspace ONE launcher OR to login to Workspace ONE to view your launcher in the first place. The VMware Verify app is currently available on iOS and Android.VMware Verify supports 3 methods of authentication:
- OneTouch approval
- One-time passcode via VMware Verify app (soft token)
- One-time passcode over SMS
By using VMware Verify, security is increased since a successful authentication does not depend only on something users know (their passwords) but also on something users have (their mobile phones), and for a successful break-in, attackers would need to steal both things from compromised users.
1. Configure VMware Verify
First you need to download and install “VMware Workspace ONE Access“, which is very simple to deploy using ova. VMware Verify is provided as-a-service, and thus, it does not require to install anything on-premise server. To enable VMware Verify, you must contact VMware support. They will provide you a security token which is all you need to enable the integration with VMware Workspace One Access (vIDM).Once you get the token, login into vIDM as an admin user and go to:
- Click on the Identity & Access Management tab
- Click on the Manage button
- Select Authentication Methods
- Click on the configure icon (pencil) next to VMware Verify
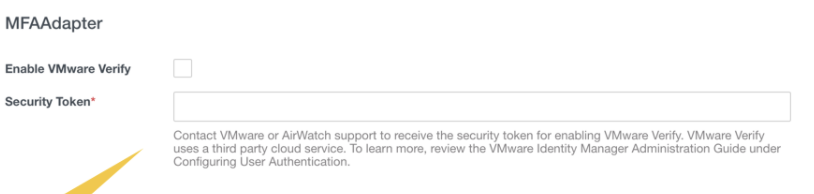
- A new window will pop-up, on which you need to select the Enable VMware Verify checkbox, enter the security token provided by VMware support, and click on Save.


2. Create a Local Directory on VMware Workspace One Access
VMware Workspace ONE Access not only supports Active Directories , LDAP Directories but also supports other types of directories, such as local directories and Just-in-Time directories.For this Lab , i am going to create a local directory using local directory feature of Workspace One Access,Local users are added to a local directory on the service. we need to manage the local user attribute mapping and password policies. You can create local groups to manage resource entitlements for users.
- Select the Directories tab
- Click on “Add Directory”
- Specify Directory and domain name (this is same domain name i have registered for VMware Verify


3. Create/Configure a built-in Identity Provider
Once the second authentication factor is enabled as described on steps 1 and 2, it must next be added as an authentication method to a Workspace one access built-in provider. If in your environment already exists one, you can re-configure it. Alternatively, you can create a new built-in identity provider as explained below.Login to Workspace One Access as an admin user and then:
- Select the Identity & Access Management tab
- Click on the Manage button
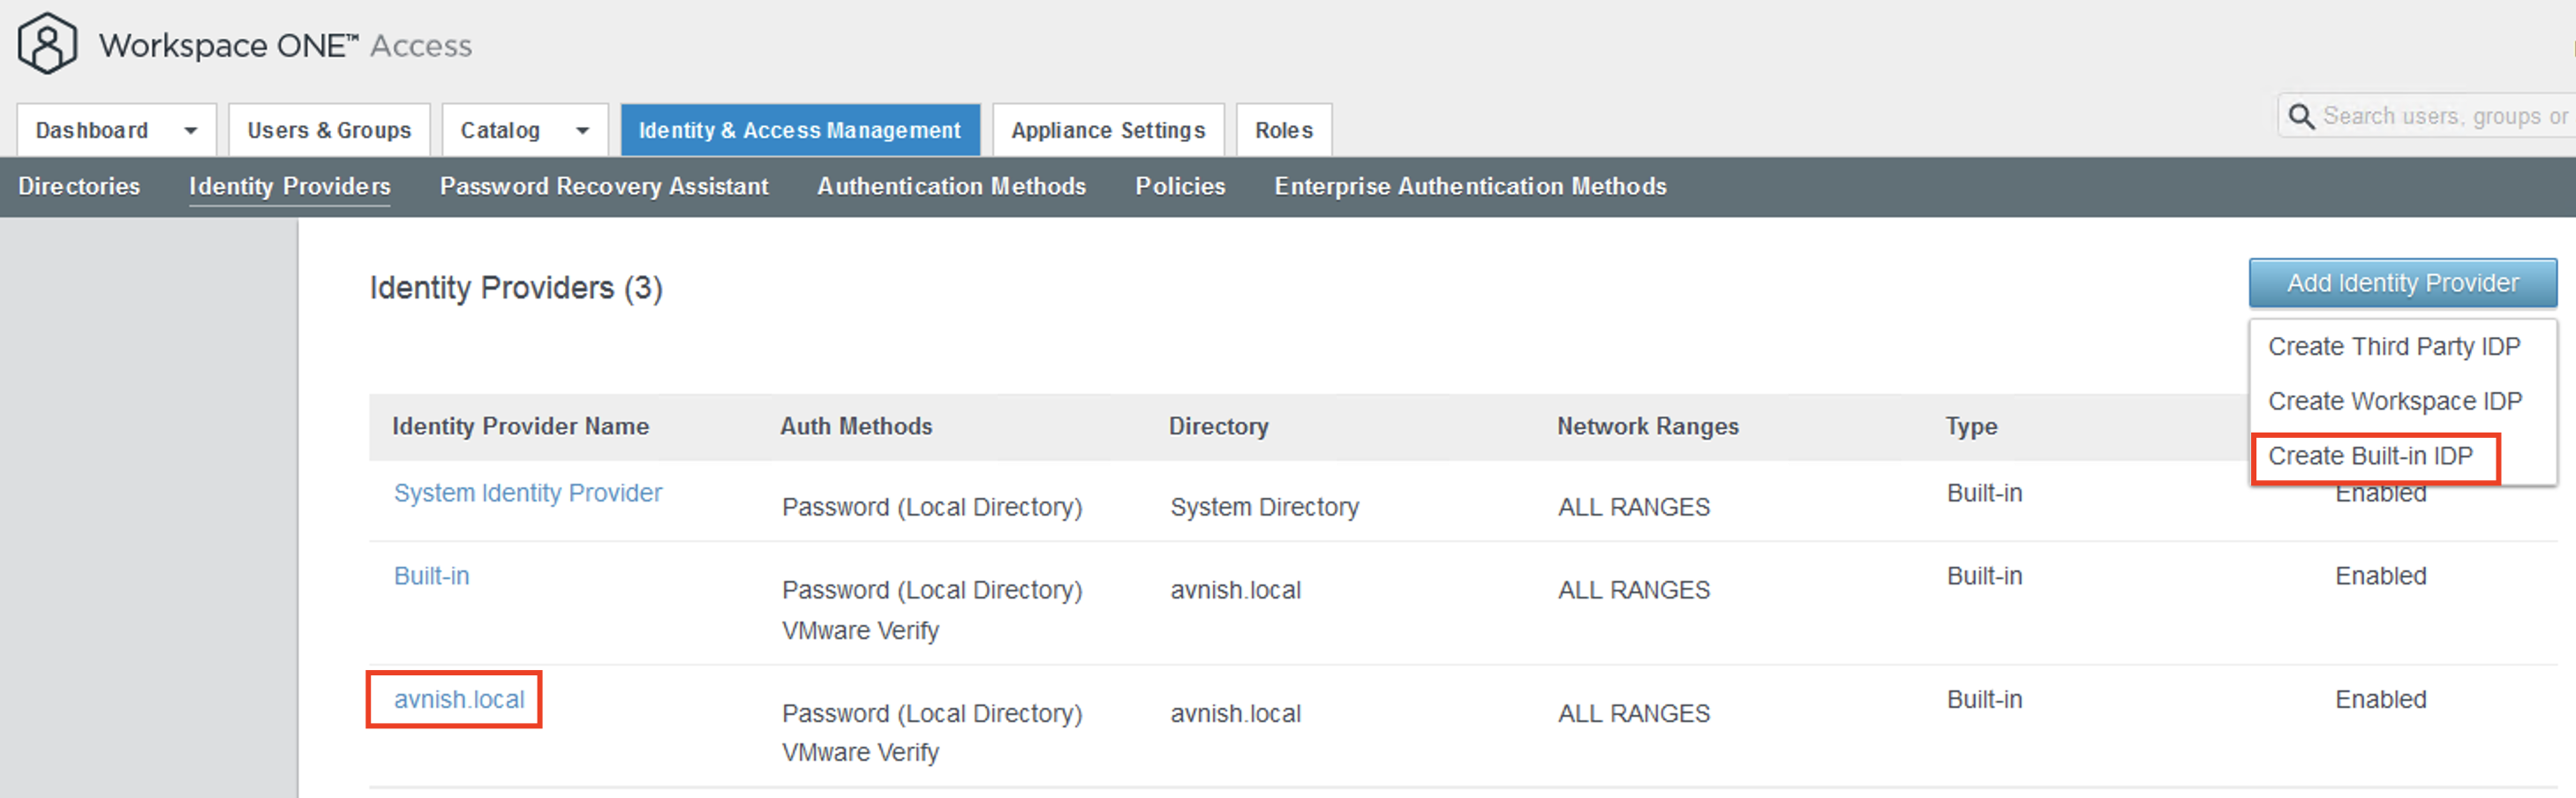
- Click on the Identity Providers link
- Click on the Add Identity Provider button and select Create Built-in IDP
- Enter a name describing the Identity Provider (IdP)
- Which users can authenticate using the IdP – In the example below I am selecting the local directory that i had created above.
- Network ranges from which users will be directed to the authentication mechanism described on the IdP
- The authentication methods to associate with this IdP – Here I am selecting VMware Verify as well as Local Directory.
- Finally click on the Add button

4. Update Access Policies on Workspace One Access
The last configuration step on Workspace One Access (vIDM) is to update the default access policy to include the second factor authentication mechanism. For that, login into Workspace One Access as an admin user and then:
- Select the Identity & Access Management tab
- Click on the Manage button
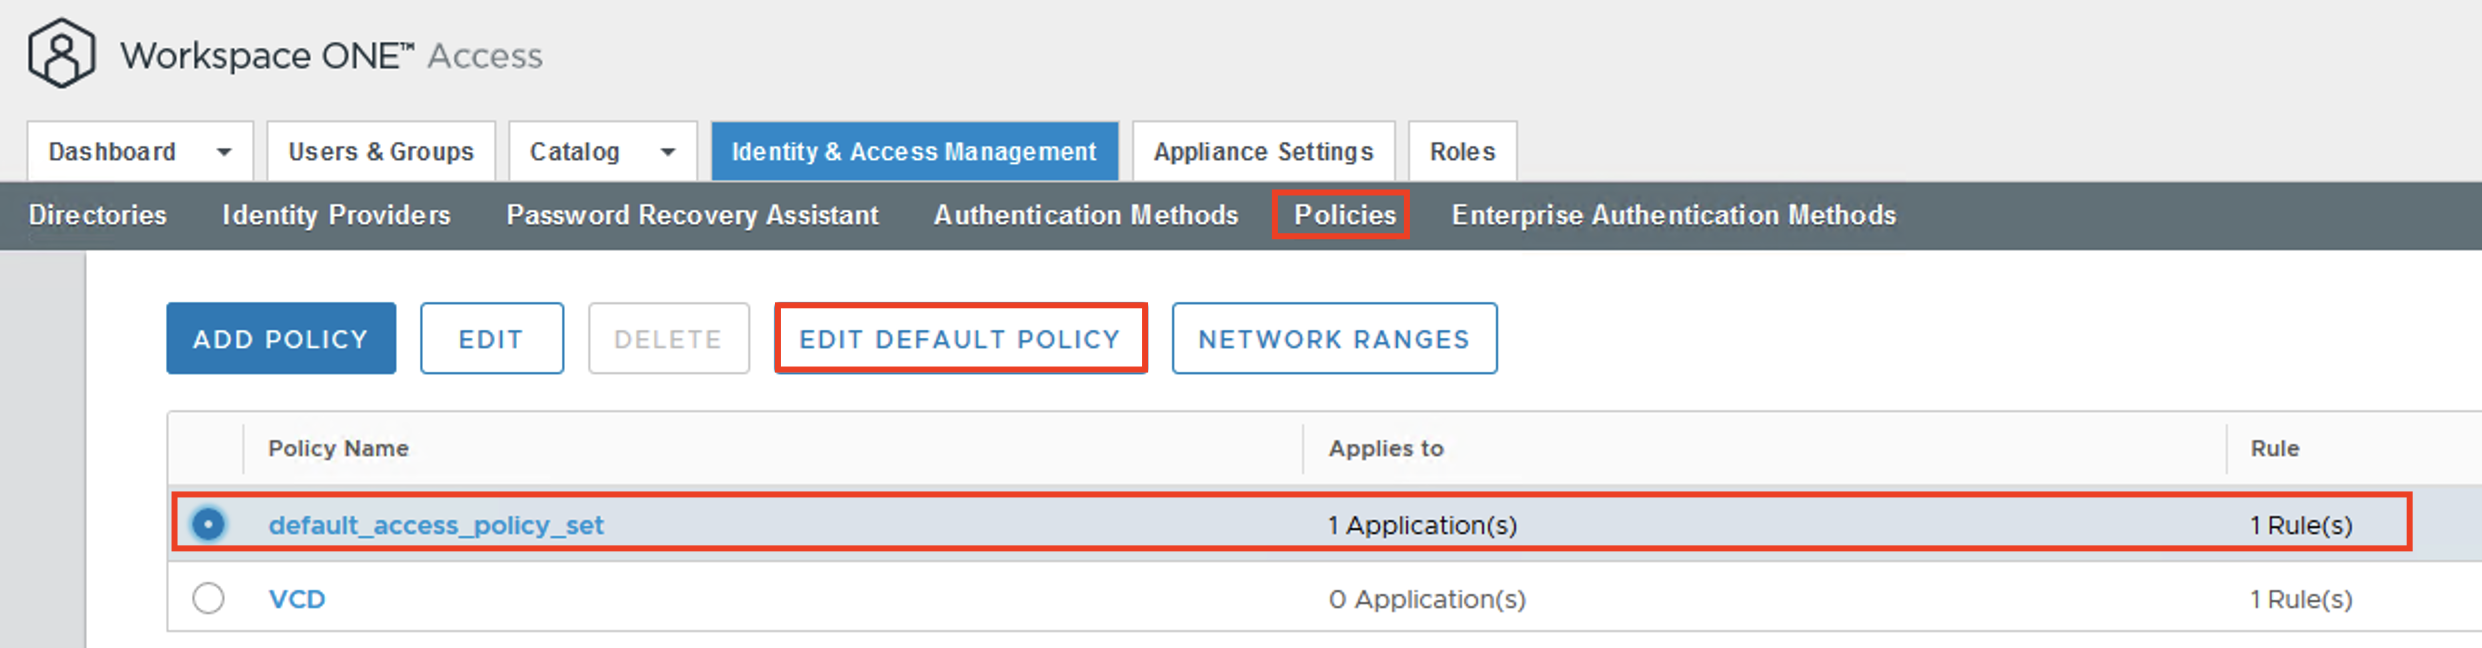
- Click on the Policies link
- Click on the Edit Default Policy button
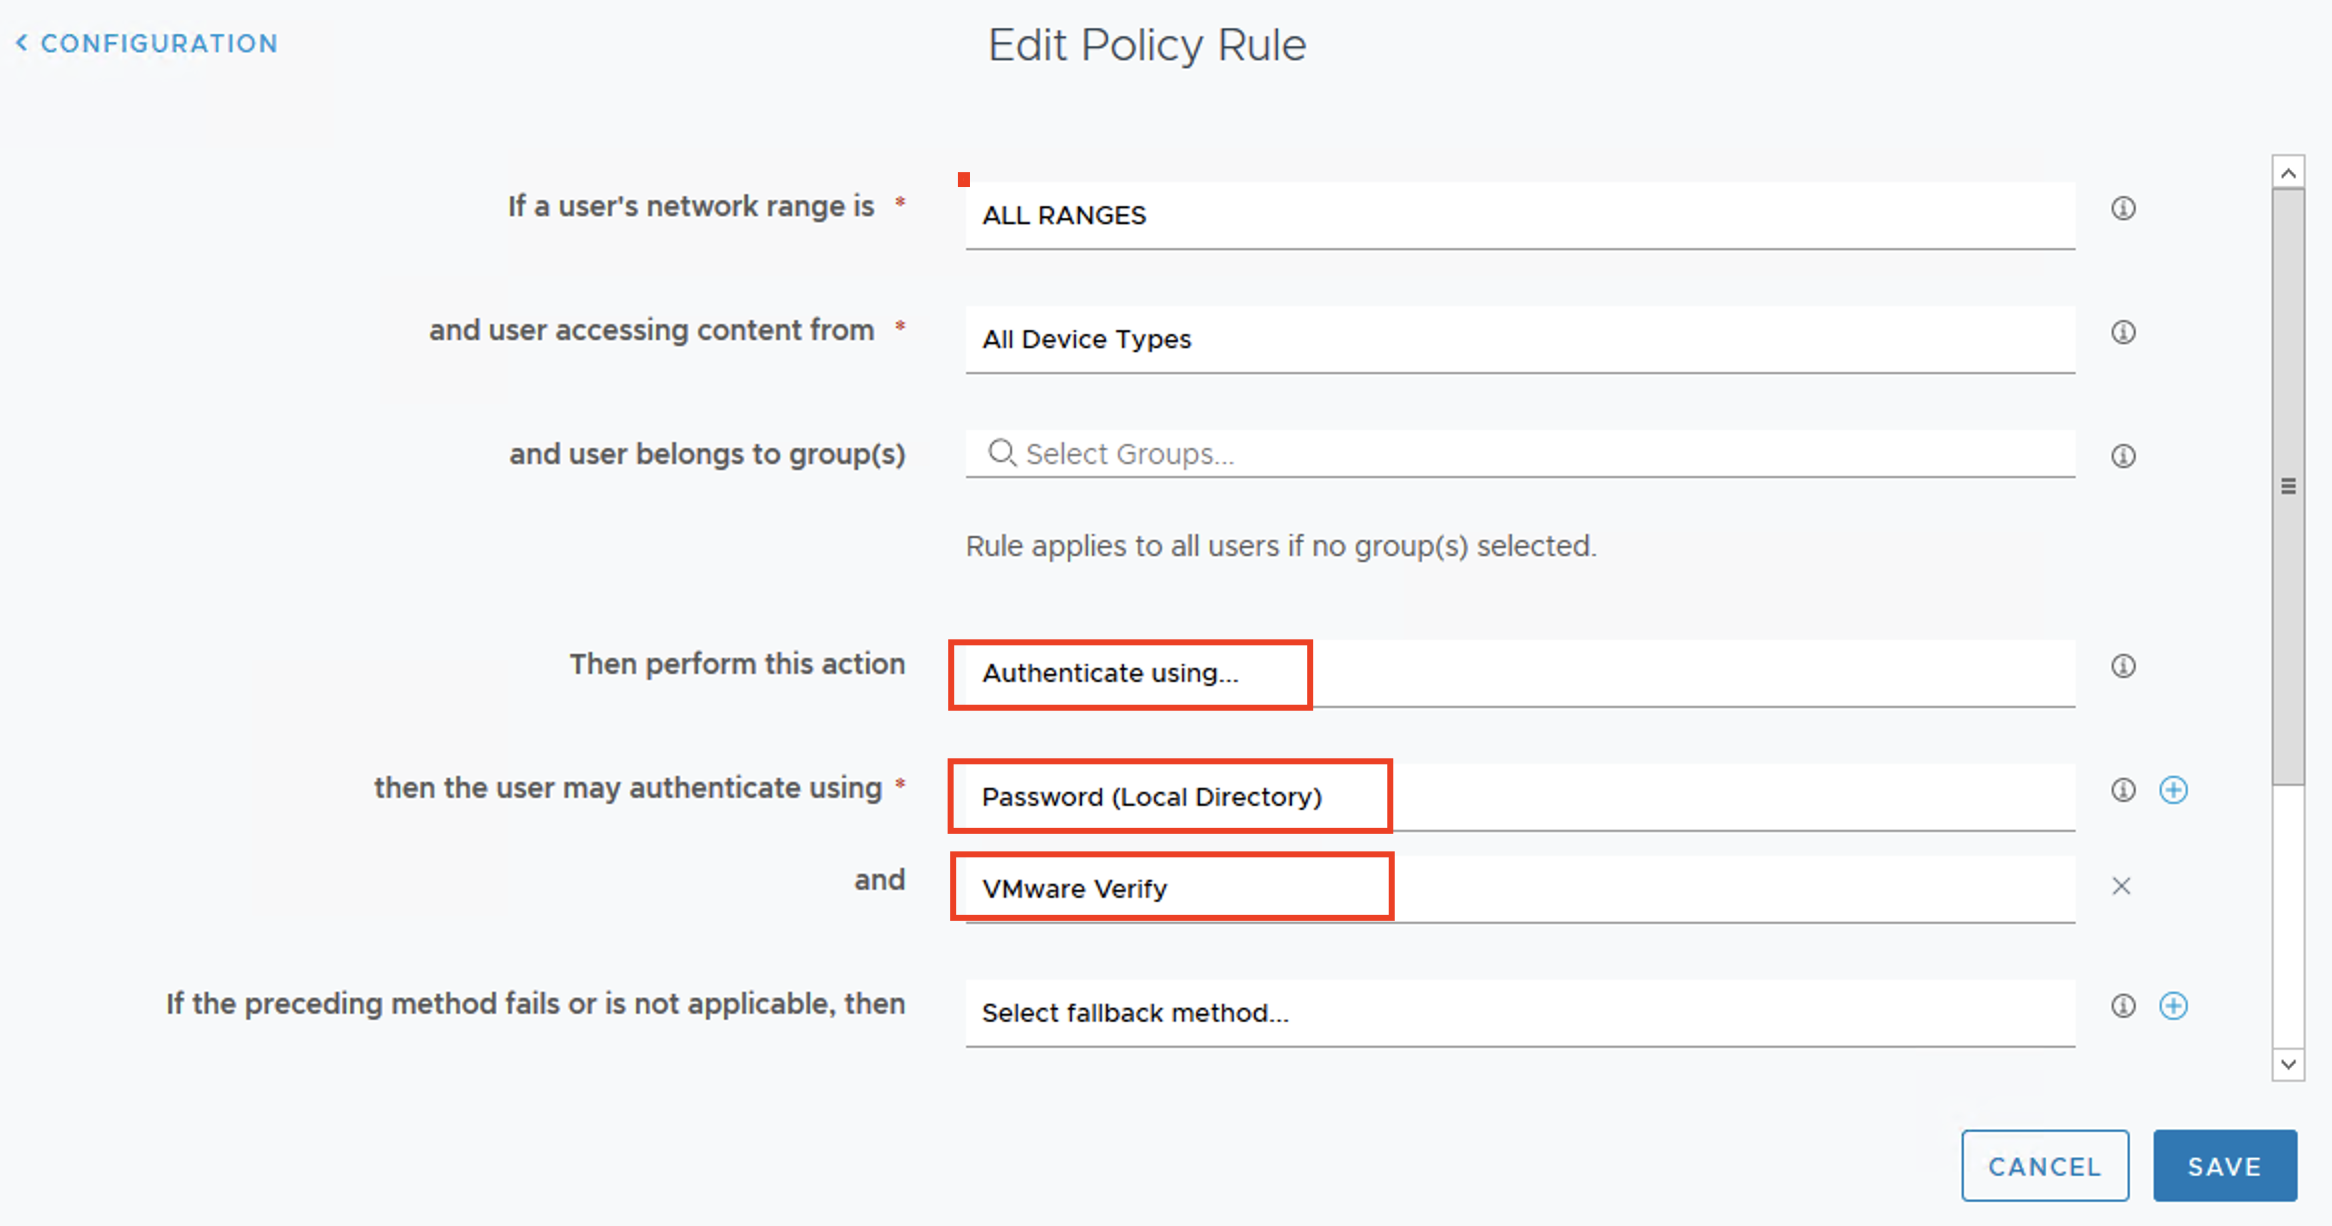
- This will open up new page showing the details of the default access policy. Go to “Configuration” and Click on “ALL RANGES”.
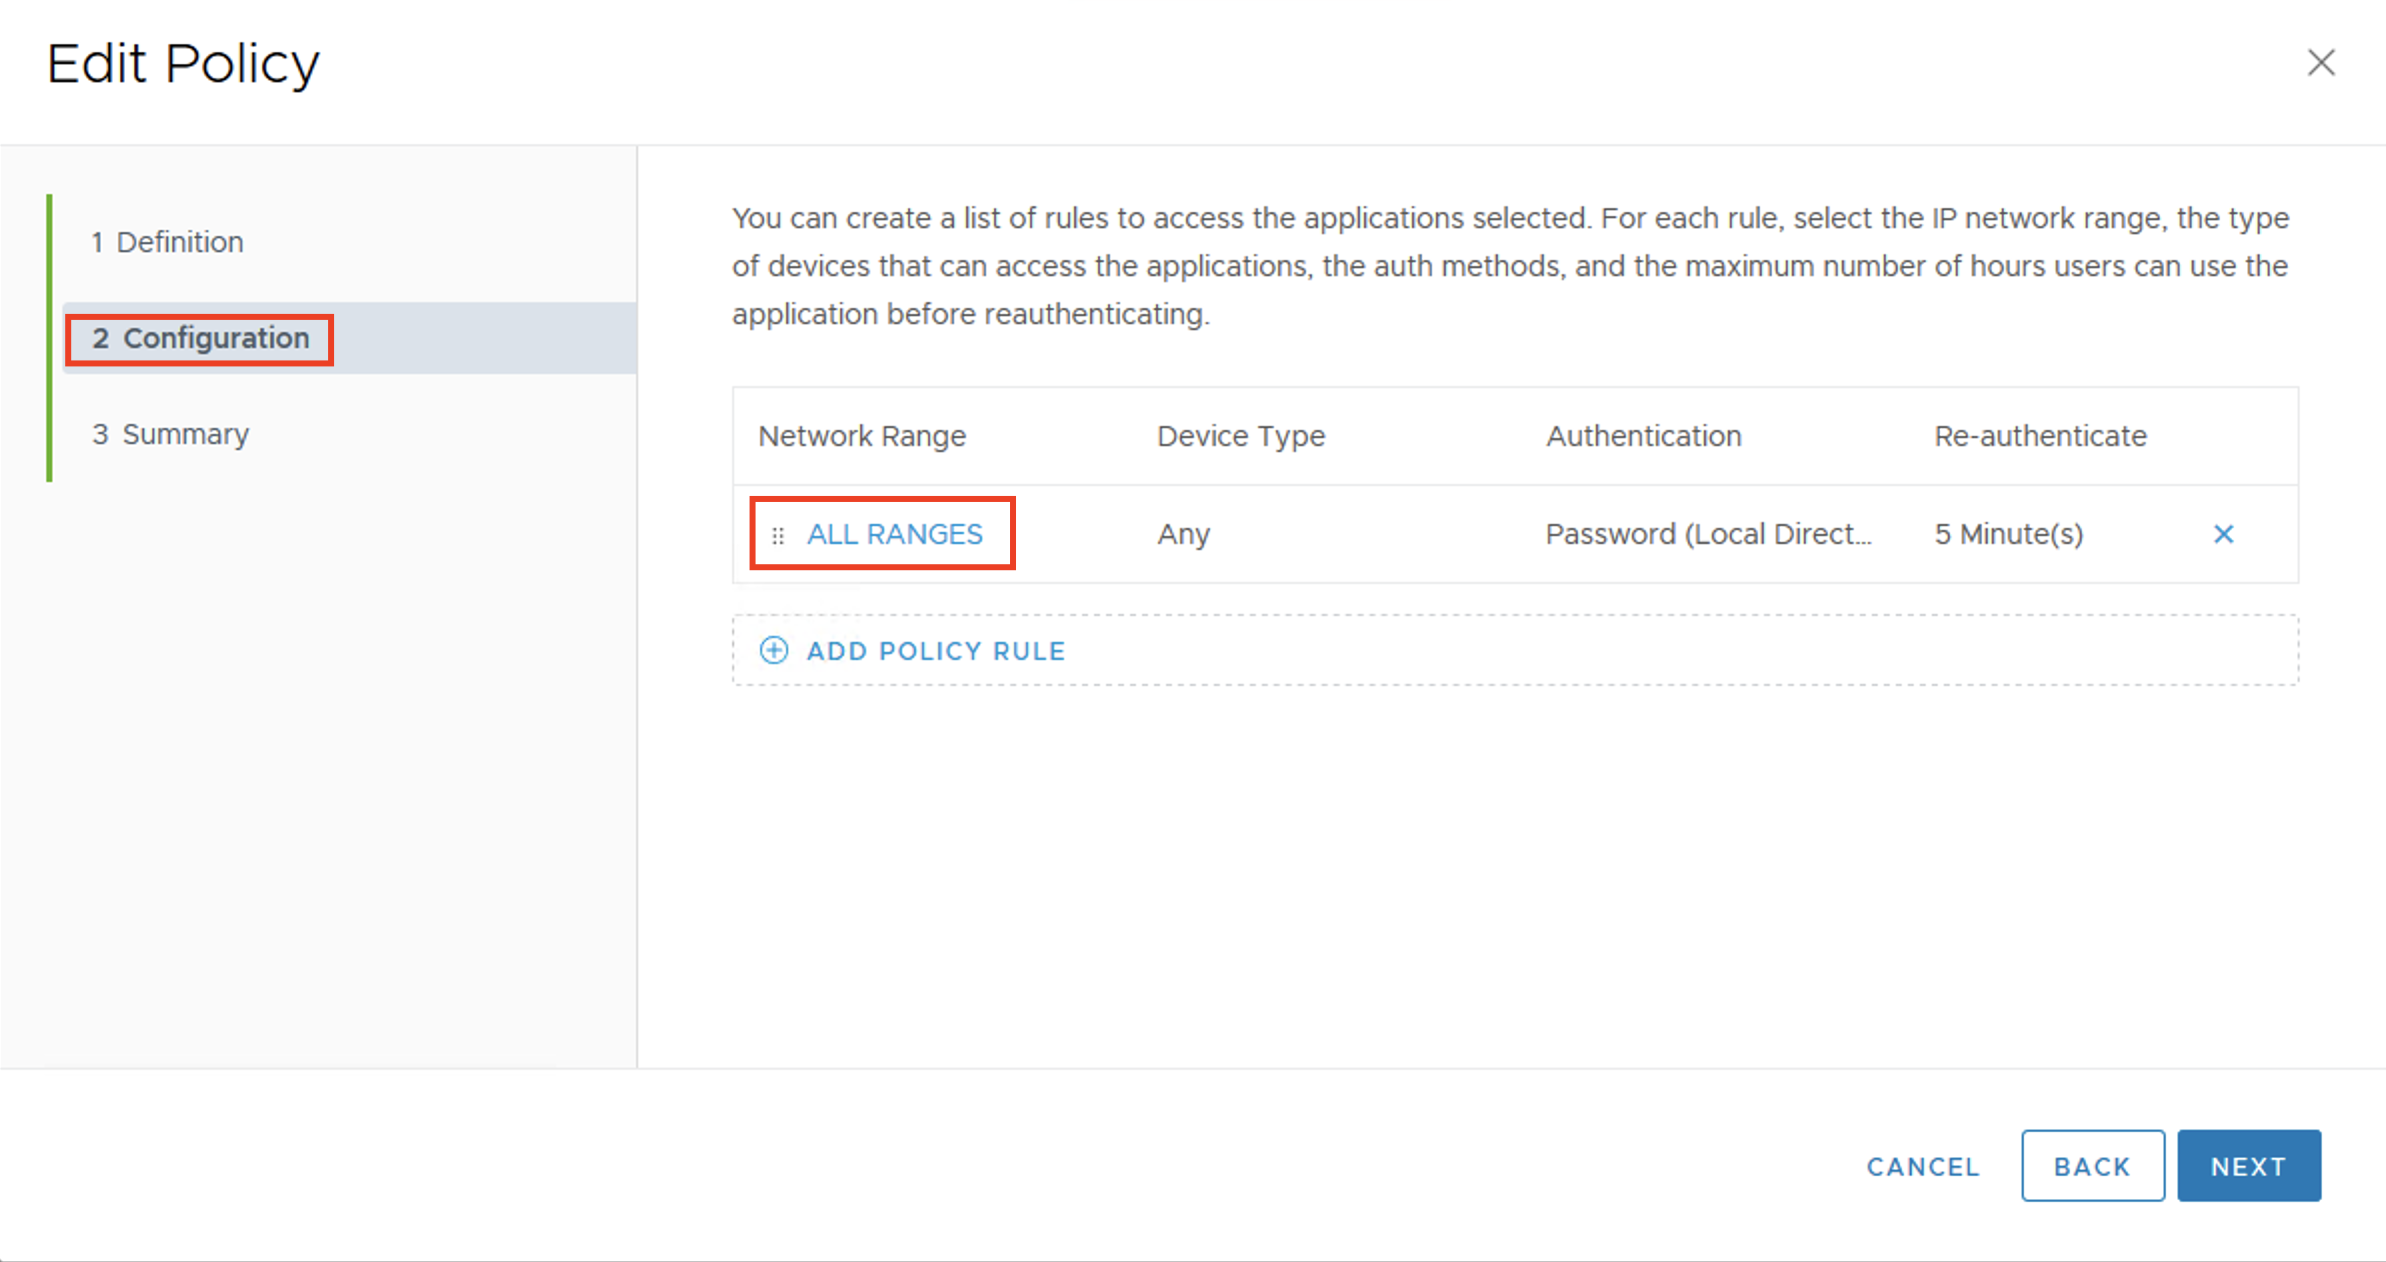
A new window will pop-up. Modify the settings right below the line “then the user may authenticate using:”
- Select Password as the first authentication method – This way users will have to enter their ID and password as defined on the configured Local Directory
- and Select second authentication mechanism. here I am adding VMware Verify – This will make that after a successful password authentication, users will get a notification on their mobile phones to accept or deny the login request.
- I am leaving empty the line “If preceding Authentication Method fails or is not applicable, then:” – This is because I don’t want to configure any fallback authentication mechanism or you can choose based on your choice.
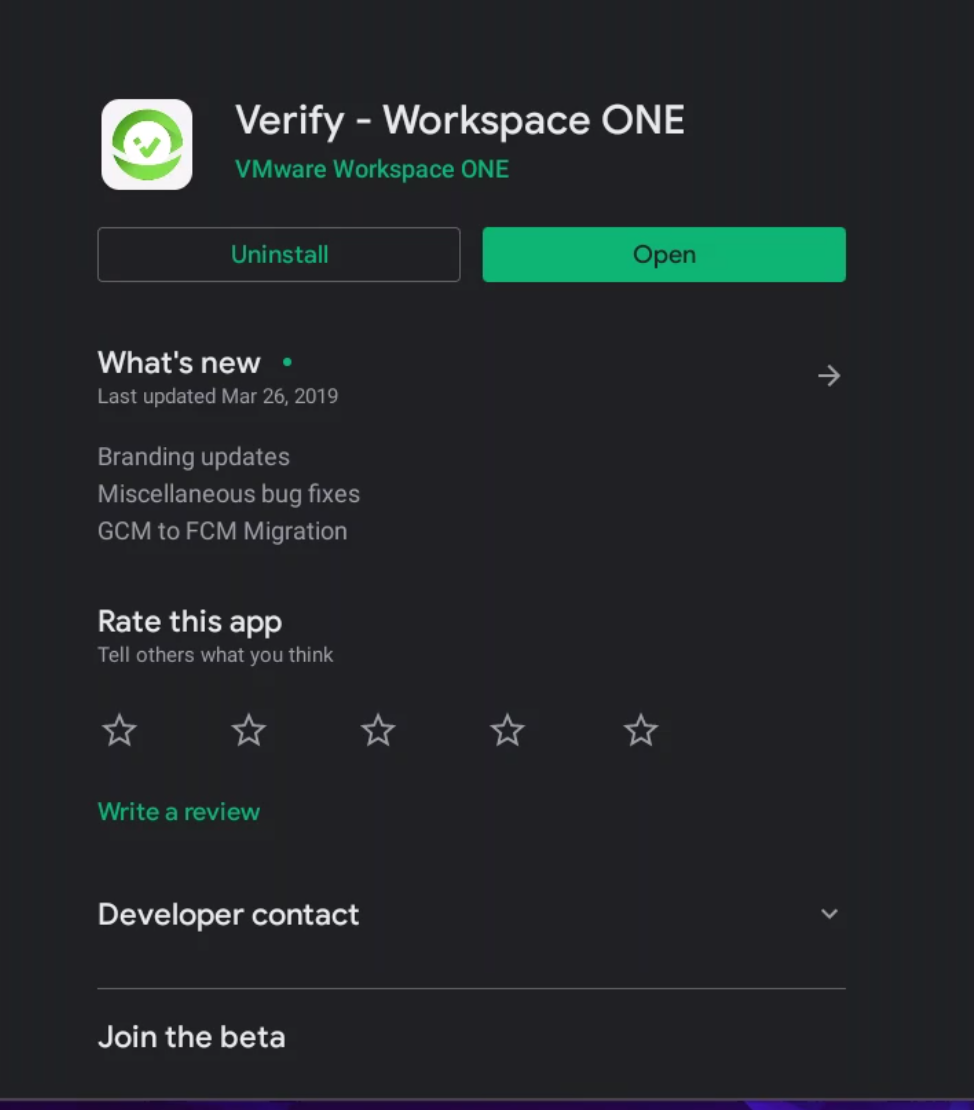
5. Download the app in your mobile and register a user from an Cloud Director Organization
- Access the app provider on your mobile phone. Search for VMware Verify and download it.
- Once it is downloaded, open the application. It will ask for your mobile number and e-mail address. Enter your domain details. On the screenshot below, I’m providing my mobile number and an e-mail which is only valid in my lab.After clicking OK, you will be provided two options for verifying your identity:

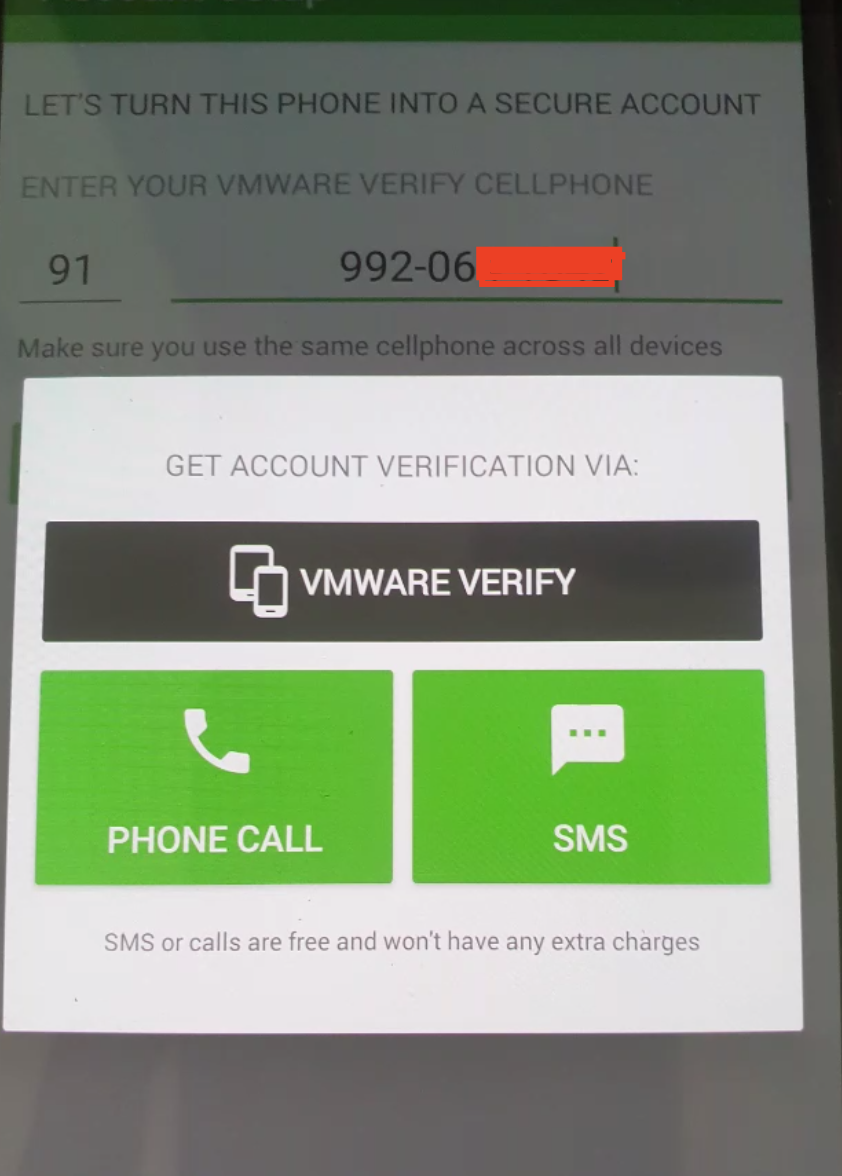
- Receiving and SMS message – SMS will have registration code which will allow you to enter in to APP along with registration code.
- Receiving a Phone Call – after clicking on this option, the app will show a registration code you will need to type on the phone pad once you receive the call
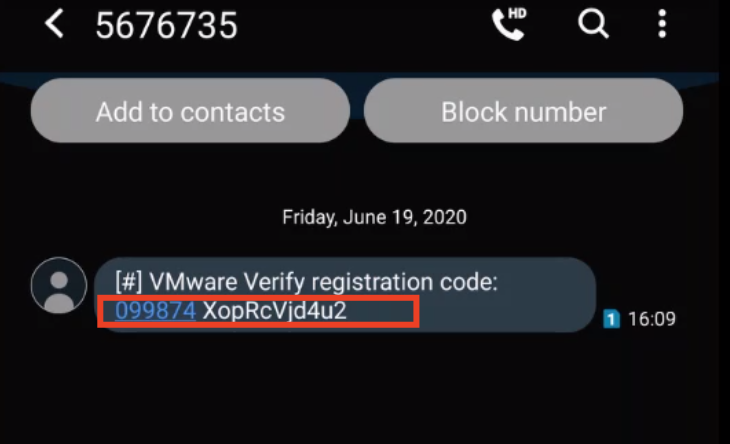
- Since i am using SMS way to doing it , it will ask you to Enter the code which you have received in SMS Manually (XopRcVjd4u2)
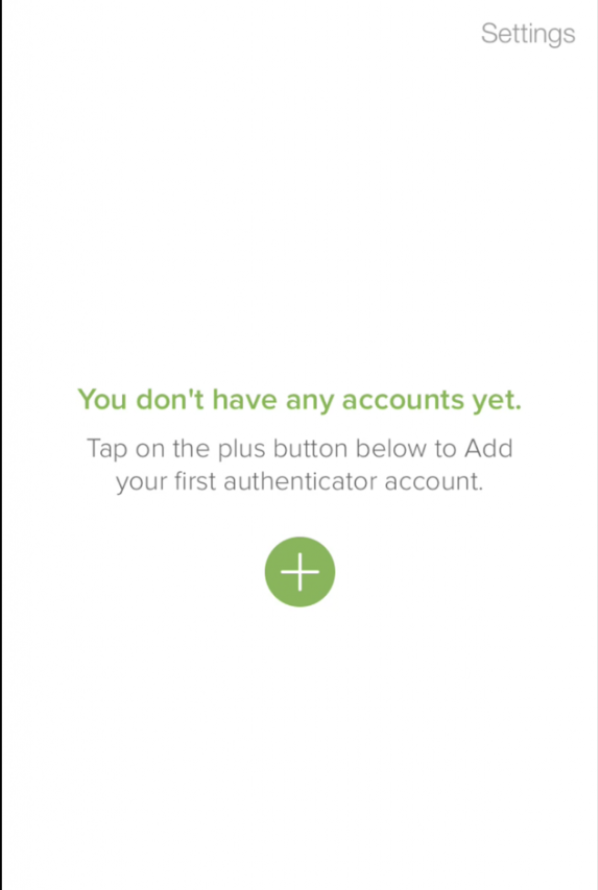
- Once your identity has been verified, you will be asked to protect the app by setting a PIN number. After that, the app will show there are not accounts configured yet.
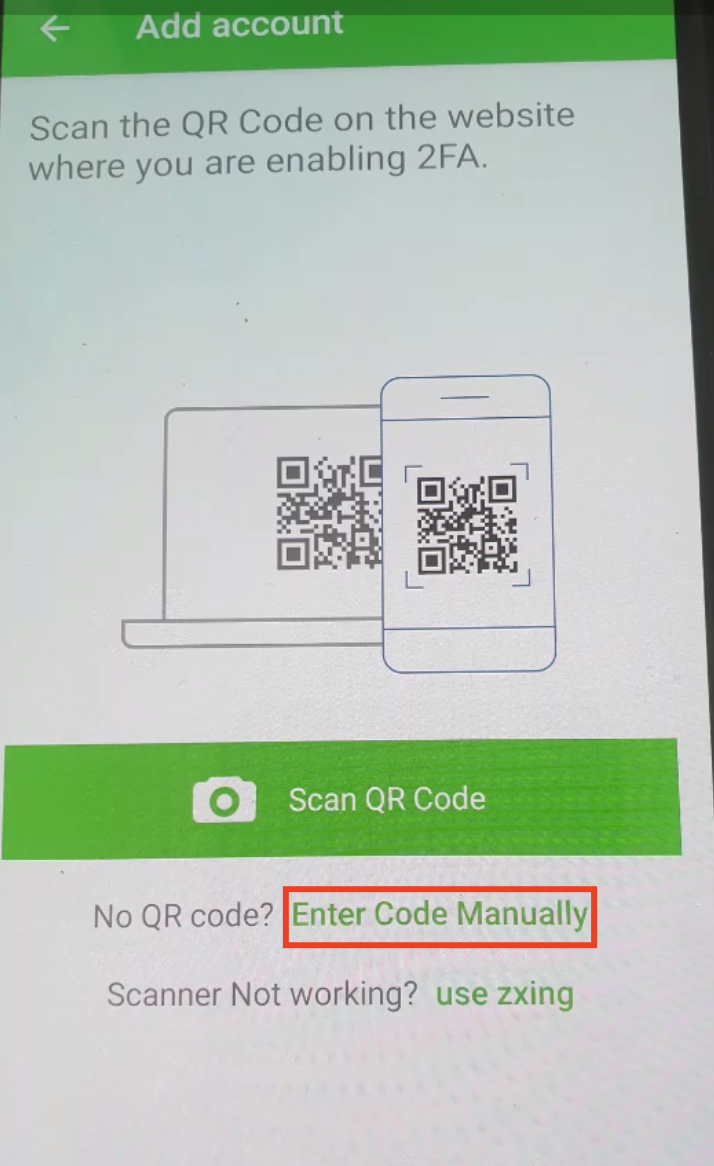
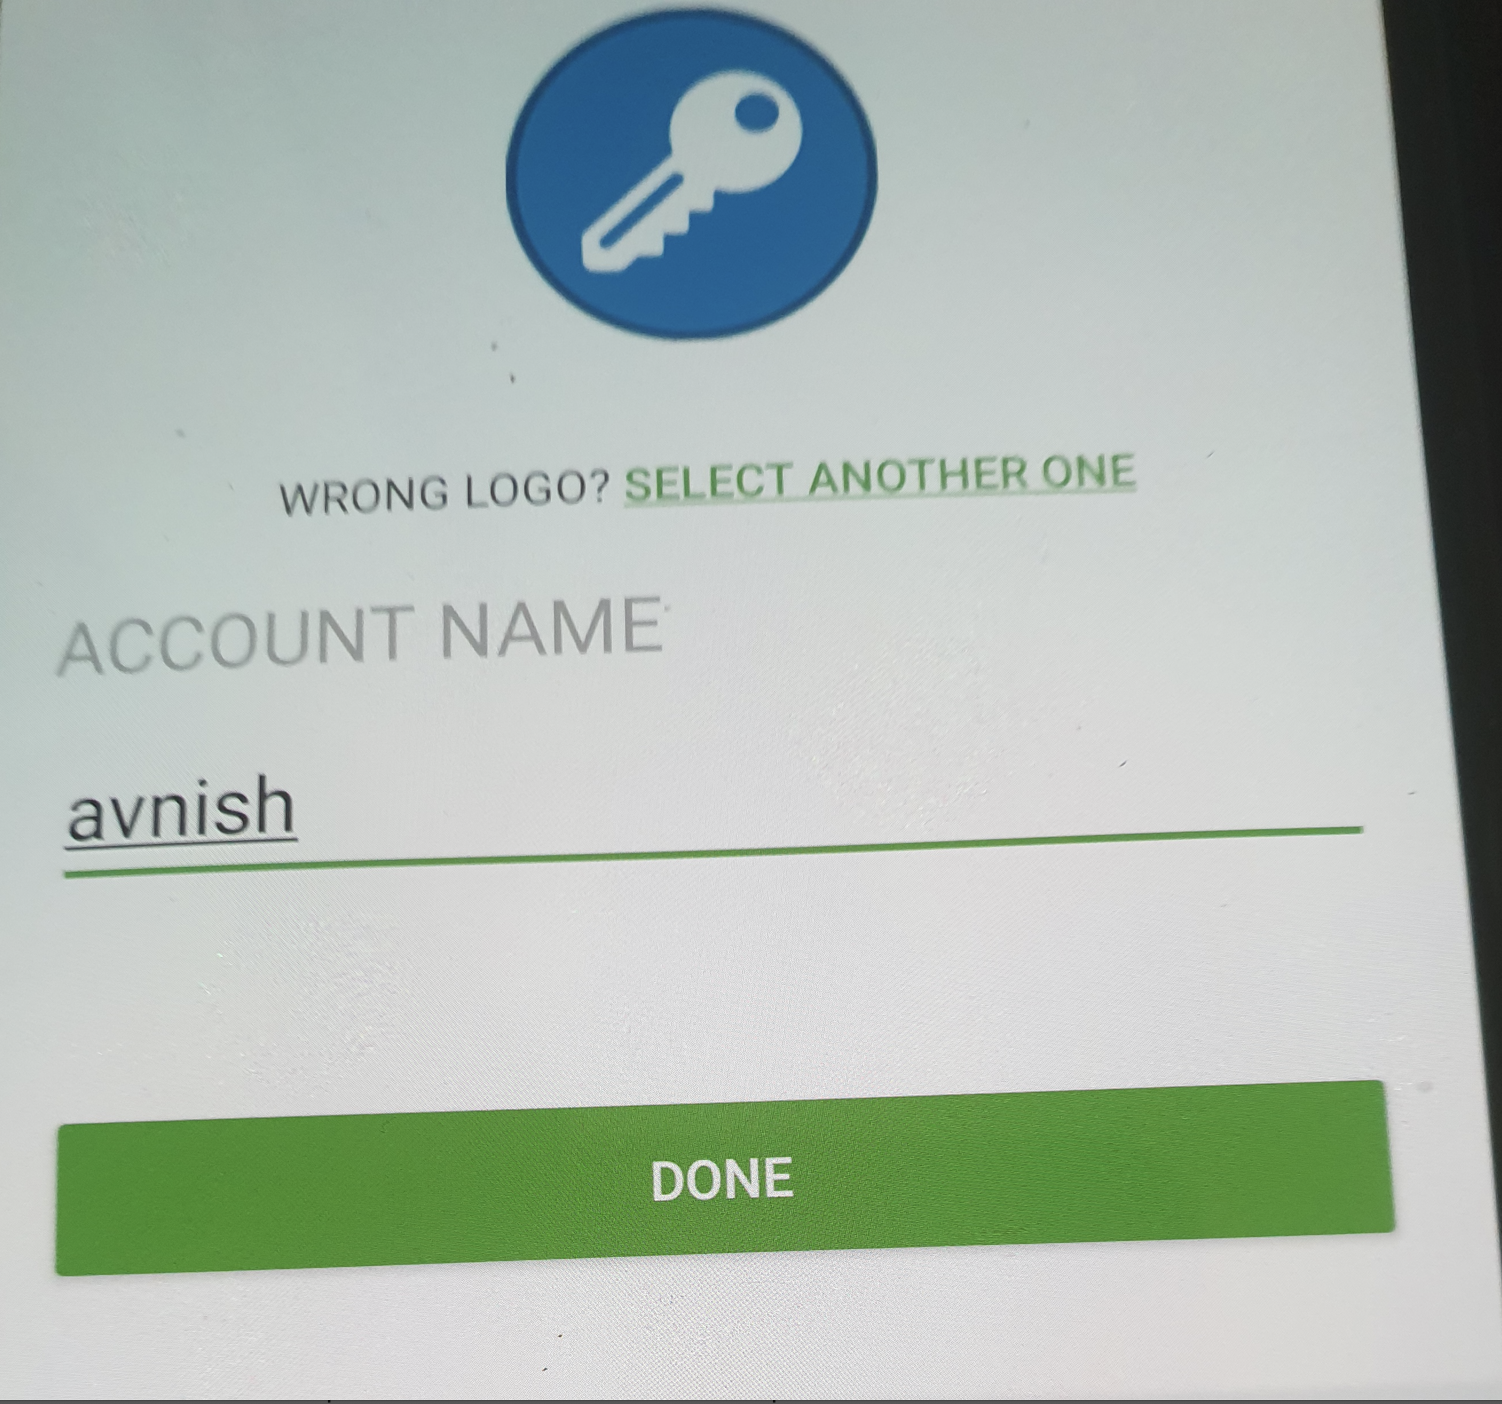
- Click on Account and add the account


Immediately after that, we will start receiving tokens on the VMware Verify mobile app. so at this moment, you are ready to move to the next step.
6. Enable VMware Cloud Director Federation with VMware Workspace ONE Access
There are three authentication methods that are supported by vCloud Director:
Local: local users which are created at the time of installing vCD or while creating any new organization.
LDAP service: LDAP service enables the organisations to use their own LDAP servers for authentication. Users can then be imported into vCD from the configured LDAP.
SAML Identity Provider: A SAML Identity Provider can be used to authenticate users in organisations. SAML v2.0 metadata is required for the service to be configured. The metadata must include the location of the single sign-on service, the single logout service, and the X.509 certificate for the service. In this post we will be using federation between VMware Workspace One Access with VMware Cloud Director.
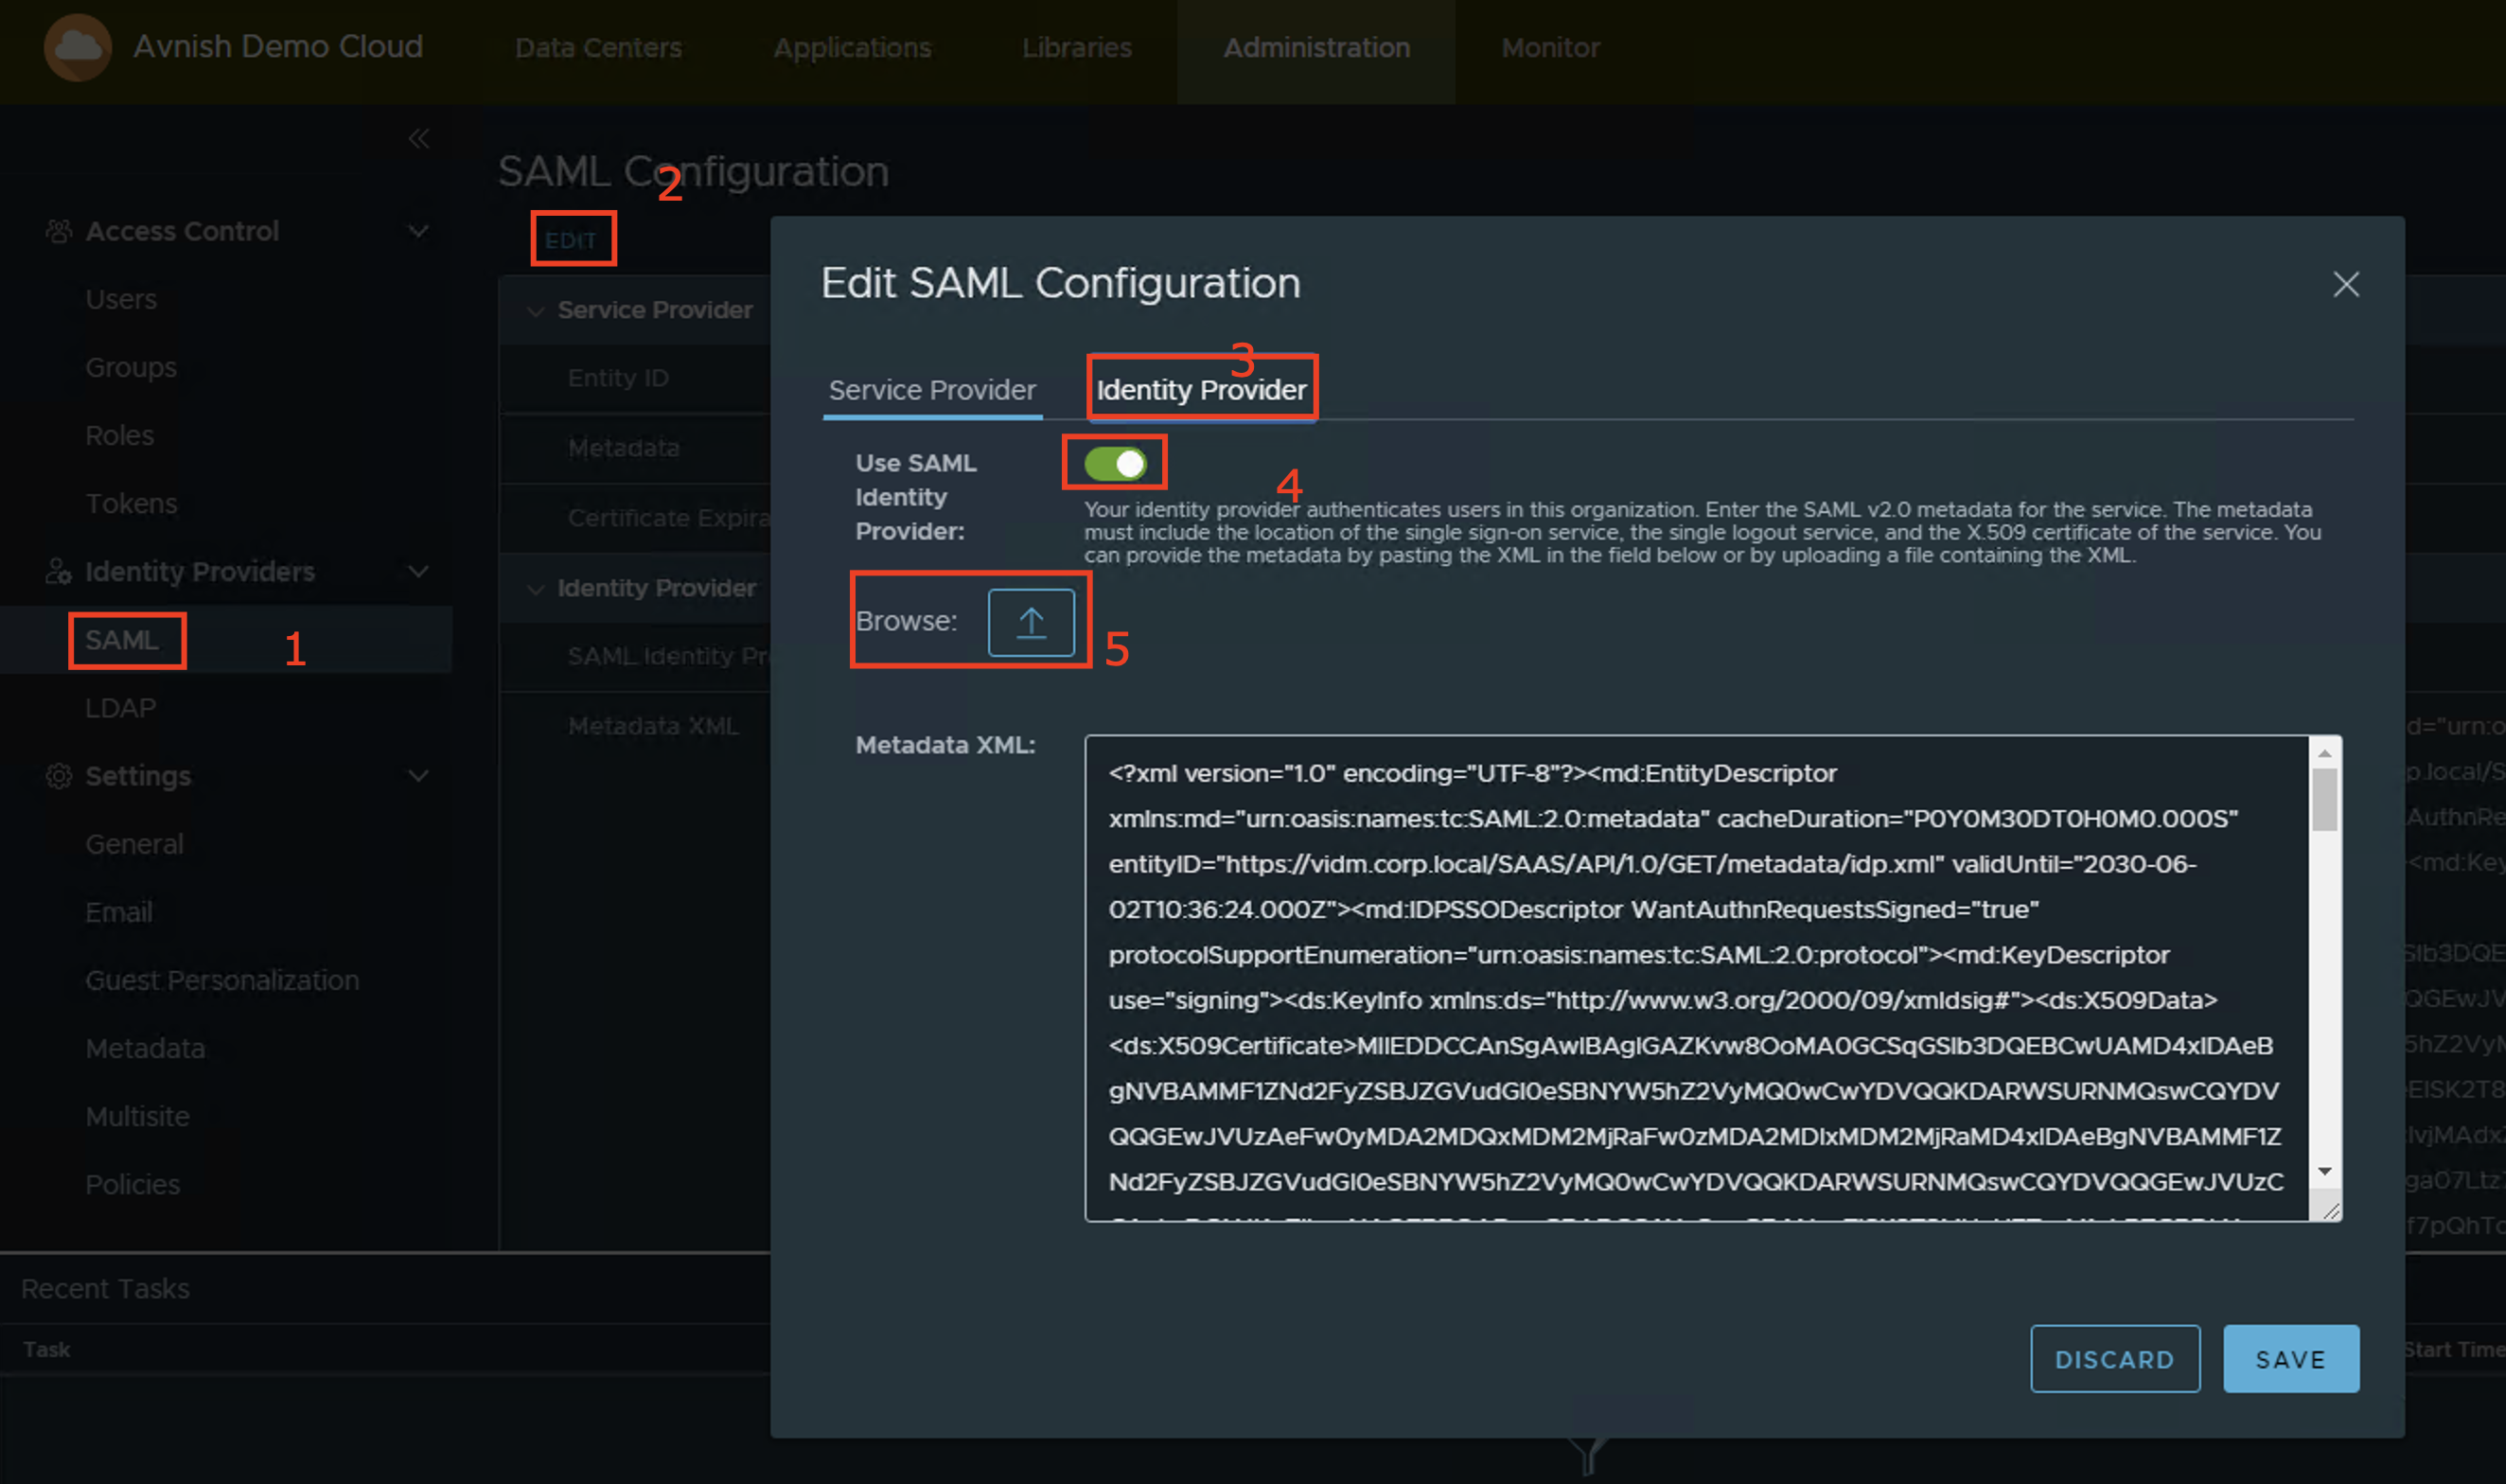
So, let’s go ahead and login to VMware Cloud Director Organization and go to “Administration” and Click on “SAML”
- Enable Federation by setting “Entity ID” to any other unique string , in this case i am setting “org name” , in my case my org name is “abc”
- Then click on “Generate” to generate a new certificate and click “SAVE”
- Download Metadata from the link , It will download file “spring_saml_metadata.xml“. This activity can be performed by system or Org Administrator.
- In VMware Workspace ONE Access(VIDM) admin console, go to “Catalog” and create new web application.
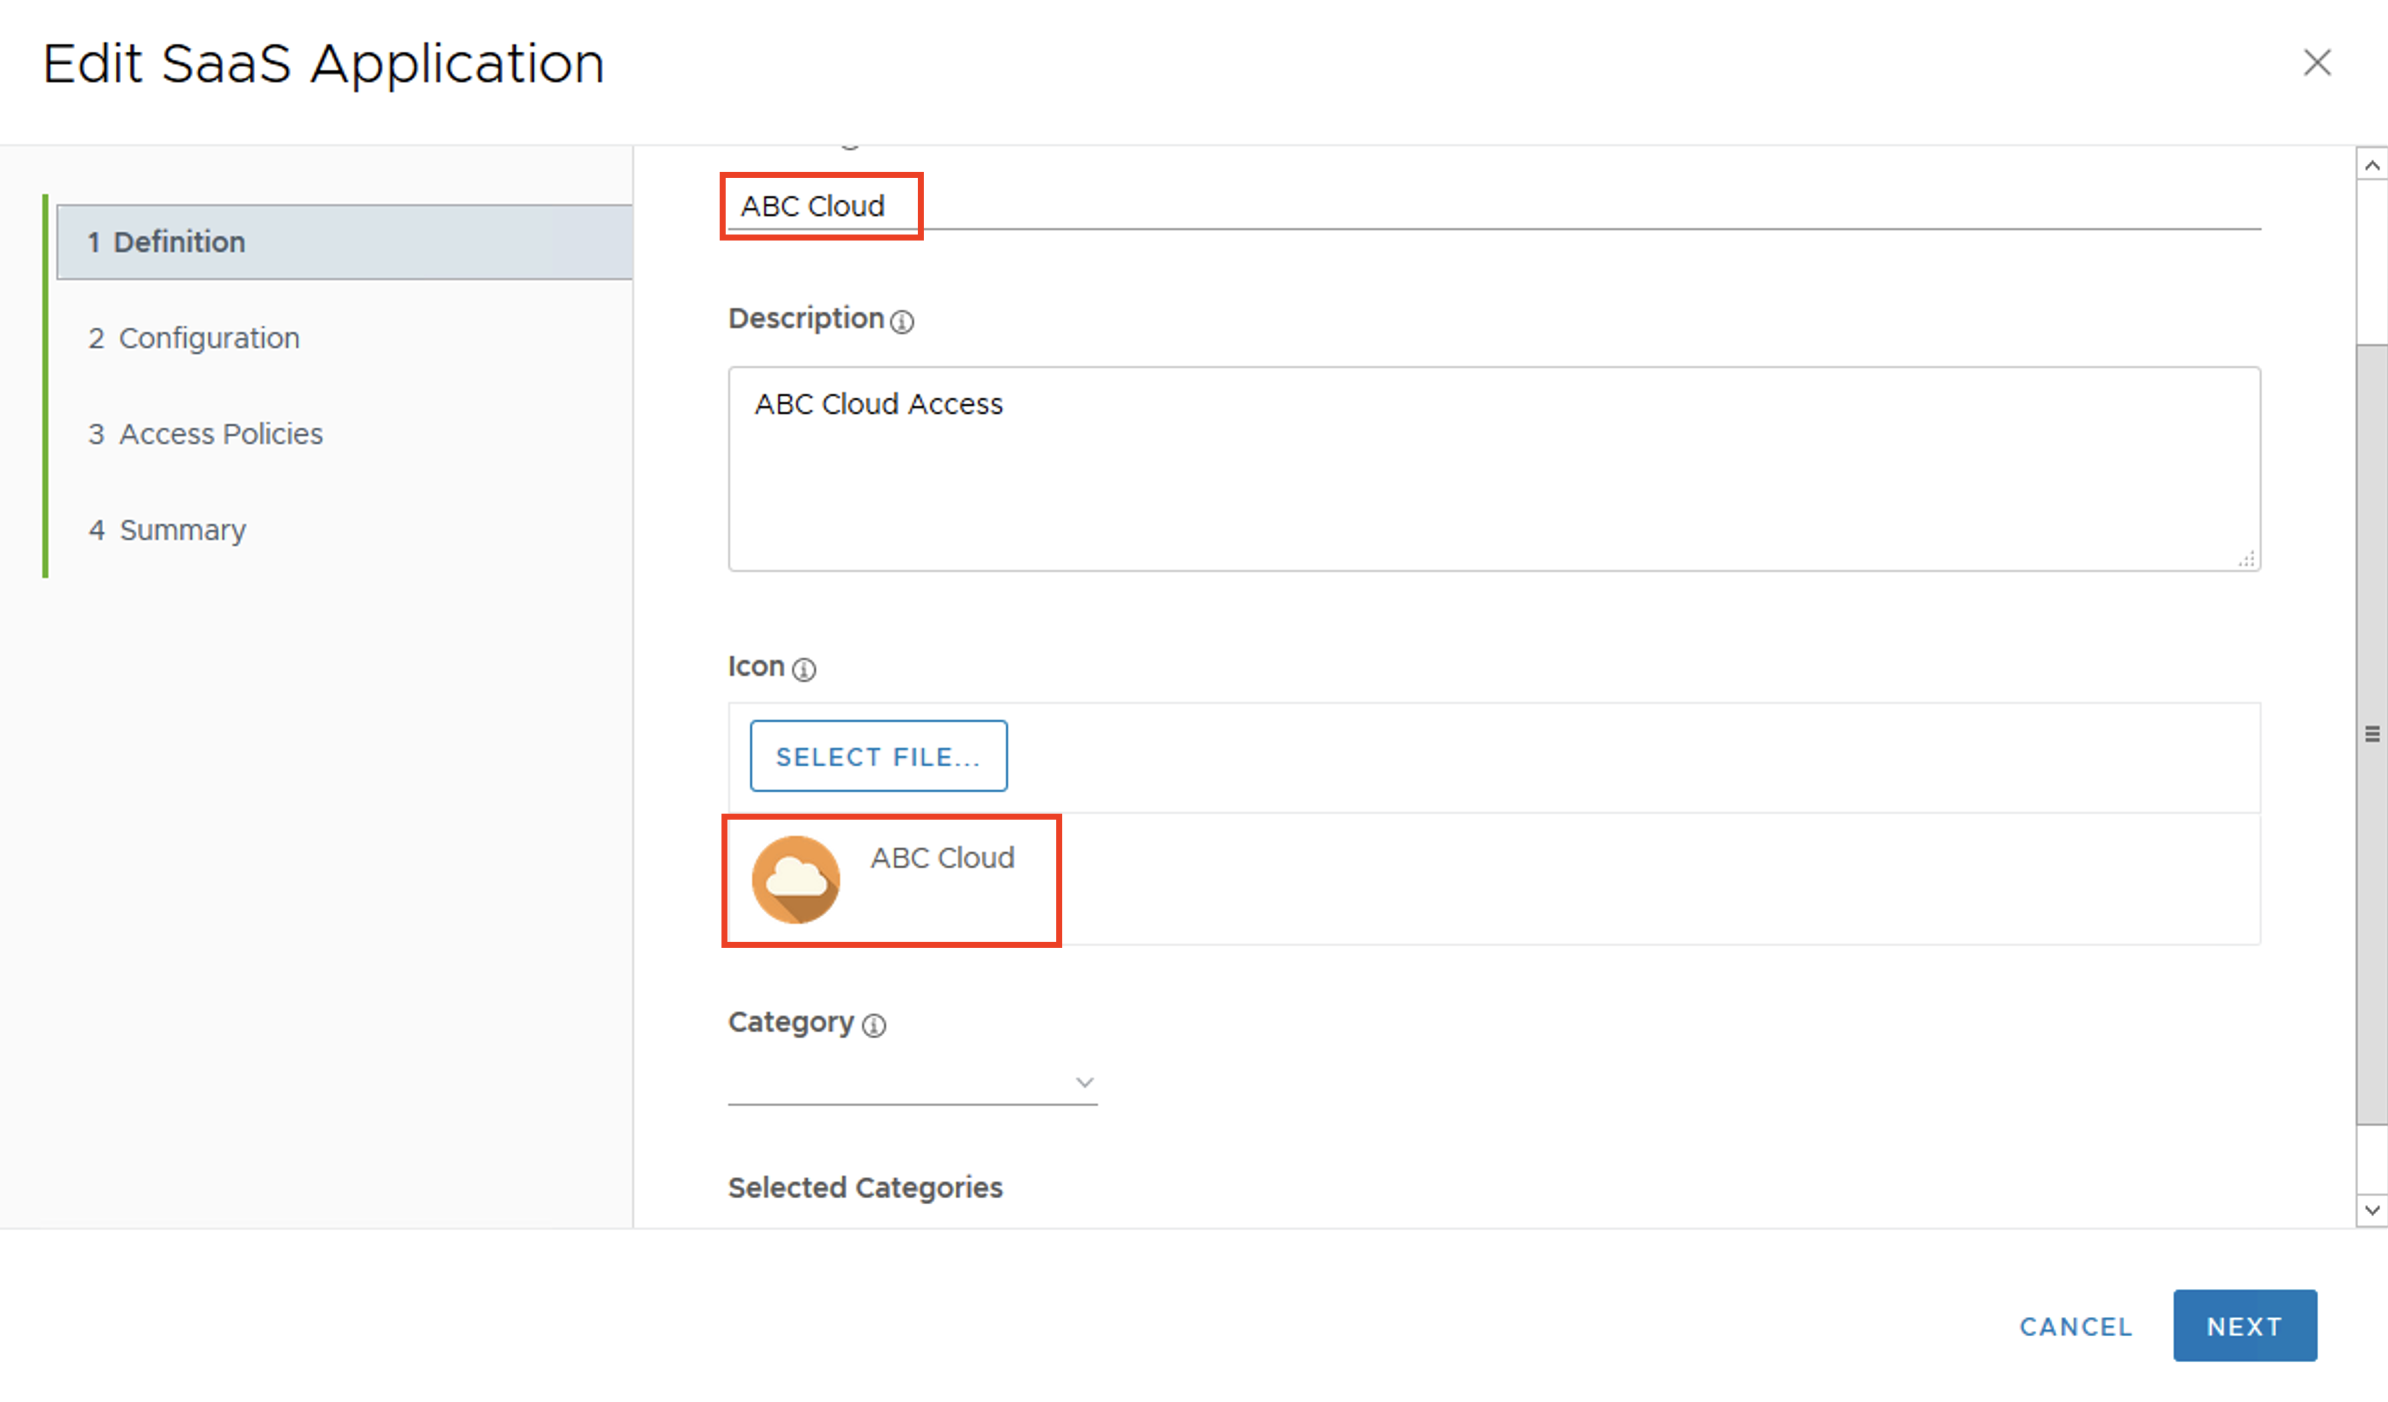
- Write application name, description and upload nice icon and choose category.
- In the next screen keep Authentication Type SAML 2.0 and paste the xml metadata downloaded in step #1 into the URL/XML window. Scroll down to Advanced Properties.
- In Advanced Properties we will keep the defaults but add Custom Attribute Mappings which describe how VIDM user attributes will translate to VCD user attributes. Here is the list:
- Now we can finish the wizard by clicking next, select access policy (keep default) and reviewing the Summary on the next screen.
- Next we need to retrieve metadata configuration of VIDM – this is by going back to Catalog and clicking on Settings. From SAML Metadata download Identity Provider (IdP) metadata.
- Now we can finalize SAML configuration in vCloud Director. on Federation page Toggle Use SAML Identity Provider button to enable it and import the downloaded metadata (idp.xml) with Browse and Upload buttons and click Apply.
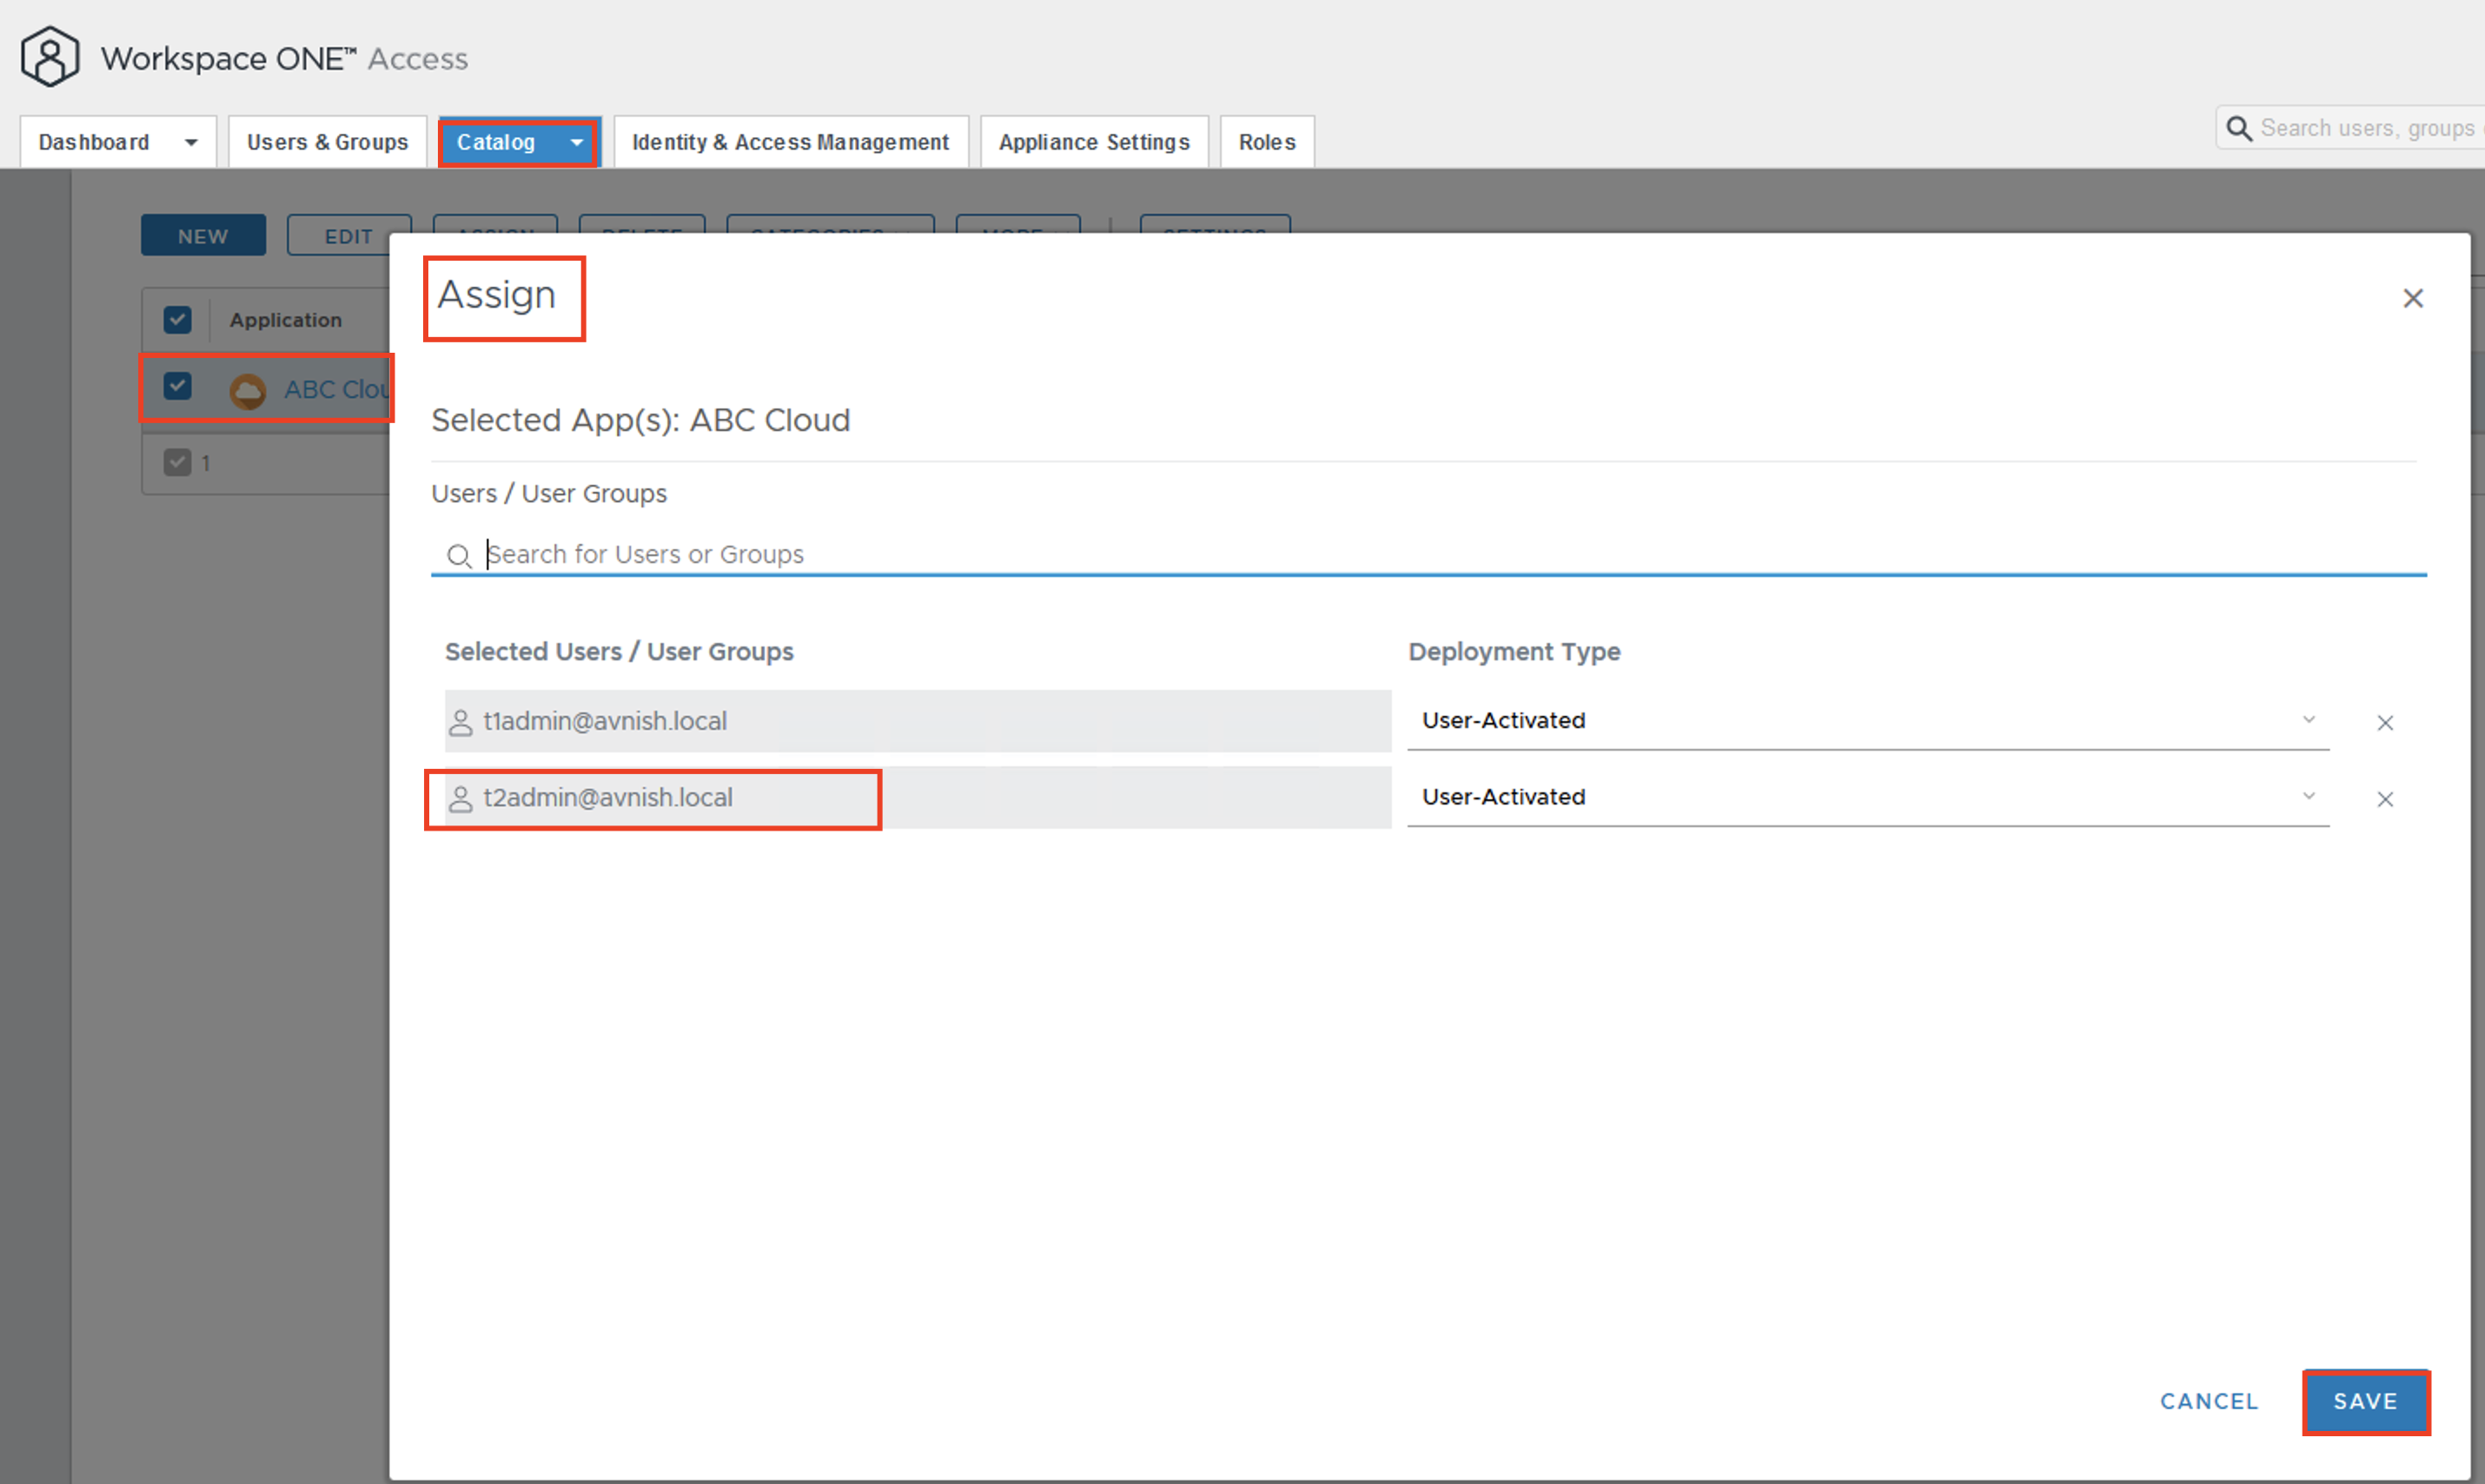
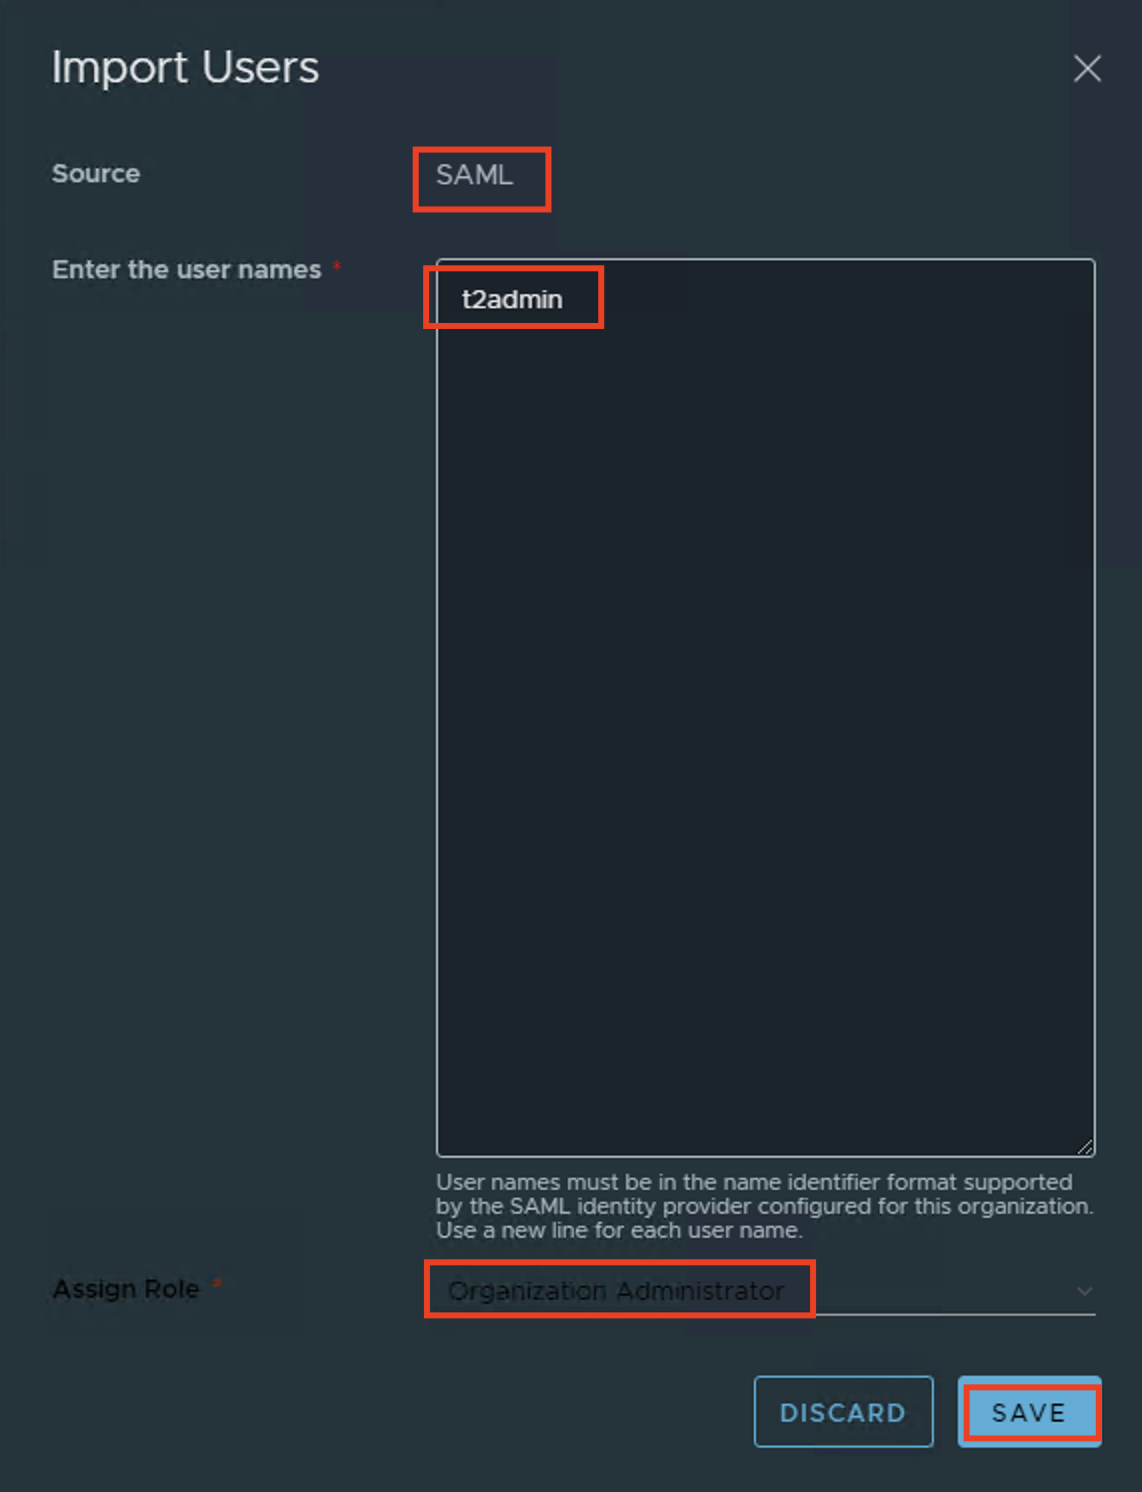
- we first need to import some users/groups to be able to use SAML. You can import VMware Workspace ONE Access(VIDM) users by their user name or group. We can also assign role to the imported user.


This completes the federation process between VMware Workspace ONE Access (VIDM) and VMware Cloud Director. For More details you can refer This Blog Post.
Result – Cloud Director Two Factor Authentication in Action
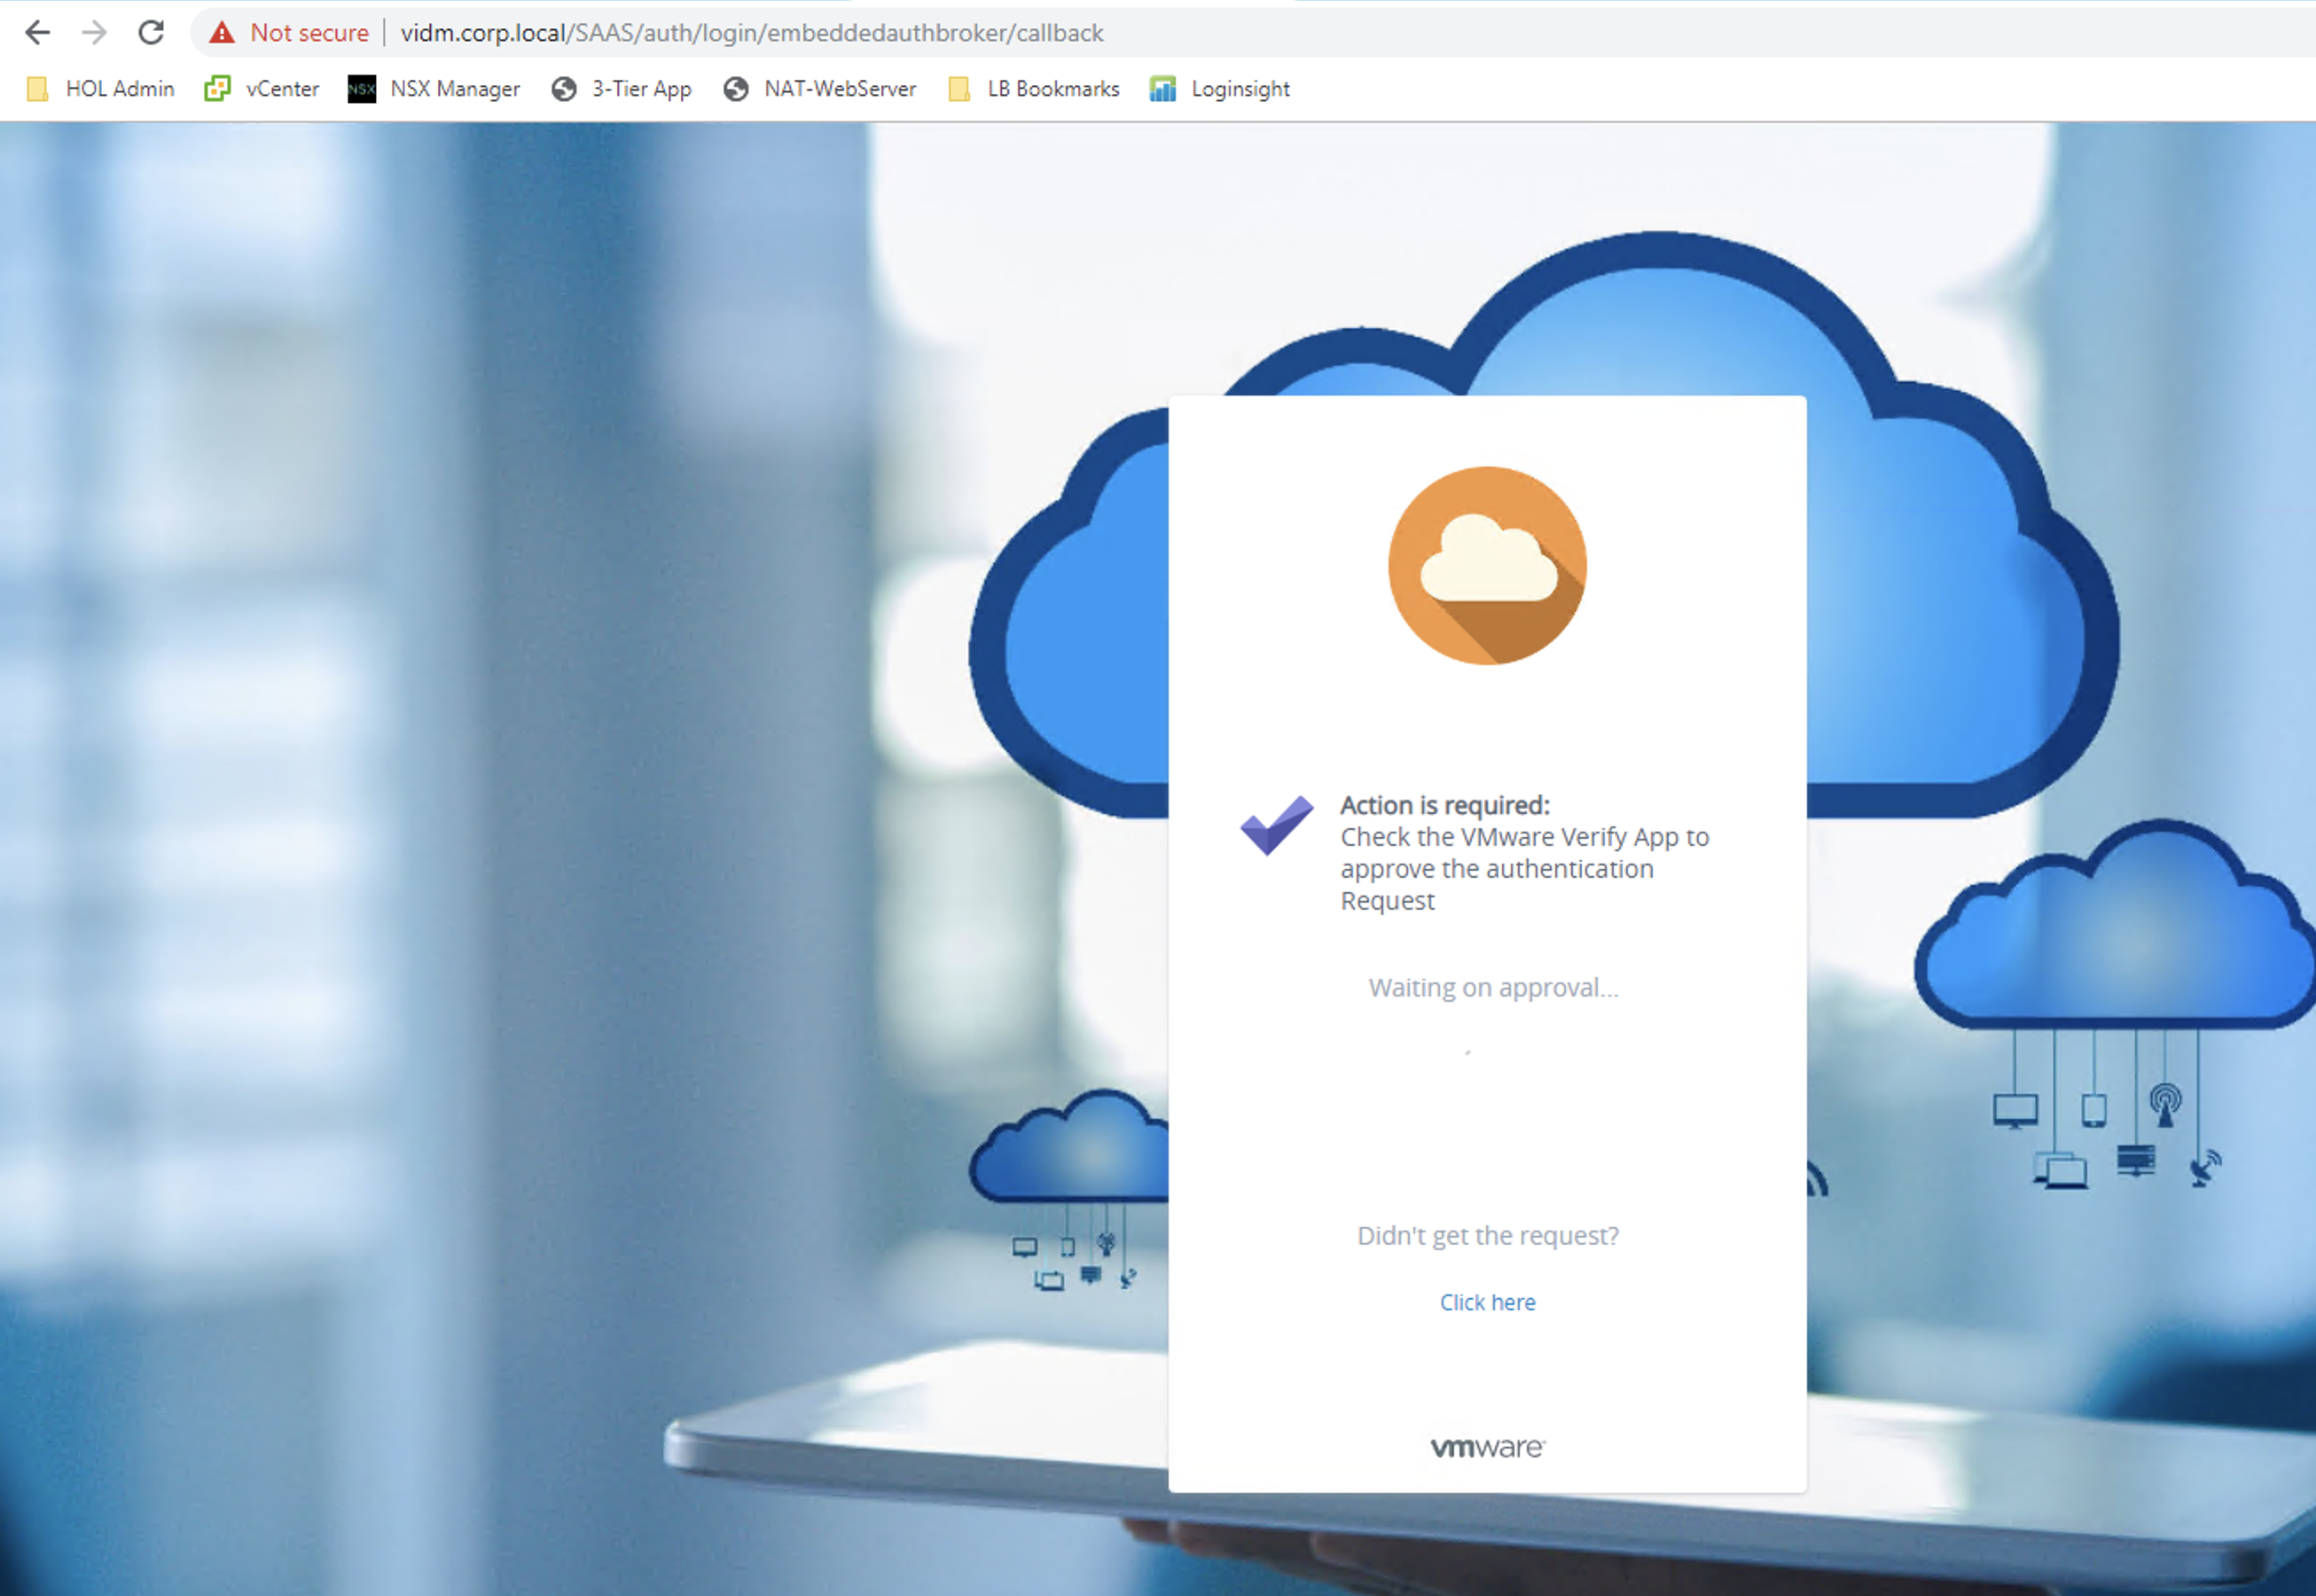
Lets your tenant go to browser and browse their tenant URL, they will get atomically redirected to VMware Workspace ONE Access page for authentication:
- User enters user name and password and if user get successfully authenticated , if moves to 2FA
- on the next step, user gets a notification on thier mobile phones
- Once user approves the authentication on the phone , VMware Workspace ONE Access allows access to user based on the role given on VMware Cloud Director.


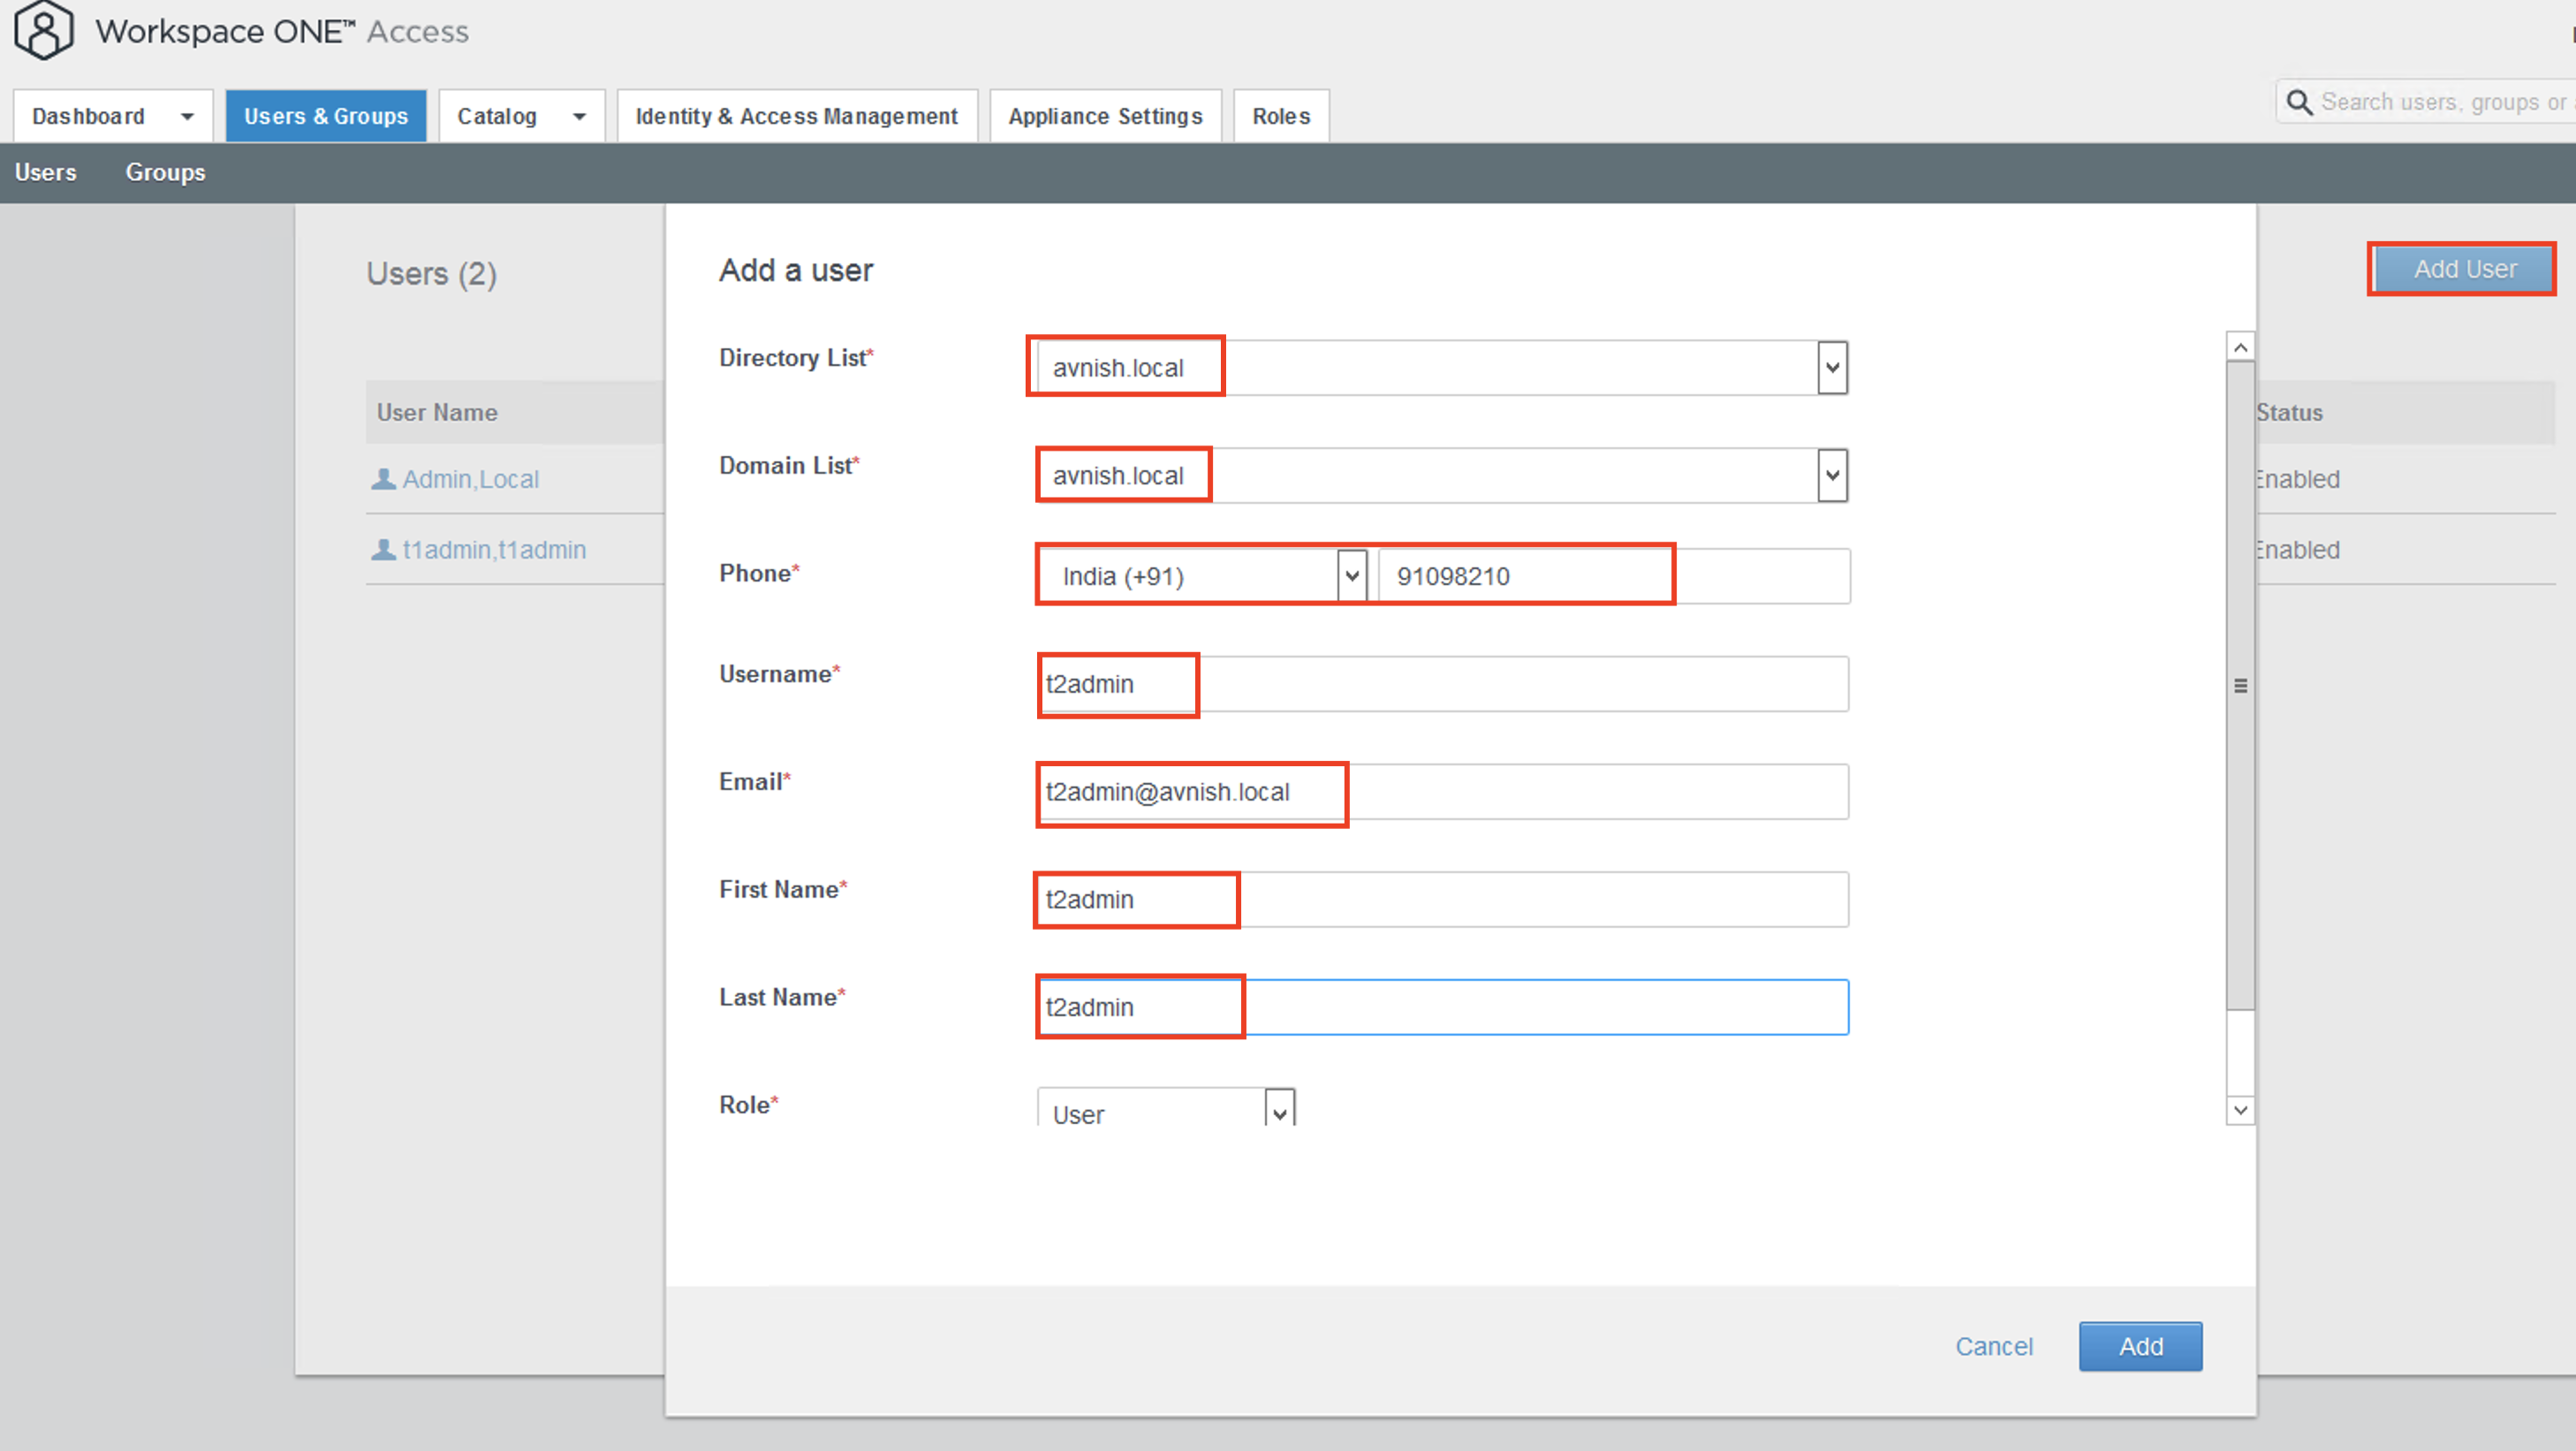
On-Board a New User
- Create a new User in VMware Workspace and also add him to application access.
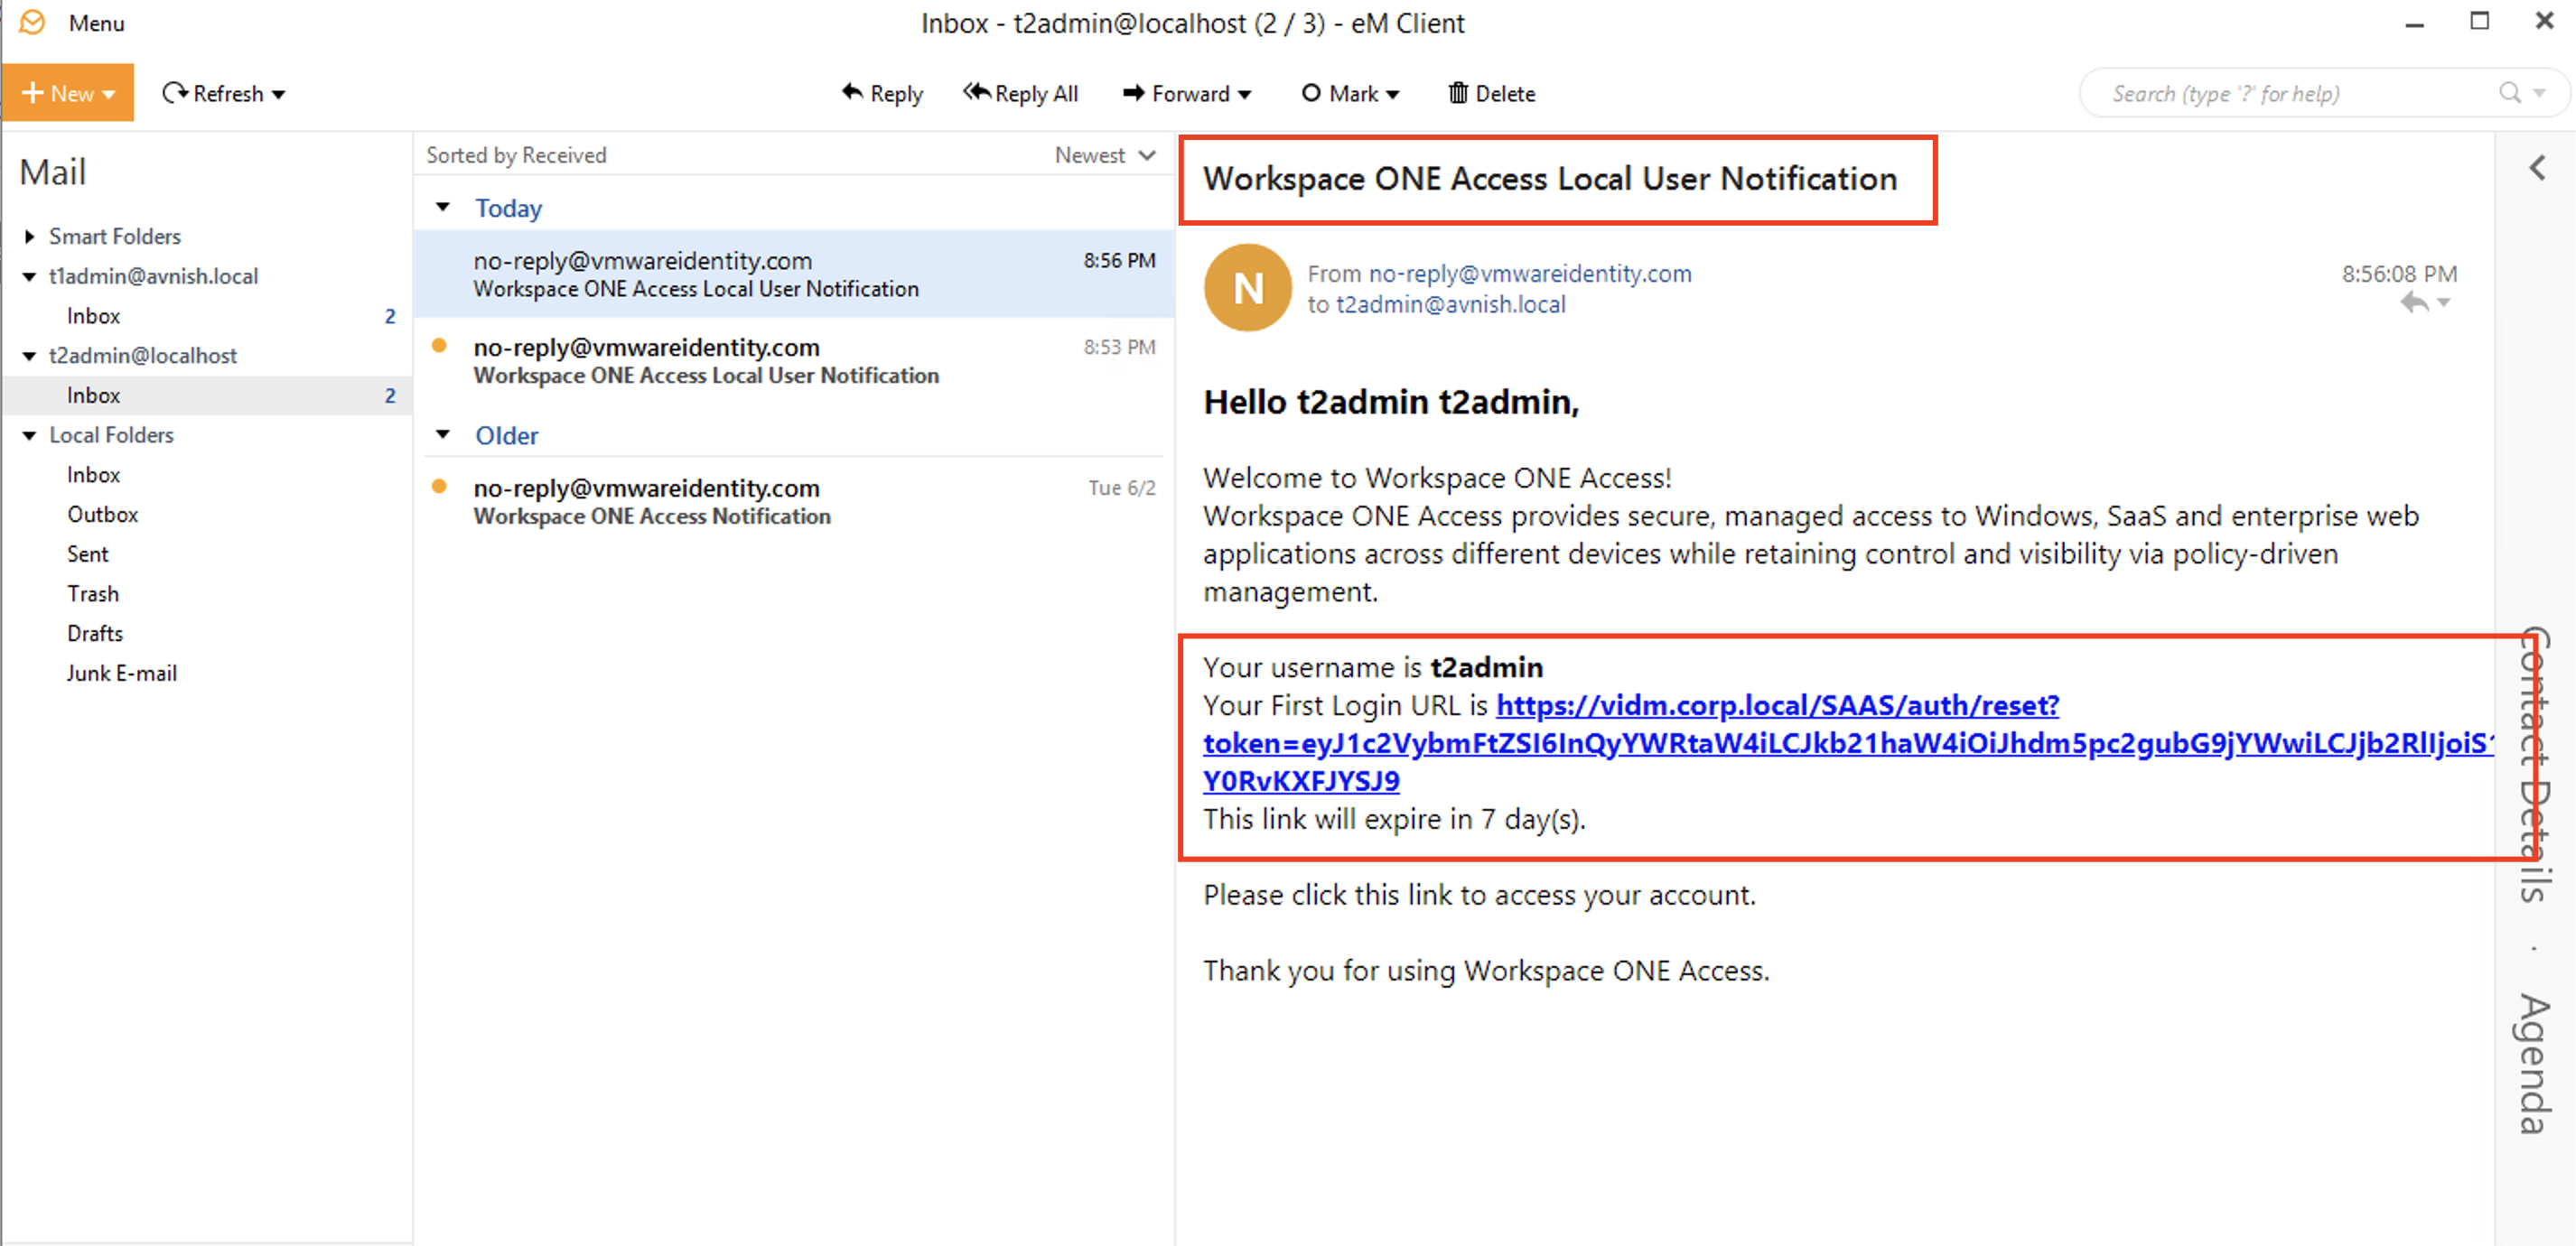
- User gets an email to setup his/her password, user must configure his/her password.
- Administrator login to Cloud Director and Import newly created user from SAML with a Cloud Director role
- User browses cloud URL and after user logs in to portal with user id and password, he/she asked to provide mobile number for second factor authentication.
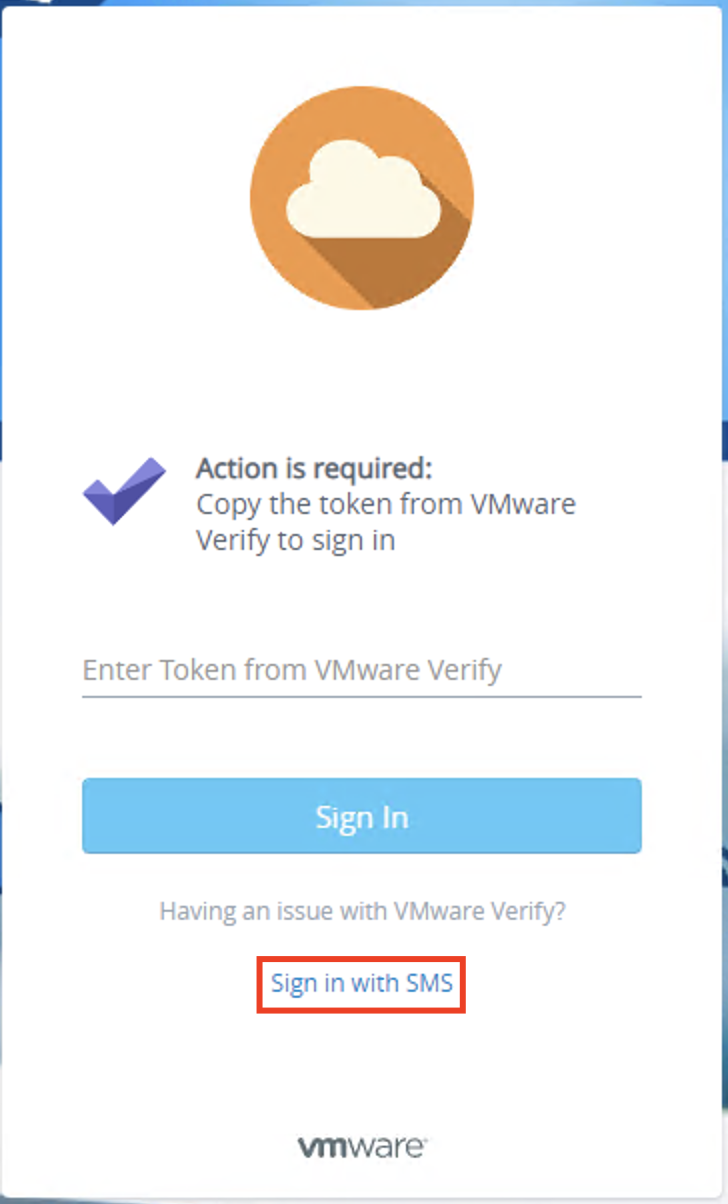
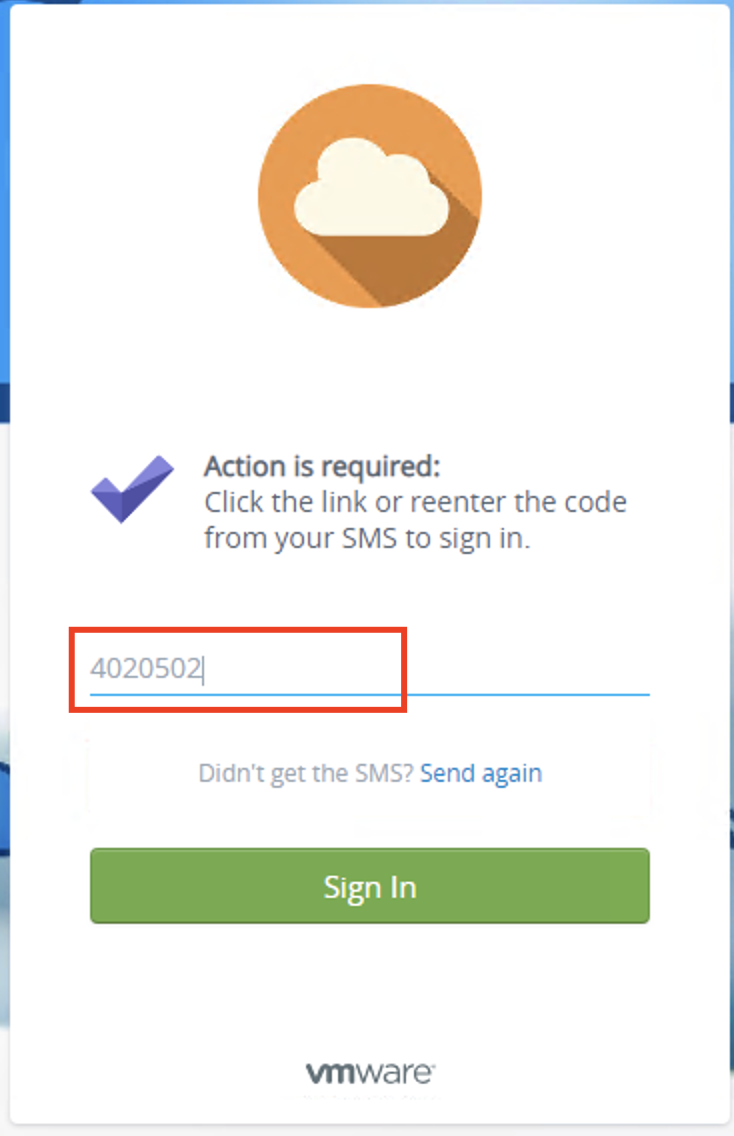
- After entering mobile number , if user has installed “VMware Verify” app , he/she get notification for Approve/Deny or if app has not been installed , click on “Sign in with SMS” , user will receive an SMS , enter that SMS for second factor authentication.
- Once user enters the passcode received on his/her cell phone, VMware Workspace One Access allow user to login to cloud director.


This completes the installation and configuration of VMware Verify with VMware Cloud Director. you can add additional things like branding of your cloud etc.. which will give this your cloud identity.
