
NSX Advance Load Balancer’s (AVI) Intent-based Software Load Balancer provides scalable application delivery across any infrastructure. AVI provides 100% software load balancing to ensure a fast, scalable and secure application experience. It delivers elasticity and intelligence across any environments. It scales from 0 to 1 million SSL transactions per second in minutes. It achieves 90% faster provisioning and 50% lower TCO than traditional appliance-based approach.
With the release of Cloud Director 10.2 , NSX ALB is natively integrated with Cloud Director to provider self service Load Balancing as a Service (LBaaS) where providers can release load balancing functionality to tenants and tenants consume load balancing functionality based on their requirement. In this blog post we will cover how to configure LBaaS.
Here is High Level workflow:
- Deploy NSX ALB Controller Cluster
- Configure NSX-T Cloud
- Discover NSX-T Inventory,Logical Segments, NSGroups (ALB does it automatically)
- Discover vCenter Inventory,Hosts, Clusters, Switches (ALB does it automatically)
- Upload SE OVA to content library (ALB does it automatically, you just need to specify name of content library)
- Register NSX ALB Controller, NSX-T Cloud and Service Engines to Cloud Director and Publish to tenants (Provider Controlled Configuration)
- Create Virtual Service,Pools and other settings (Tenant Self Service)
- Create/Delete SE VMs & connect to tenant network (ALB/VCD Automatically)
Deploy NSX ALB (AVI) Controller Cluster
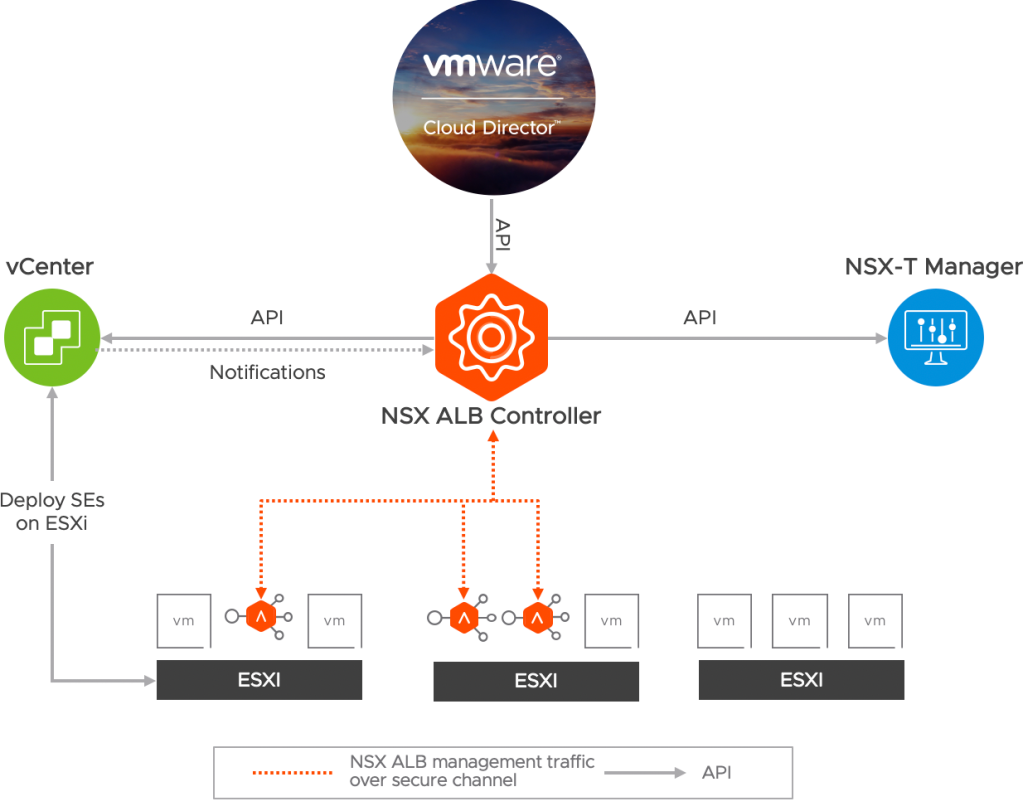
The NSX ALB (AVI) Controller provides a single point of control and management for the cloud. The AVI Controller runs on a VM and can be managed using its web interface, CLI, or REST API but in this case Cloud Director.The AVI Controller stores and manages all policies related to services and management. To ensure AVI controllers High Availability we need to deploy 3 AVI Controller nodes to create a 3-node AVI Controller cluster.
Deployment Process is documented Here & Cluster creation Process is Here
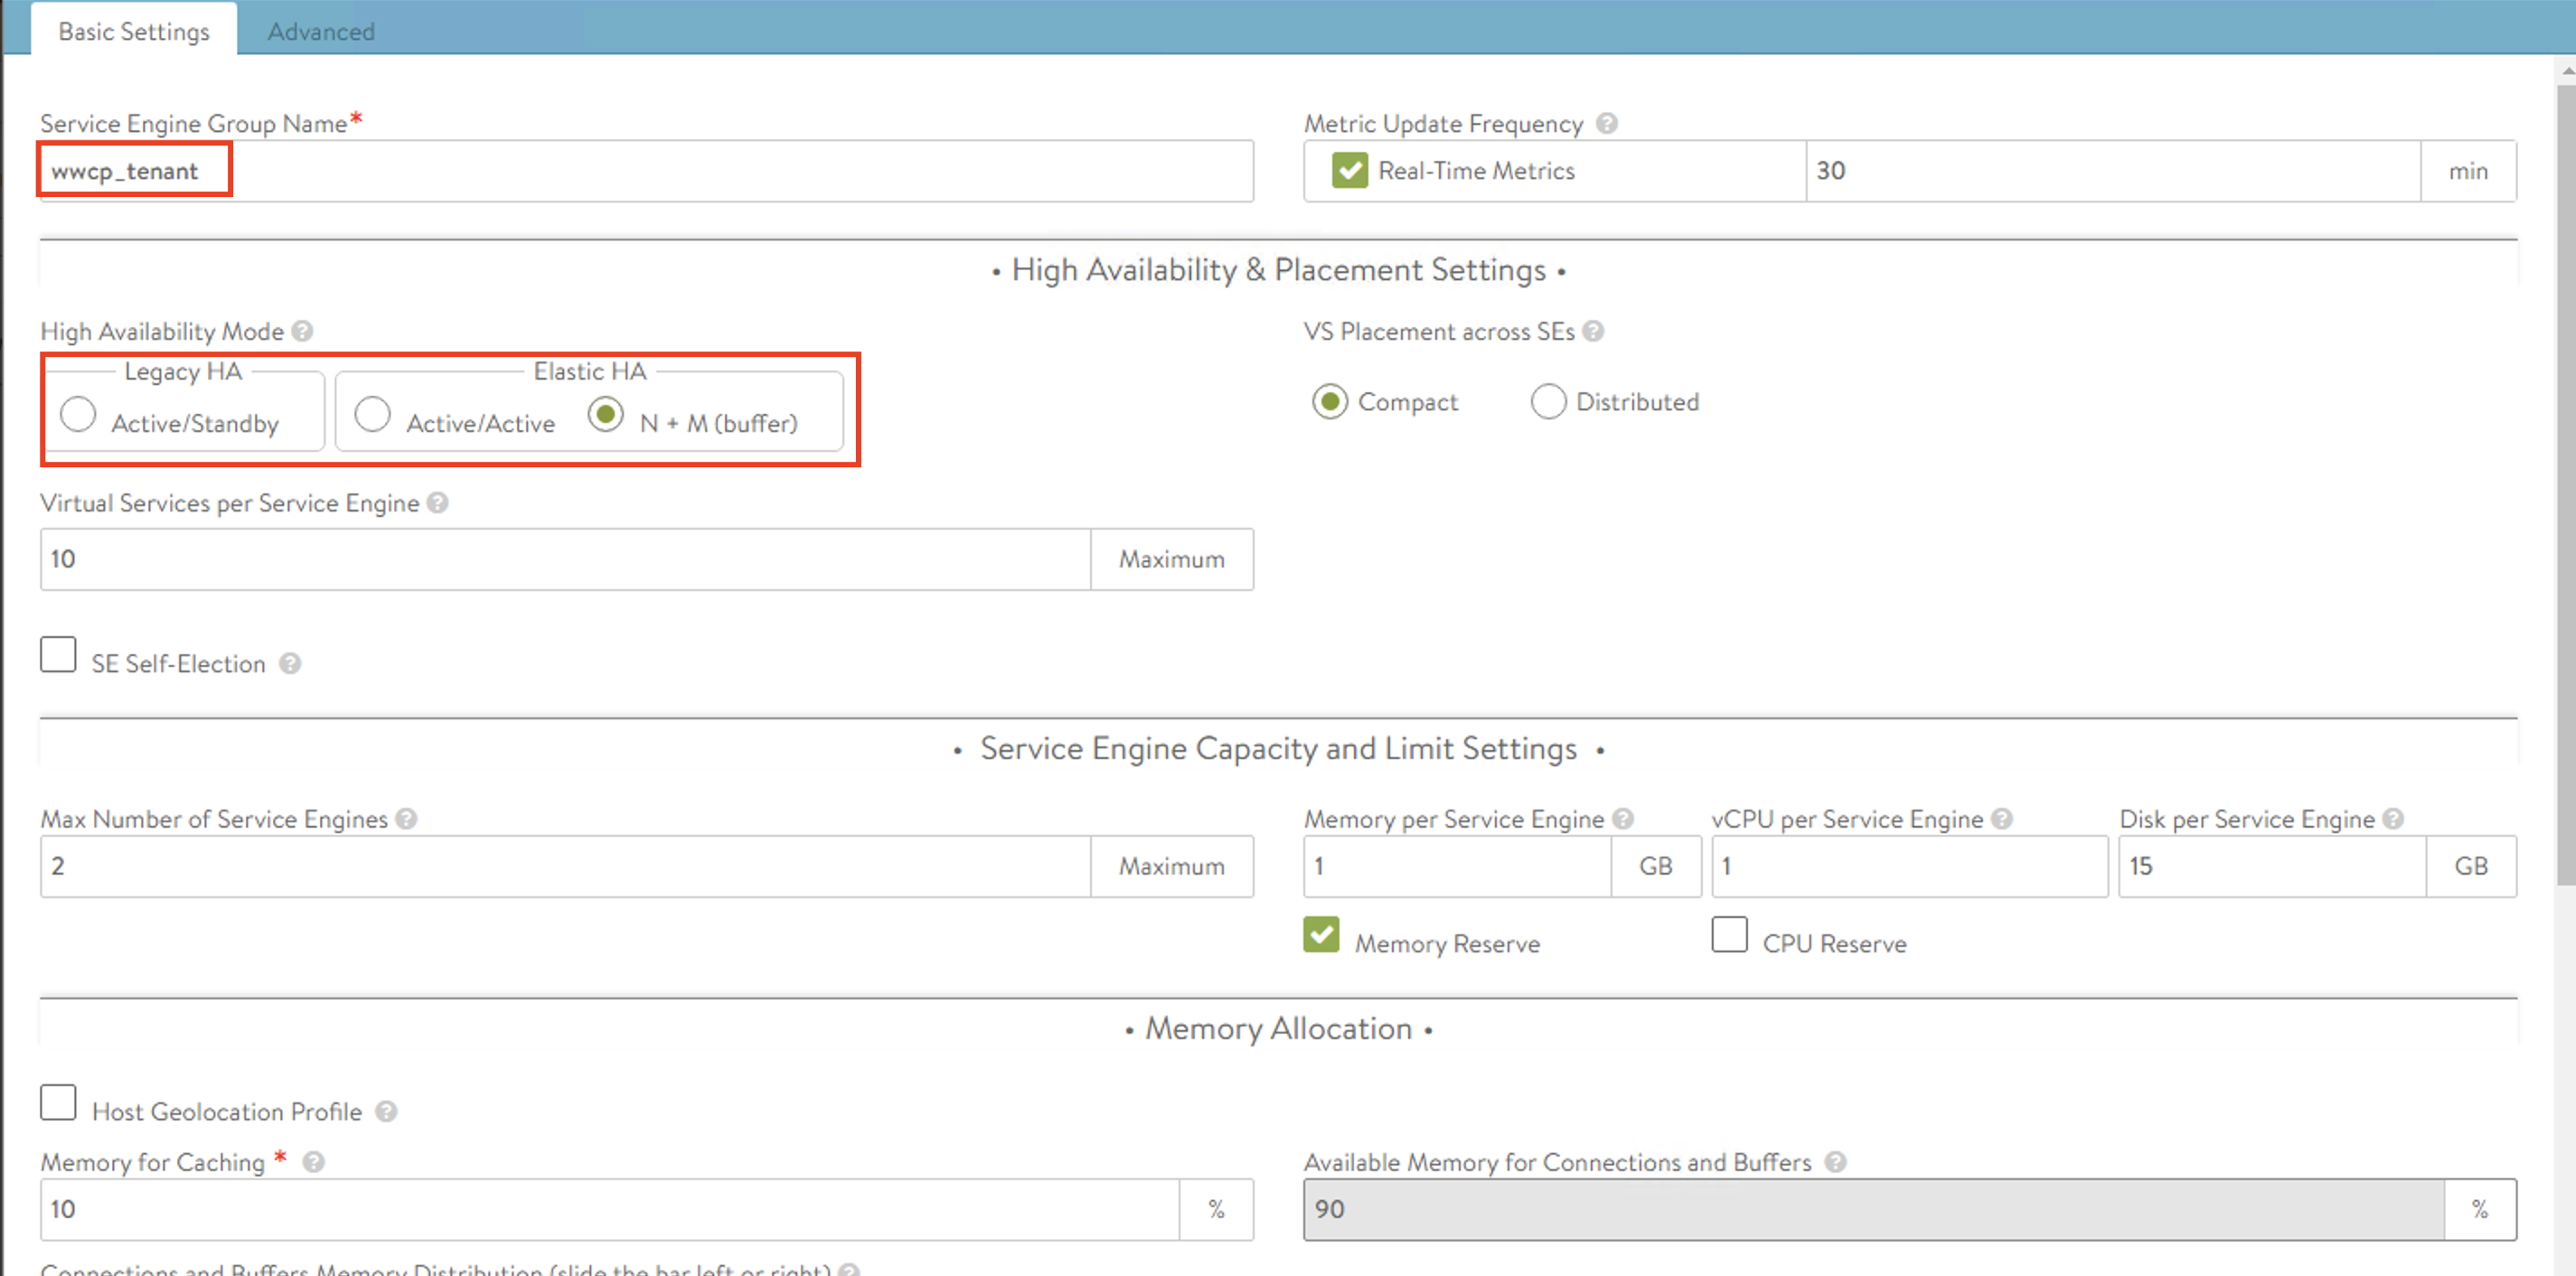
Create NSX-T Cloud inside NSX ALB (AVI) Controller
NSX ALB (AVI) Controller which uses APIs to interface with the NSX-T manager and vCenter to discover the infrastructure.here is high level activities to configure NSX-T Cloud in NSX ALB management console:
- Configure NSX-T manager IP/URL (One per Cloud)
- Provide admin credentials
- Select Transport zone (One to One Mapping – One TZ per Cloud)
- Select Logical Segment to use as SE Management Network
- Configure vCenter server IP/URL (One per Cloud)
- Provide Login username and password
- Select Content Library to push SE OVA into Content Library
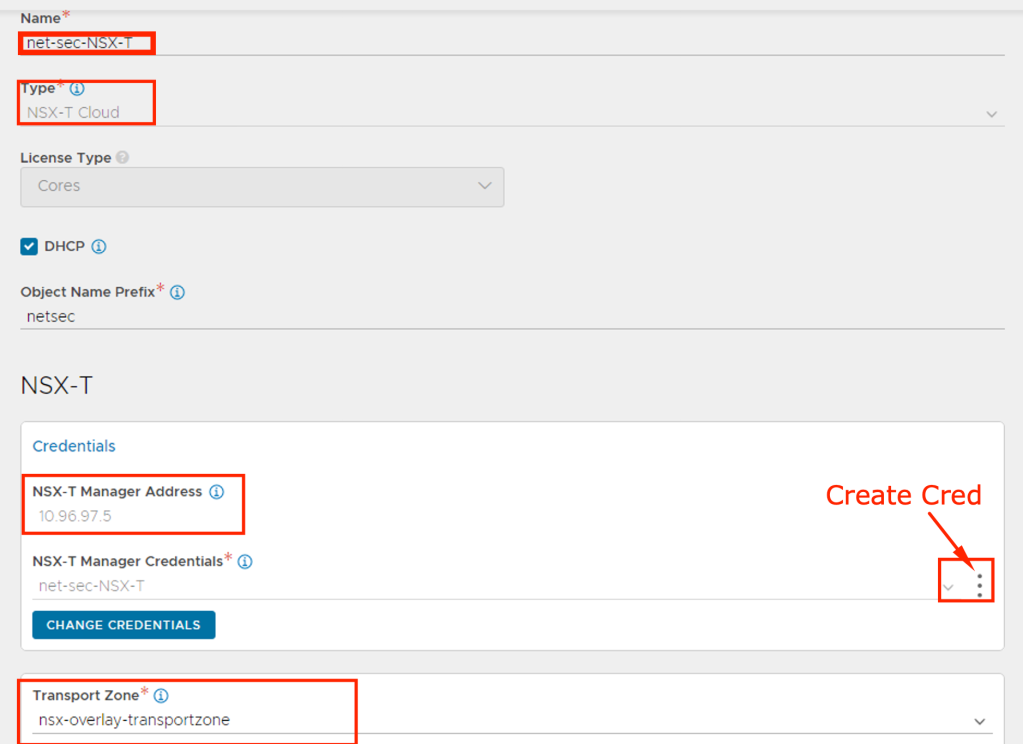


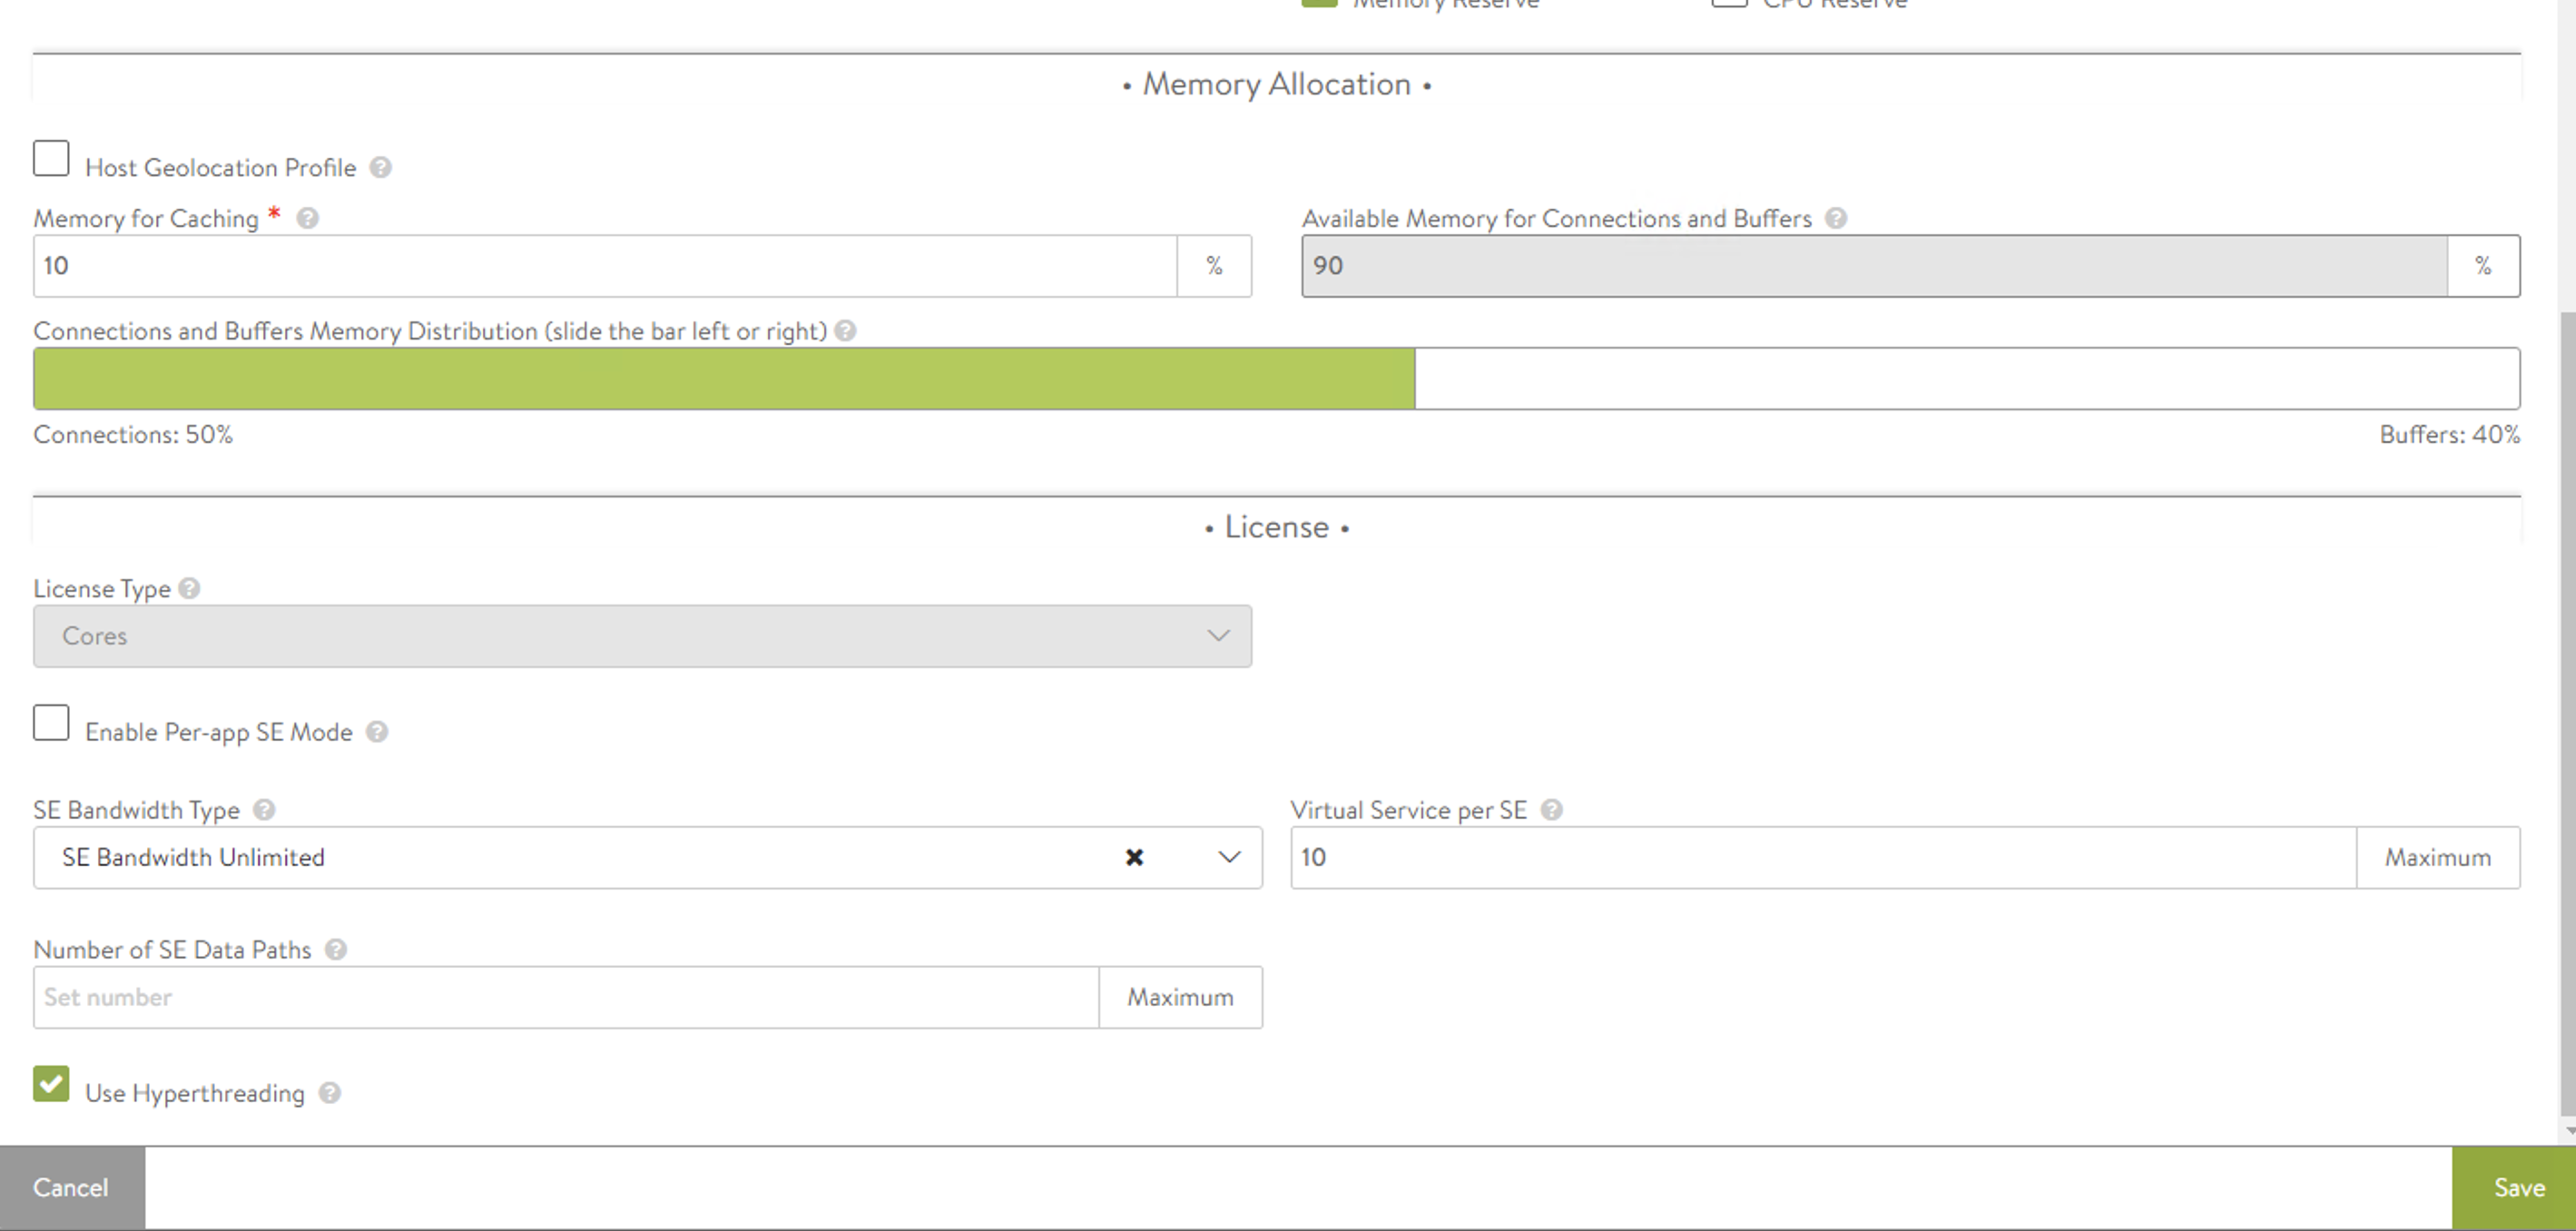
Service Engine Groups & Configuration
Service Engines are created within a group, which contains the definition of how the SEs should be sized, placed, and made highly available. Each cloud will have at least one SE group.
- SE Groups contain sizing, scaling, placement and HA properties
- A new SE will be created from the SE Group properties
- SE Group options will vary based upon the cloud type
- An SE is always a member of the group it was created within in this case NSX-T Cloud
- Each SE group is an isolation domain
- Apps may gracefully migrate, scale, or failover across SEs in the groups
Service Engine High Availability:
Active/Standby
- VS is active on one SE, standby on another
- No VS scaleout support
- Primarily for default gateway / non-SNAT app support
- Fastest failover, but half of SE resources are idle
Elastic N + M
- All SEs are active
- N = number of SEs a new Virtual Service is scaled across
- M = the buffer, or number of failures the group can sustain
- SE failover decision determined at time of failure
- Session replication done after new SE is chosen
- Slower failover, less SE resource requirement
Elastic Active / Active
- All SEs are active
- Virtual Services must be scaled across at least 2 Service engines
- Session info proactively replicated to other scaled service engines
- Faster failover, require more SE resources

Cloud Director Configuration
Cloud Director Configuration is two fold, Provider Config and Tenant Config, lets first cover provider Config…
Provider Configuration
Register AVI Controller: Provider administrator login as a admin and register AVI Controller with Cloud Director. provider has option to add multiple AVI controllers.
NOTE – incase if you are registering with NSX ALB’s default self sign certificate and if it throws error while registering , then regenerate self sign certificate in NSX ALB.
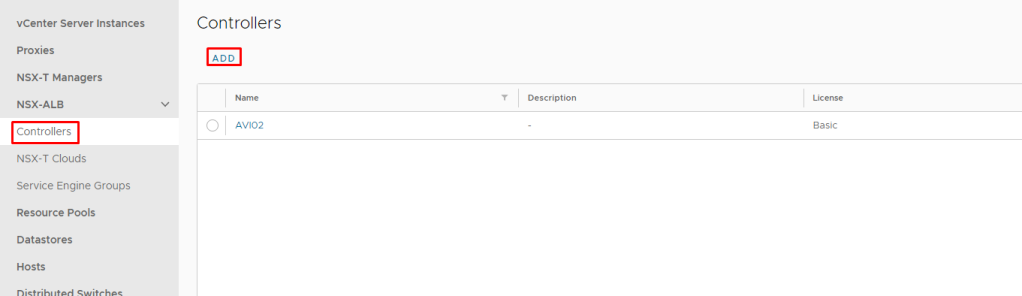
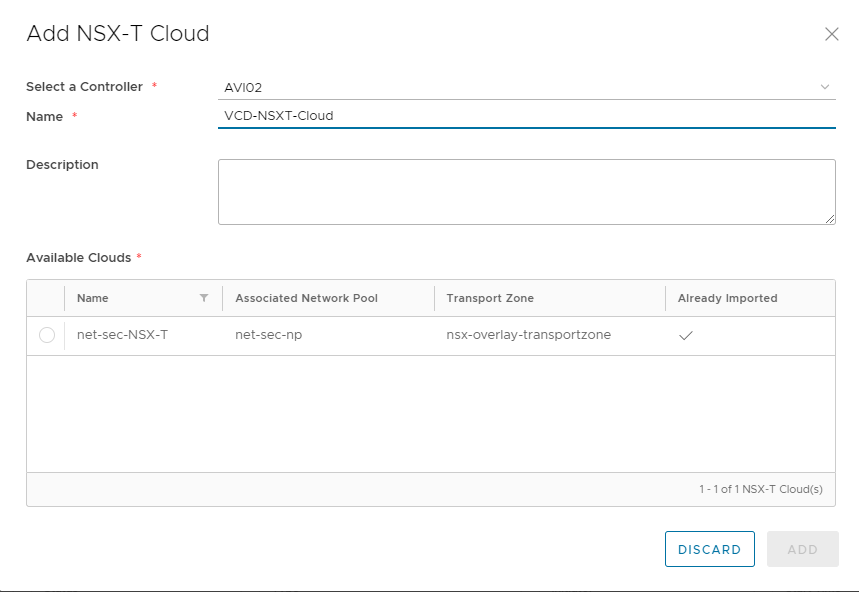
Register NSX-T cloud
Now next thing is we need to register NSX-T cloud with Cloud Director, which we had configured in ALB controller:
- Selecting one of the registered AVI Controller
- Provide a meaning full name to the controller
- Select the NSX-T cloud which we had registered in AVI
- Click on ADD.
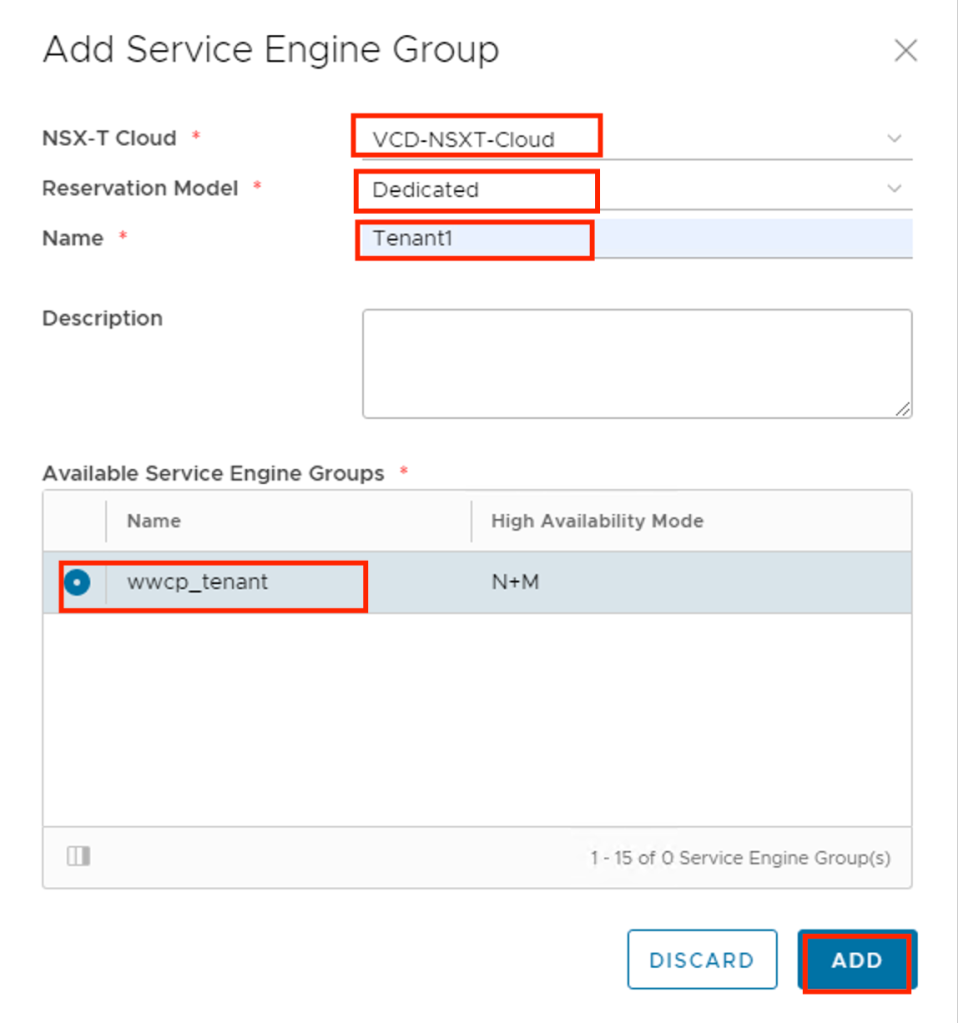
Assign Service Engine groups
Now register service engine groups either “Dedicated” or “Reserved” based on tenant requirement or provider can have both type of groups and assign to tenant based on requirements.
- Select NSX-T Cloud which we had registered above
- Select the “Reservation Model”
- Dedicated Reservation Model:- For each tenant Organization VDC Edge gateway, AVI will create two Service Engine nodes for each LB enabled Org VDC Edge GW.
- Shared Reservation Model:- Shared is elastic and shared among all tenants. AVI will create pool of service engines that are going to be shared across tenant. Capacity allocation is managed in VCD, Avi elastically deploys and un-deploys service engines based on usage
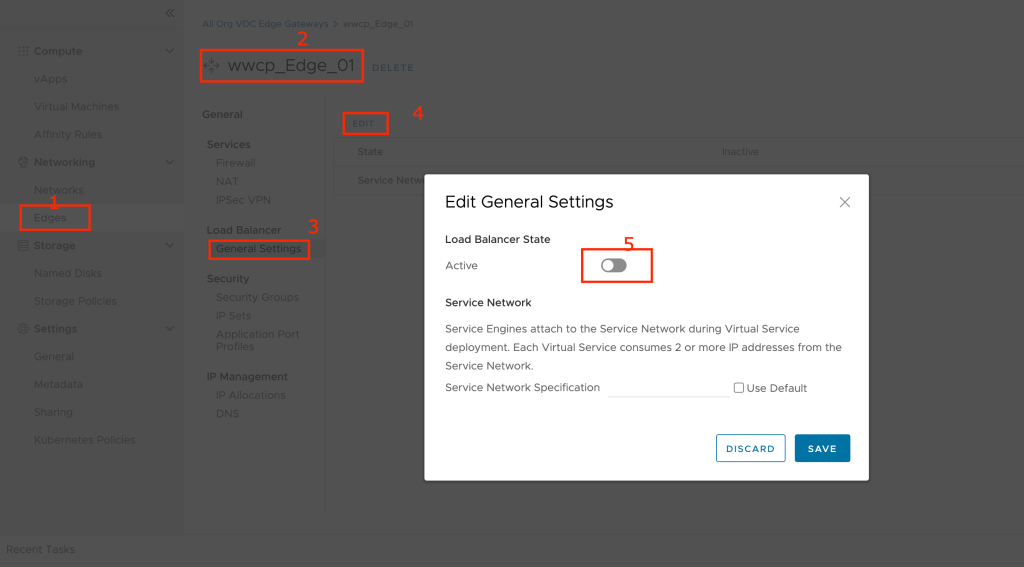
Provider Enables and Allocates resources to Tenant
Provider enables LB functionality in the context of Org VCD Edge by following below steps:
- Click on Edges
- Choose Edge on which he want to enable load balancing
- Go to “Load Balancer” and click on “General Settings”
- Click on “Edit”
- Toggle on to Activate to activate the load balancer
- Select Service Specification
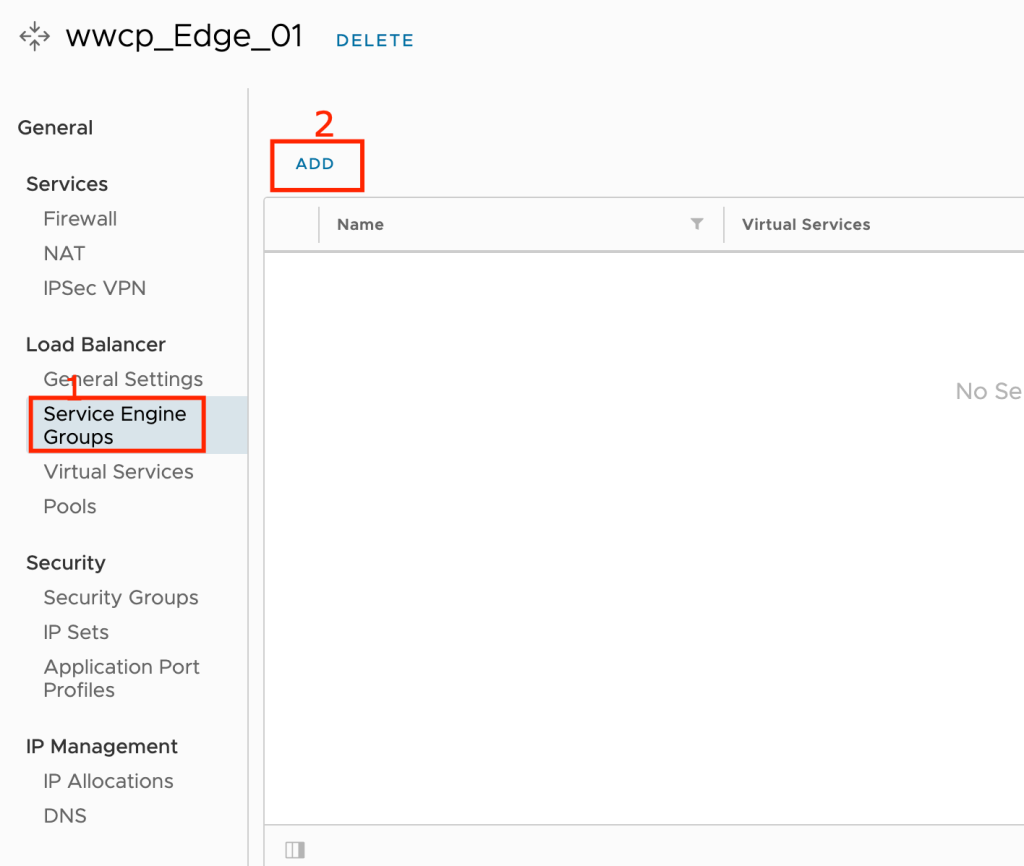
Next step is to assign Service Engines to tenant based on requirement, for that go to Service Engine Group and Click on “ADD” and add one of the SE group which we had registered previously to customer’s one of the Edge.
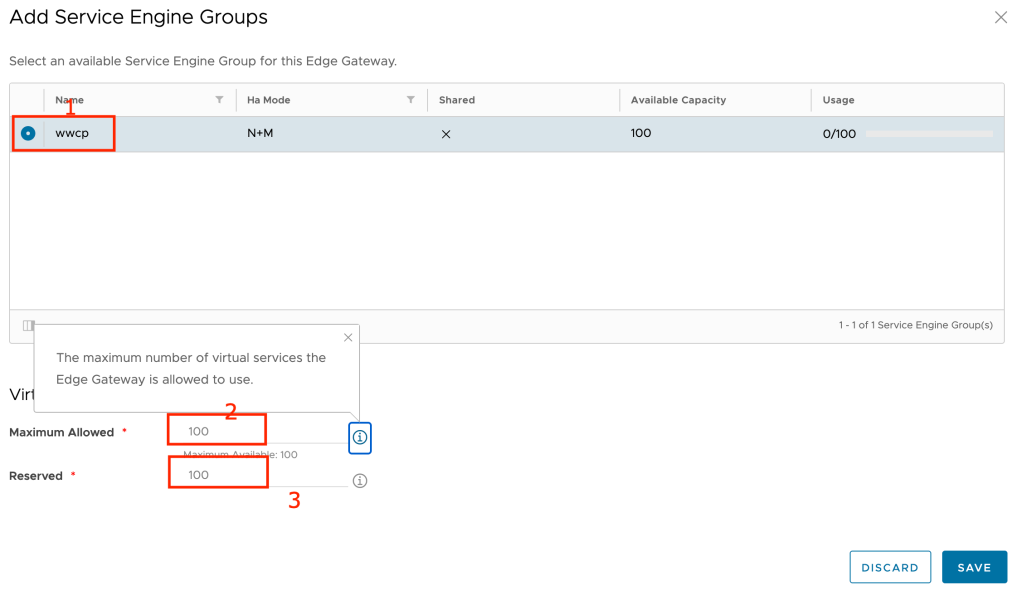
Provider can restrict usage of Service Engines by configuring:
- Maximum Allowed: The maximum number of virtual services the Edge Gateway is allowed to use.
- Reserved: The number of guaranteed virtual services available to the Edge Gateway.
Tenant User Self Service Configuration
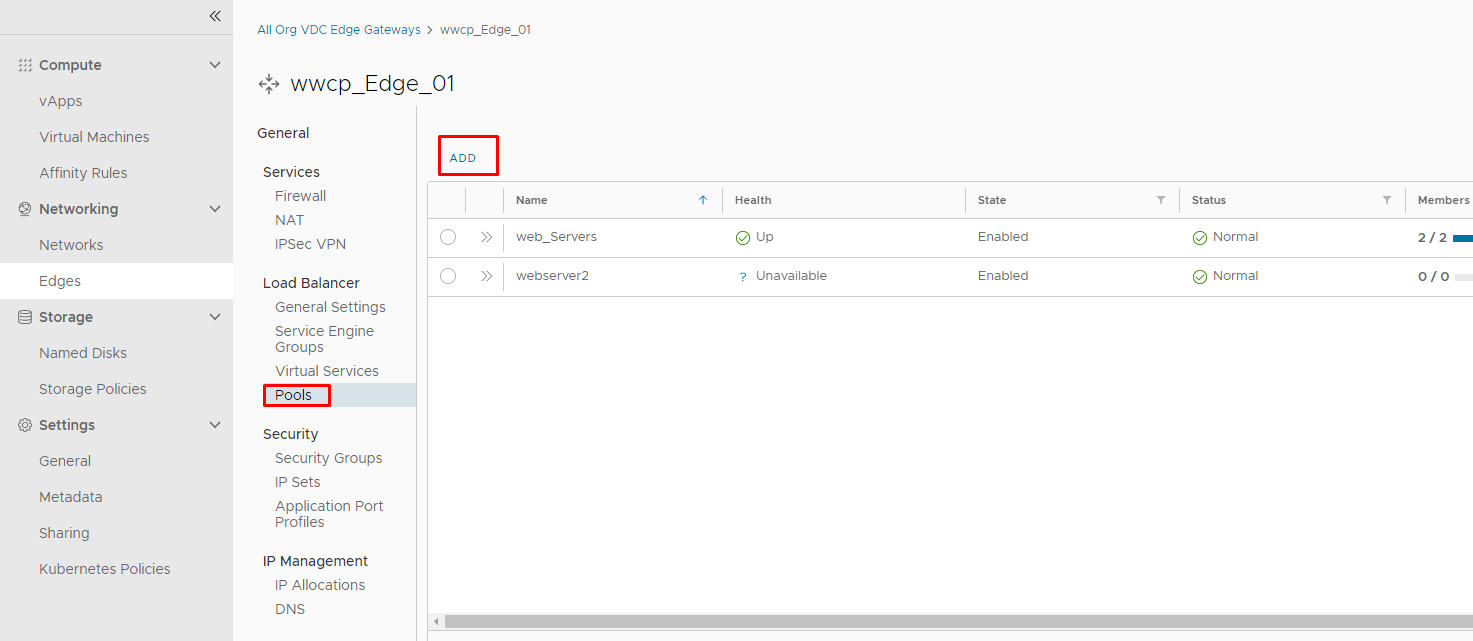
Pools: Pools maintain the list of servers assigned to them and perform health monitoring, load balancing, persistence.
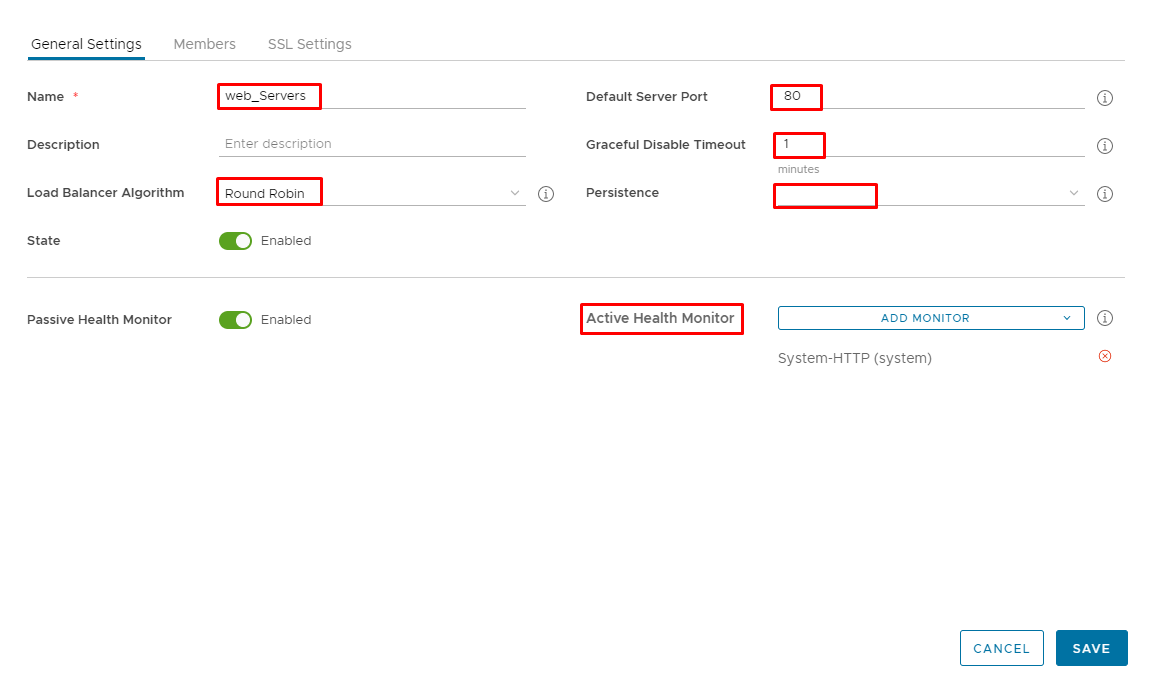
- Inside General Settings some of the key settings are:
- Provide Name of the Pool
- Load Balancing Algorithm
- Default Server Port
- Persistence
- Health Monitor
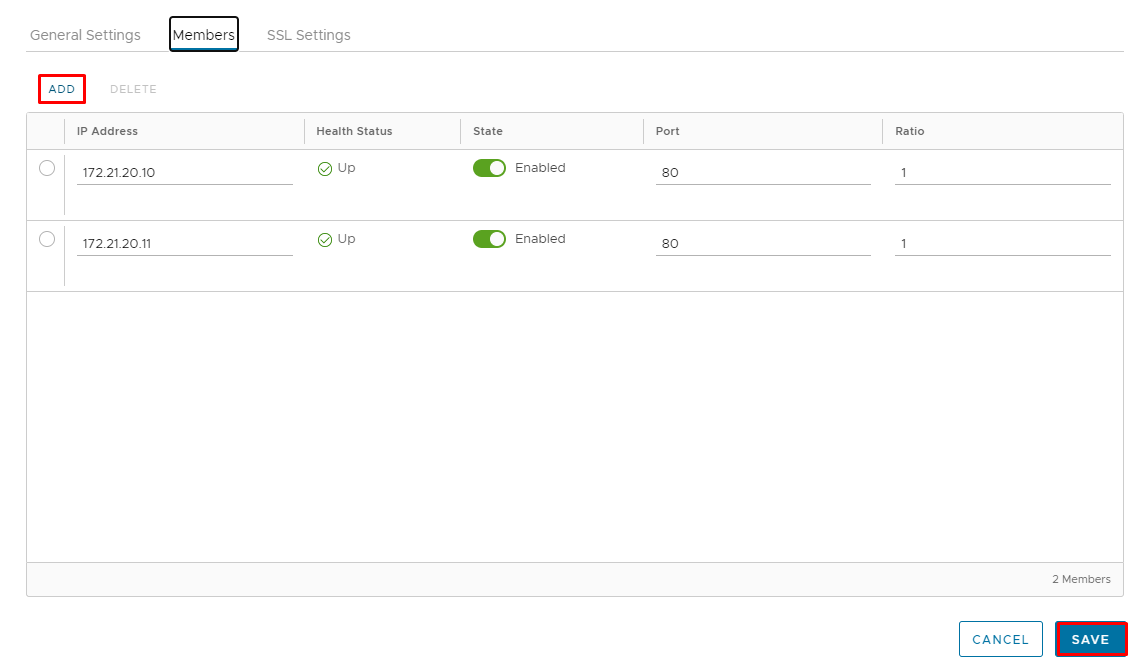
- Inside Members section:
- Add Virtual Machine IP addresses which needs to be load balanced
- Define State, Port and Ratio
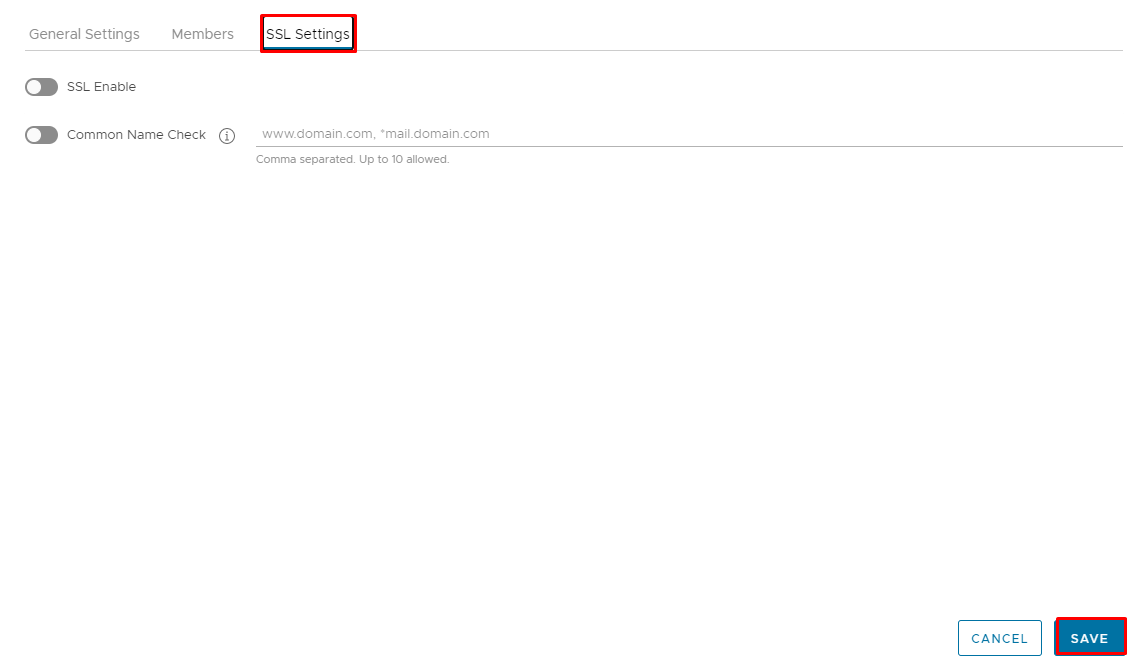
- SSL Settings allow SSL offload and Common Name Check
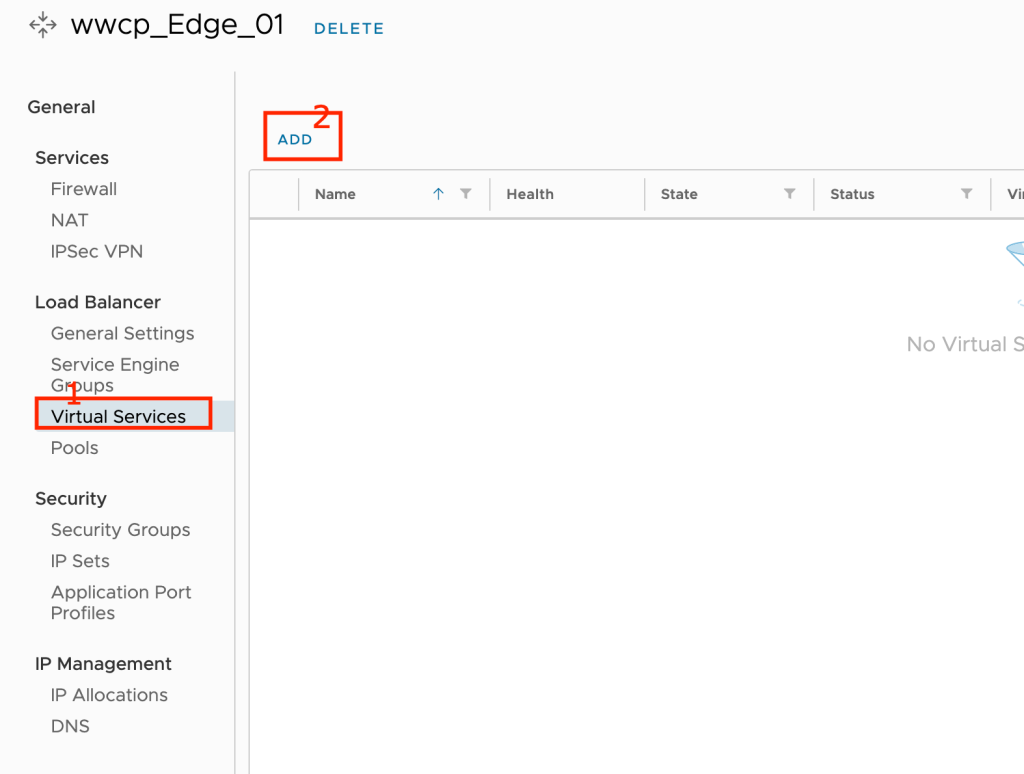
Virtual Services: A virtual service advertises an IP address and ports to the external world and listens for client traffic. When a virtual service receives traffic, it may be configured to:
- Proxy the client’s network connection.
- Perform security, acceleration, load balancing, gather traffic statistics, and other tasks.
- Forward the client’s request data to the destination pool for load balancing.
Tenant choose Service Engine Group which provider has assigned to tenant, then choose Load Balancer Pool which we created in above step and most important Virtual IP This IP address can be from External IP range of the Org VDC or if you want Internal IP , then you can use any IP.
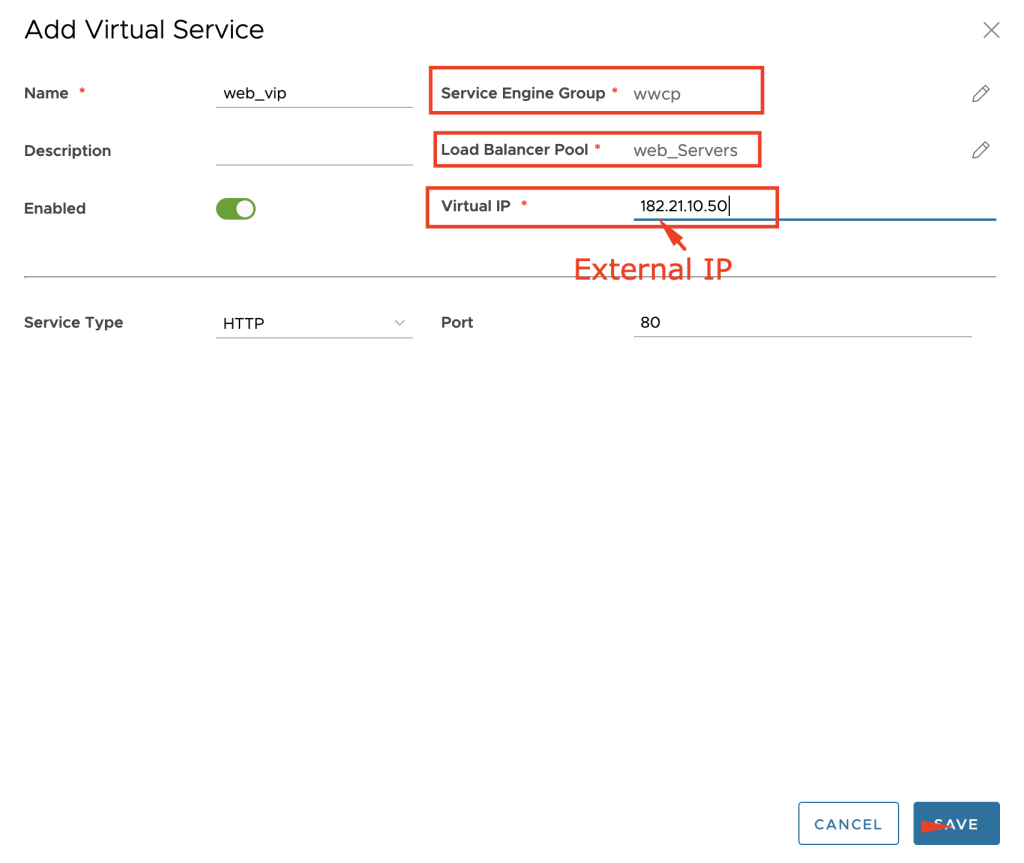
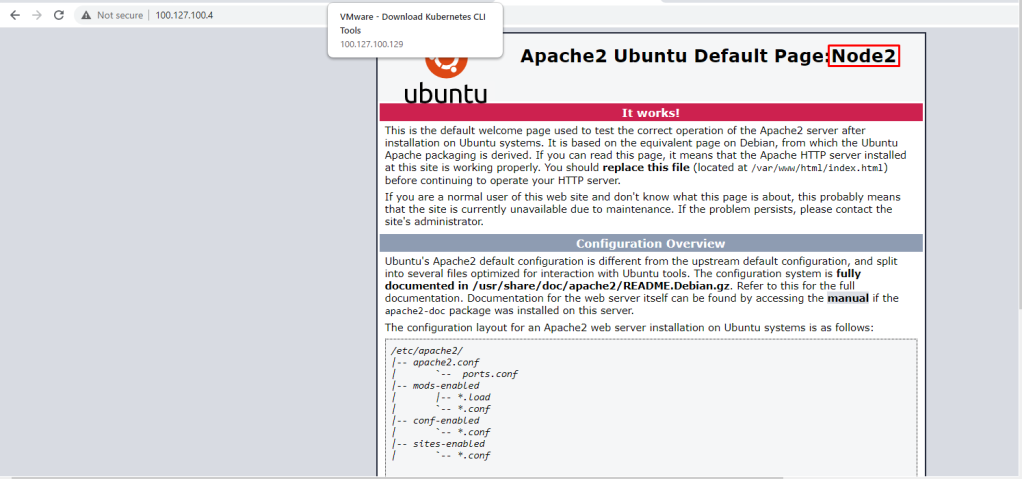
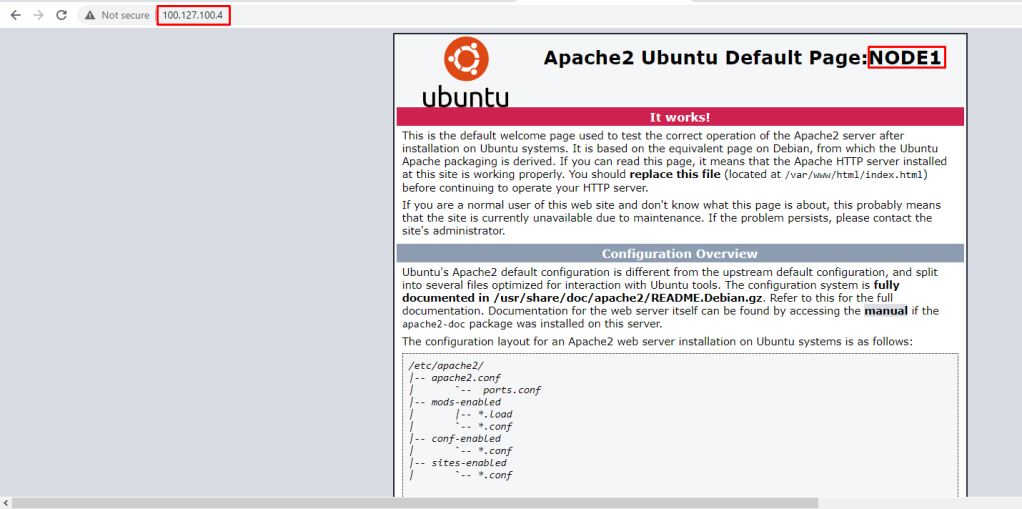
So in my example, i am running two virtual machines having Org VDC Internal IP addresses and VIP is from external public IP address range, so if I browse VIP , i can reach to web servers sucessfully using VCD/AVI integration.
This completes basic integration and configuration of LBaaS using Cloud Director & NSX Advance Load Balancer. feel free to share feedback.
