
If your organisation is building an application based on Windows components (such as .NET Framework) and willing to deploy Windows containers on VMware Tanzu, this blog post is on how to build a Windows custom machine image and deploy windows Kubernetes cluster.
Windows Image Prerequisites
- vSphere 6.7 Update 3 or greater
- A macOS or Linux workstation, Docker Desktop and Ansible must be installed on workstation
- Tanzu Kubernetes Grid v1.5.x or greater
- Tanzu CLI
- A Recent Image of Windows 2019 (newer than April 2021) and must be downloaded from Microsoft Developer Network (MSDN) or Volume Licensing (VL) account.
- The latest VMware Tools Windows ISO image. Download from VMware Tools
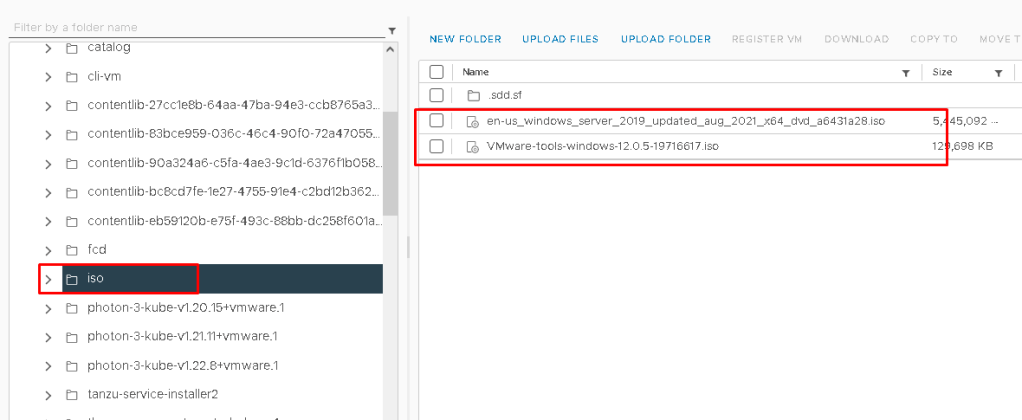
- on vCenter, Inside a data store create a folder such as iso and upload windows ISO and VMware Tools iso

Build a Windows Image
- Deploy Tanzu Management Cluster with Ubuntu 2004 Kubernetes v1.22.9 OVA
- Create a YAML file named
builder.yamlwith the following configuration, On my local system I have saved this yaml asbuilder.yaml
apiVersion: v1
kind: Namespace
metadata:
 name: imagebuilder
---
apiVersion: v1
kind: Service
metadata:
 name: imagebuilder-wrs
 namespace: imagebuilder
spec:
 selector:
   app: image-builder-resource-kit
 type: NodePort
 ports:
 - port: 3000
   targetPort: 3000
   nodePort: 30008
---
apiVersion: apps/v1
kind: Deployment
metadata:
 name: image-builder-resource-kit
 namespace: imagebuilder
spec:
 selector:
   matchLabels:
     app: image-builder-resource-kit
 template:
   metadata:
     labels:
       app: image-builder-resource-kit
   spec:
     nodeSelector:
       kubernetes.io/os: linux
     containers:
     - name: windows-imagebuilder-resourcekit
       image: projects.registry.vmware.com/tkg/windows-resource-bundle:v1.22.9_vmware.1-tkg.1
       imagePullPolicy: Always
       ports:
         - containerPort: 3000
Connect the Kubernetes CLI to your management cluster by running:
#kubectl config use-context MY-MGMT-CLUSTER-admin@MY-MGMT-CLUSTER
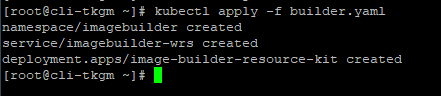
Apply the builder.yaml file as below:
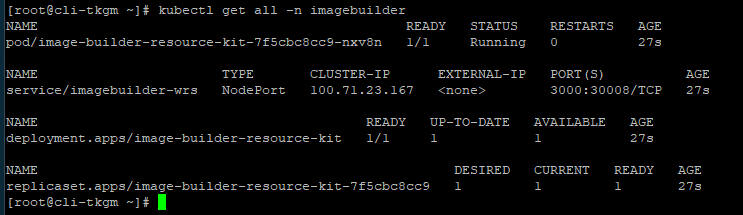
To ensure the container is running run below command:
List the cluster’s nodes, with wide output and take note of Internal IP address value of the node with ROLE listed as control-plane,master
#kubectl get nodes -o wide
Retrieve the containerd component’s URL and SHA, Query the control plane’s nodePort endpoint:
#curl http://CONTROLPLANENODE-IP:30008
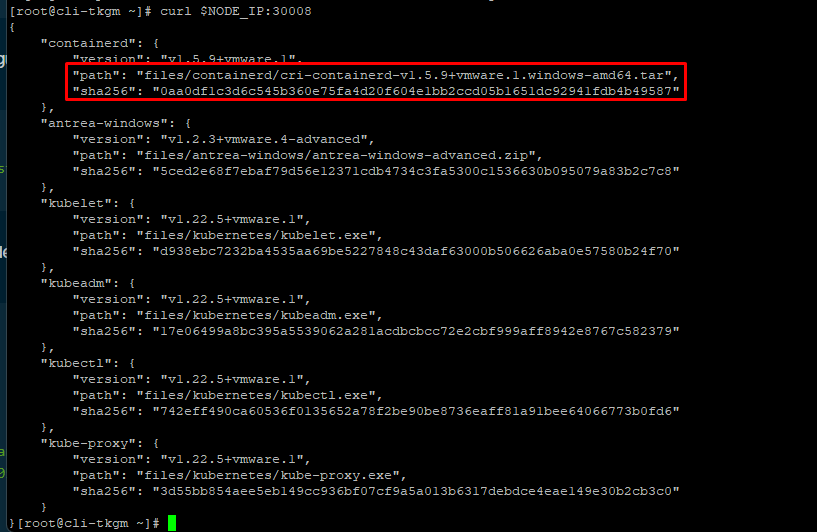
Take note of containerd.path and containerd.sha256 values. The containerd.path value ends with something like containerd/cri-containerd-v1.5.9+vmware.2.windows-amd64.tar.
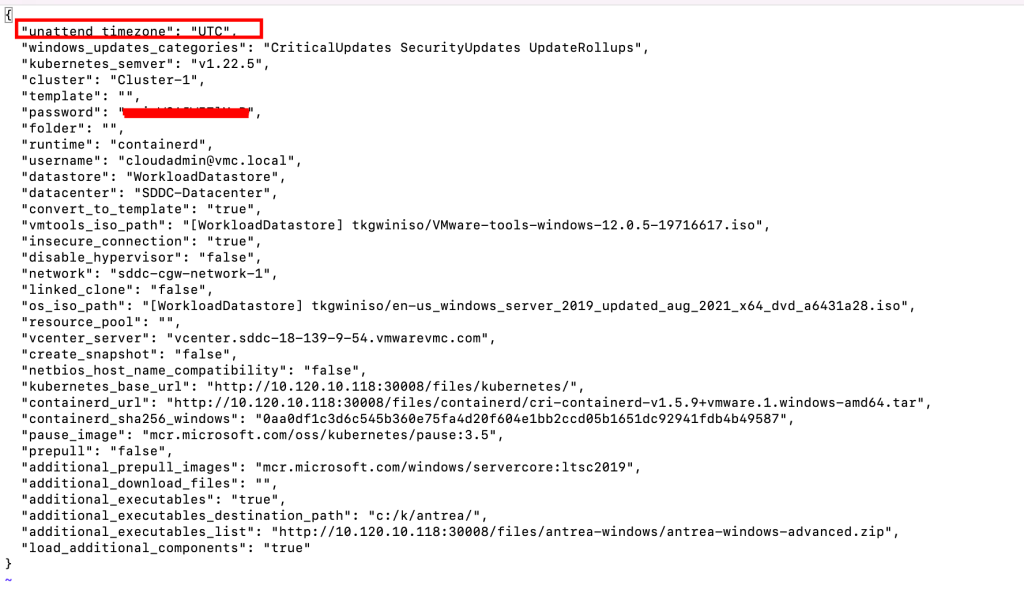
Create a JSON file in an empty folder named windows.json with the following configuration:
{
 "unattend_timezone": "WINDOWS-TIMEZONE",
 "windows_updates_categories": "CriticalUpdates SecurityUpdates UpdateRollups",
 "windows_updates_kbs": "",
 "kubernetes_semver": "v1.22.9",
 "cluster": "VSPHERE-CLUSTER-NAME",
 "template": "",
 "password": "VCENTER-PASSWORD",
 "folder": "",
 "runtime": "containerd",
 "username": "VCENTER-USERNAME",
 "datastore": "DATASTORE-NAME",
 "datacenter": "DATACENTER-NAME",
 "convert_to_template": "true",
 "vmtools_iso_path": "VMTOOLS-ISO-PATH",
 "insecure_connection": "true",
 "disable_hypervisor": "false",
 "network": "NETWORK",
 "linked_clone": "false",
 "os_iso_path": "OS-ISO-PATH",
 "resource_pool": "",
 "vcenter_server": "VCENTER-IP",
 "create_snapshot": "false",
 "netbios_host_name_compatibility": "false",
 "kubernetes_base_url": "http://CONTROLPLANE-IP:30008/files/kubernetes/",
 "containerd_url": "CONTAINERD-URL",
 "containerd_sha256_windows": "CONTAINERD-SHA",
 "pause_image": "mcr.microsoft.com/oss/kubernetes/pause:3.5",
 "prepull": "false",
 "additional_prepull_images": "mcr.microsoft.com/windows/servercore:ltsc2019",
 "additional_download_files": "",
 "additional_executables": "true",
 "additional_executables_destination_path": "c:/k/antrea/",
 "additional_executables_list": "http://CONTROLPLANE-IP:30008/files/antrea-windows/antrea-windows-advanced.zip",
 "load_additional_components": "true"
}
update the values in file as below:
Add the XML file that contains the Windows settings by following these steps:
- Go to the
autounattend.xmlfile on VMware {code} Sample Exchange. - Select Download.
- If you are using the Windows Server 2019 evaluation version, remove
<ProductKey>...</ProductKey>. - Name the file
autounattend.xml. - Save the file in the same folder as the
windows.jsonfile and change permission of file to 777.
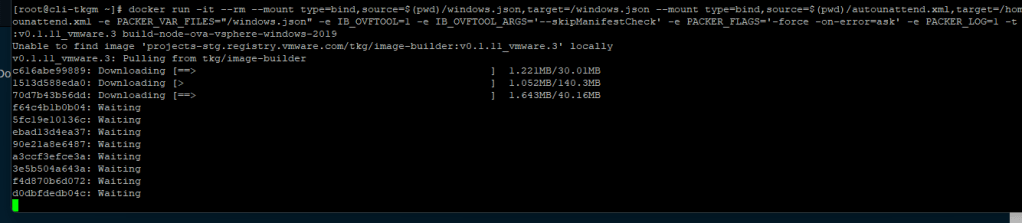
From your client VM run following command from folder containing your windows.json and autounattend.xml file:
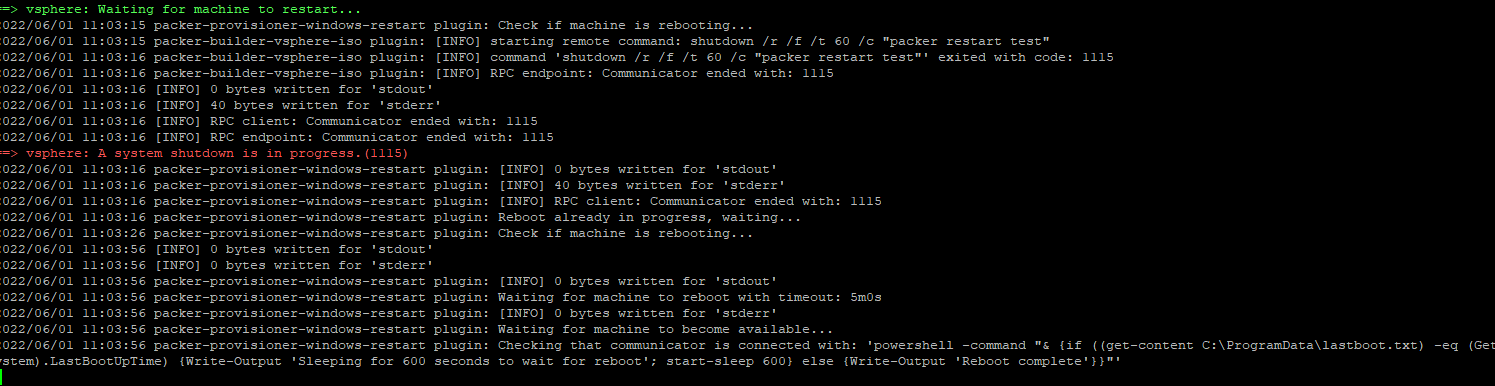
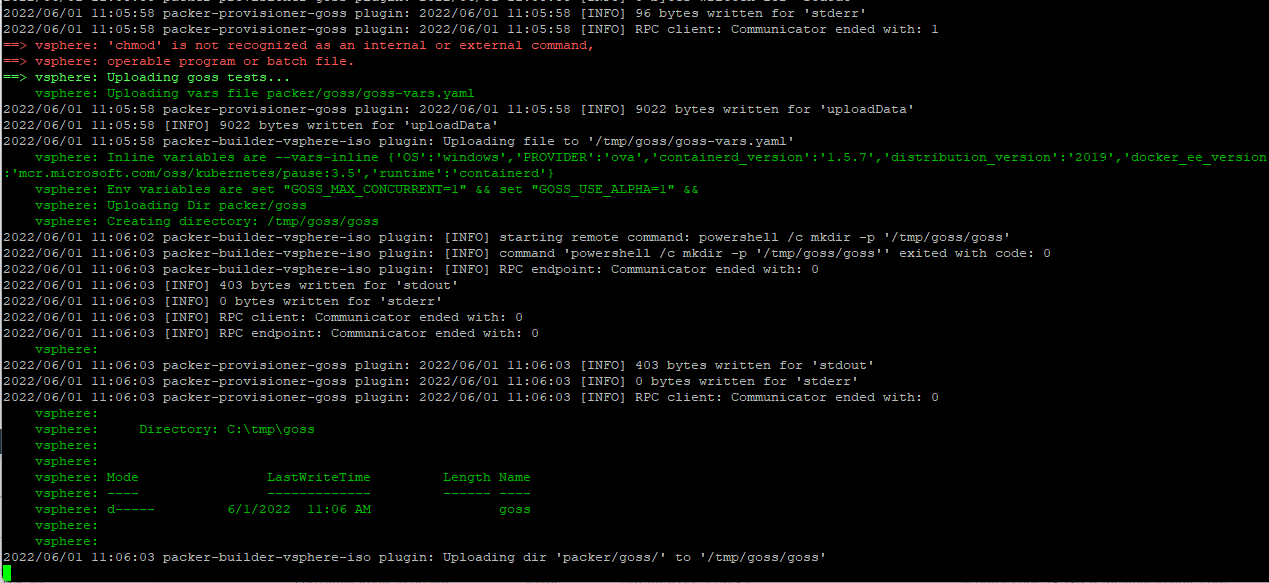
#docker run -it --rm --mount type=bind,source=$(pwd)/windows.json,target=/windows.json --mount type=bind,source=$(pwd)/autounattend.xml,target=/home/imagebuilder/packer/ova/windows/windows-2019/autounattend.xml -e PACKER_VAR_FILES="/windows.json" -e IB_OVFTOOL=1 -e IB_OVFTOOL_ARGS='--skipManifestCheck' -e PACKER_FLAGS='-force -on-error=ask' -t projects.registry.vmware.com/tkg/image-builder:v0.1.11_vmware.3 build-node-ova-vsphere-windows-2019
NOTE: Before you run below command, make sure your workstation is running “Docker Desktop” as well “Ansible”


To ensure the Windows image is ready to use, select your host or cluster in vCenter, select the VMs tab, then select VM Templates to see the Windows image listed.
Use a Windows Image for a Workload Cluster
Use a Windows Image for a Workload Cluster, below yaml shows you how to deploy a workload cluster that uses your Windows image as a template. (This windows cluster is using NSX Advance LB)
#! ---------------------------------------------------------------------
#! non proxy env configs
#! ---------------------------------------------------------------------
CLUSTER_CIDR: 100.96.0.0/11
CLUSTER_NAME: tkg-workload02
CLUSTER_PLAN: dev
ENABLE_CEIP_PARTICIPATION: 'true'
IS_WINDOWS_WORKLOAD_CLUSTER: "true"
VSPHERE_WINDOWS_TEMPLATE: windows-2019-kube-v1.22.5
ENABLE_MHC: "false"

IDENTITY_MANAGEMENT_TYPE: oidc

INFRASTRUCTURE_PROVIDER: vsphere
SERVICE_CIDR: 100.64.0.0/13
TKG_HTTP_PROXY_ENABLED: false
DEPLOY_TKG_ON_VSPHERE7: 'true'
VSPHERE_DATACENTER: /SDDC-Datacenter
VSPHERE_DATASTORE: WorkloadDatastore
VSPHERE_FOLDER: /SDDC-Datacenter/vm/tkg-vmc-workload
VSPHERE_NETWORK: /SDDC-Datacenter/network/tkgvmc-workload-segment01
VSPHERE_PASSWORD: <encoded:T1V3WXpkbStlLUlDOTBG>
VSPHERE_RESOURCE_POOL: /SDDC-Datacenter/host/Cluster-1/Resources/Compute-ResourcePool/Tanzu/tkg-vmc-workload
VSPHERE_SERVER: 10.97.1.196
VSPHERE_SSH_AUTHORIZED_KEY: ssh-rsa....loudadmin@vmc.local

VSPHERE_USERNAME: cloudadmin@vmc.local
WORKER_MACHINE_COUNT: 3
VSPHERE_INSECURE: 'true'
ENABLE_AUDIT_LOGGING: 'true'
ENABLE_DEFAULT_STORAGE_CLASS: 'true'
ENABLE_AUTOSCALER: false
AVI_CONTROL_PLANE_HA_PROVIDER: 'true'
OS_ARCH: amd64
OS_NAME: photon
OS_VERSION: 3

WORKER_SIZE: small
CONTROLPLANE_SIZE: large
REMOVE_CP_TAINT: "true"
if your cluster yaml file is correct, you should see that new windows cluster has been started to deploy.

and after some time if should deploy cluster sucessfully.


In case if you are using NSX-ALB AKO or Pinniped and see that those pods are not running, please refer Here
NOTE – if you see this error during image build process : Permission denied: ‘./packer/ova/windows/windows-2019/autounattend.xml, check the permission of file autounattend.yaml


Leave a comment