
In Continuation of my previous blog post here , where i have explained PKS component and sizing details , in this post i will be covering PKS component deployment.
Previous Post in this Series:
Getting Started with VMware PKS & NSX-T
Pre-requisite:
- Install a New or Existing server which has DNS role installed and configured , which we will use in this deployment.
- Install vCenter and ESXi , for this Lab i have created two vSphere Cluster:
- Management Cluster + Edge Cluster – Three Nodes
- Compute Cluster – Two Nodes
- Create a Ubuntu server , where you will need to install client utilities like:
- PKS CLI
- The PKS CLI is used to create, manage, and delete Kubernetes clusters.
- KUBECTL
- To deploy workloads/applications to a Kubernetes cluster created using the PKS CLI, use the Kubernetes CLI called “kubectl“.
- UAAC
-
To manage users in Pivotal Container Service (PKS) with User Account and Authentication (UAA). Create and manage users in UAA with the UAA Command Line Interface (UAAC).
-
- BOSH
- BOSH CLI used to manage PKS management components deployments and provides information about the VMs using its Cloud Provider Interface (CPI) which is vSphere in my Lab and could be AZURE , AWS and GCP also.
- OM
- Bosh Operations Manager command line interface.
- PKS CLI
-
Prepare NSX-T
For this Deployment make sure NSX-T is deployed and configured, high level steps are as below:
- Install NSX Manager
- Deploy NSX Controllers
- Register Controllers with Managers as well as other controller with Master controller.
-
Deploy NSX Edge Nodes
-
Register NSX Edge Nodes with NSX Manager
-
Enable Repository Service on NSX Manager
-
Create TEP IP Pool
-
Create Overlay Transport Zone
-
Create VLAN Transport Zone
-
Create Uplink Profile for Edge Nodes
-
Create Edge Transport Nodes
-
Create Edge Cluster
-
Create T0 Logical Router and configure BGP routing with physical device
-
Configure Edge Nodes for HA
-
Prepare ESXi Servers for the PKS Compute Cluster
My PKS deployment topology is look like below:

- PKS Deployment Topology – PKS management stack running out of NSX-T
- PKS VMs (Ops Manager, BOSH, PKS Control Plane, Harbor) are deployed to a VDS backed portgroup
- Connectivity between PKS VMs, K8S Cluster Management and T0 Router is through a physical router
- NAT is only configured on T0 to provide POD networks access to associated K8S Cluster Namespace
- Create a IP Pool
- Create a new IP Pool which will be used to allocate Virtual IPs for the exposed K8S Services The network also provides IP addresses for Kubernetes API access. Go to Inventory->Groups->IP Pool and enter the following configuration:
- Name: PKS-FLOATING-POOL
- IP Range: 172.26.0.100 – 172.26.255.254
- CIDR: 172.26.0.0/16

- Create a new IP Pool which will be used to allocate Virtual IPs for the exposed K8S Services The network also provides IP addresses for Kubernetes API access. Go to Inventory->Groups->IP Pool and enter the following configuration:
- Create POD-IP-BLOCK
- We need to create a new POD IP Block which will by used by PKS on-demand to create smaller /24 networks and assigned those to each K8S namespace. This IP block should be sized sufficiently to ensure that you do not run out of addresses. To create POD-IP-BLOCK , go to NETWORKING->IPAM and enter the following:

- Create NODEs-IP-BLOCK
- We need to create new NODEs IP Block which will be used by PKS to assign IP address to Kubernetes master and worker nodes.Each Kubernetes cluster owns the /24 subnet , so to deploy multiple Kubernetes clusters, plan for larger than /24 subnet. (recommendation is /16)

Prepare Client VM
- Create and install a small Ubuntu VM with default configuration. you can use the latest server version and insure that the VM has internet connectivity either by proxy or direct.
- Once the Ubuntu VM is ready , download PKSCLI and KUBECTL from https://network.pivotal.io/products/pivotal-container-service

and copy both the PKS (pks-linux-amd64-1.3.0-build.126 or latest) and Kubectl (kubectl-linux-amd64-1.12.4 or latest) CLI to VM.
- Now SSH to the Ubuntu VM and run the following commands to make binaries executable and renaming/relocating them to /usr/local/bin directory:
- chmod +x pks-linux-amd64-1.3.0-build.126
- chmod +x kubectl-linux-amd64-1.12.4
- mv pks-linux-amd64-1.3.0-build.126 /usr/local/bin/pks
- mv kubectl-linux-amd64-1.12.4 /usr/local/bin/kubectl
- Check version using – pks -v and kubectl version
- Next is to install Cloud Foundry UAAC , run this command
- apt -y install ruby ruby-dev gcc build-essential g++
- gem install cf-uaac
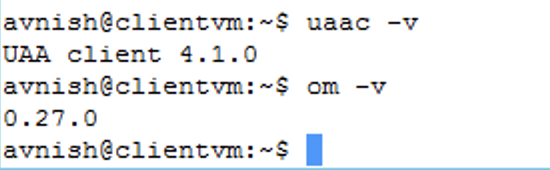
- Check version using – uaac -v
- Next is to install
- wget https://github.com/pivotal-cf/om/releases/download/0.50.0/om-linux
- chmod +x om-linux
- mv om-linux /usr/local/bin/om
- Check version using – om-v

This completes this part , in the next part we will start deploying PKS management VMs and their configuration.

Pingback: Deploy VMware PKS – Part2 – VMTECHIE
Pingback: Deploy VMware PKS – Part3 – VMTECHIE